Page 2 - SPECIFICATIONS; Applicable battery cartridge and charger; SAFETY WARNINGS; General power tool safety warnings; Save all warnings and instruc-
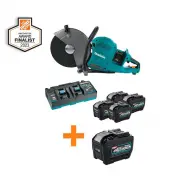
2 ENGLISH ENGLISH (Original instructions) SPECIFICATIONS Model: GEC01 Wheel diameter 355 mm (14″) Max. wheel thickness 5.0 mm (3/16″) Max. cutting depth 127 mm (5″) Rated speed 5,300 /min Rated voltage D.C. 72 V - 80 V max Max. permitted pressure of feed-water 5.0 bars Overall length 786 mm (31″) Ne...
Page 4 - Cordless cutter safety warnings
4 ENGLISH Service 1. Have your power tool serviced by a qualified repair person using only identical replacement parts. This will ensure that the safety of the power tool is maintained. 2. Never service damaged battery packs. Service of battery packs should only be performed by the manufacturer or a...
Page 5 - SAVE THESE INSTRUCTIONS.; Symbols
5 ENGLISH 3. Do not position your body in line with the rotating wheel. Kickback will propel the tool in direction opposite to the wheel’s movement at the point of snagging. 4. Use special care when working corners, sharp edges etc. Avoid bouncing and snagging the accessory. Corners, sharp edges or ...
Page 6 - Important safety instructions for
6 ENGLISH Important safety instructions for battery cartridge 1. Before using battery cartridge, read all instruc- tions and cautionary markings on (1) battery charger, (2) battery, and (3) product using battery. 2. Do not disassemble or tamper with the battery cartridge. It may result in a fire, ex...
Page 7 - PARTS DESCRIPTION
7 ENGLISH PARTS DESCRIPTION 17 1 2 4 3 6 5 16 15 14 12 11 9 13 10 18 7 8 Fig.1 1 Abrasive cut-off wheel / diamond wheel 2 Wheel guard 3 Wheel cover grip 4 Front grip 5 Lamp 6 Battery cartridge 7 Lock-off button 8 Caster 9 Shaft lock button 10 Cover 11 Cock 12 Water inlet 13 Handle 14 Switch trigger ...
Page 8 - FUNCTIONAL DESCRIPTION; Installing or removing battery cartridge; Indicating the remaining battery
8 ENGLISH FUNCTIONAL DESCRIPTION CAUTION: Always be sure that the tool is switched off and the battery cartridge is removed before adjusting or checking function on the tool. Installing or removing battery cartridge CAUTION: Always switch off the tool before installing or removing of the battery car...
Page 9 - Tool / battery protection system; Lighting the lamp
9 ENGLISH Tool / battery protection system The tool is equipped with a tool/battery protection sys - tem. This system automatically cuts off power to the motor to extend tool and battery life. The tool will auto - matically stop during operation if the tool or battery is placed under one of the foll...
Page 10 - ASSEMBLY; Installing or removing abrasive cut-
10 ENGLISH Adjusting the wheel cover Hold the wheel cover grip and adjust the position of the wheel cover suitable for your work. 1 Fig.7 ► 1. Wheel cover grip Active feedback sensing technology The tool electronically detects situations where the wheel may be at risk to be bound. In the situation, ...
Page 11 - Connecting to water supply; OPERATION
11 ENGLISH NOTE: When installing the wheel, be sure to attach the flanges so that the flat side of flange faces the wheel, and attach the ring that matches the inner diameter of the wheel. 2 3 4 1 2 Fig.10 ► 1. Hex bolt 2. Flange 3. Ring 4. Abrasive cut-off wheel / diamond wheel Connecting to water ...
Page 12 - Cutting; When feeding water during cutting
12 ENGLISH Cutting CAUTION: During operation, do not bring the tool higher than your shoulder height. Fig.14 Hold the tool firmly. Grasp the handle with your right hand and the front grip with your left hand. To prevent electric shock by accidental cutting of an electric cable, always hold the front...
Page 13 - MAINTENANCE; Cleaning the tool
13 ENGLISH CAUTION: When feeding water, always keep the tool head lower than the tool body to prevent water entering into the tool mechanism. Failure to do so may cause electric shock. Fig.18 MAINTENANCE CAUTION: Always be sure that the tool is switched off and the battery cartridge is removed befor...
Page 14 - Replacing the synchro-belt
14 ENGLISH Replacing the synchro-belt 1. Remove the battery cartridges and the wheel. 2. Loosen the hex socket bolts using the tip of the box wrench, and then remove the cover. 1 2 3 Fig.21 ► 1. Box wrench 2. Hex socket bolt 3. Cover 3. Push in the shaft lock button and hold it to lock the large pul...
Page 16 - TROUBLESHOOTING; OPTIONAL; MAKITA LIMITED WARRANTY
16 ENGLISH TROUBLESHOOTING Before asking for repairs, conduct your own inspection first. If you find a problem that is not explained in the manual, do not attempt to dismantle the tool. Instead, ask Makita Authorized Service Centers, always using Makita replace - ment parts for repairs. State of abn...
Page 17 - ESPECIFICACIONES; Cartucho de batería y cargador aplicables; ADVERTENCIAS DE; Advertencias generales de; Conserve todas las advertencias
17 ESPAÑOL ESPAÑOL (Instrucciones originales) ESPECIFICACIONES Modelo: GEC01 Diámetro de la rueda 355 mm (14″) Grosor máx. de la rueda 5,0 mm (3/16″) Profundidad de corte máxima 127 mm (5″) Velocidad especificada 5 300 r/min Tensión nominal 72 V - 80 V c.c. máx. Presión máxima permitida del agua par...
Page 21 - GUARDE ESTAS; Símbolos; Instrucciones importantes de
21 ESPAÑOL Advertencias de seguridad adicionales: 1. Antes de usar una rueda de diamante segmen- tada, asegúrese de que la rueda de diamante cuente con espacio periférico de separación entre los segmentos de 10 mm o menos, solo con un ángulo de corte negativo. 2. Nunca intente cortar con la herramie...
Page 23 - DESCRIPCIÓN DE LAS PIEZAS
23 ESPAÑOL DESCRIPCIÓN DE LAS PIEZAS 17 1 2 4 3 6 5 16 15 14 12 11 9 13 10 18 7 8 Fig.1 1 Rueda cortadora abra- siva / rueda de diamante 2 Protector de la rueda 3 Empuñadura de la cubierta de la rueda 4 Empuñadura delantera 5 Lámpara 6 Cartucho de batería 7 Botón de desbloqueo 8 Rueda 9 Botón de blo...
Page 24 - Instalación o extracción del; Indicación de la capacidad restante
24 ESPAÑOL DESCRIPCIÓN DEL FUNCIONAMIENTO PRECAUCIÓN: Asegúrese siempre de que la herramienta esté apagada y el cartucho de batería haya sido extraído antes de realizar cualquier ajuste o comprobación en la herramienta. Instalación o extracción del cartucho de batería PRECAUCIÓN: Apague siempre la h...
Page 26 - MONTAJE
26 ESPAÑOL AVISO: No jale fuertemente el gatillo interruptor sin presionar el botón de desbloqueo. Esto podría dañar el interruptor. Encendido de la lámpara PRECAUCIÓN: No mire a la luz ni vea a la fuente de luz directamente. Para encender la lámpara, oprima el botón de la lámpara. Para apagar la he...
Page 27 - Conexión al suministro de agua
27 ESPAÑOL 3 4 2 5 2 5 1 Fig.9 ► 1. Perno hexagonal 2. Brida 3. Anillo 4. Rueda cortadora abrasiva / rueda de diamante 5. Flecha (dirección de rotación de la rueda) Para instalar la rueda, siga el procedimiento de extrac- ción en orden inverso. ASEGÚRESE DE APRETAR EL PERNO HEXAGONAL CON FIRMEZA. PR...
Page 28 - OPERACIÓN; Corte
28 ESPAÑOL 4. Empuje el manguito del acoplamiento en la entrada para agua hasta que quede asegurado con un clic. 1 2 3 Fig.13 ► 1. Manguito del acoplamiento 2. Entrada para agua 3. Llave AVISO: Mantenga la llave cerrada hasta que inicie la operación de corte con la alimentación de agua. Para instruc...
Page 29 - MANTENIMIENTO; Limpieza de la herramienta
29 ESPAÑOL Cuando alimente agua durante el corte PRECAUCIÓN: Cuando utilice una rueda de diamante de tipo húmedo, siempre suministre agua durante el corte. Conecte la herramienta al suministro de agua y gire la llave en la dirección de la flecha, como se ilustra. Ajuste la posición de la llave para ...
Page 32 - RESOLUCIÓN DE PROBLEMAS; ACCESORIOS OPCIONALES; GARANTÍA LIMITADA DE MAKITA; Ésta Garantía no aplica para México
32 ESPAÑOL RESOLUCIÓN DE PROBLEMAS Antes de solicitar alguna reparación, primero realice una inspección por su cuenta. Si detecta algún problema que no esté explicado en el manual, no intente desensamblar la herramienta. En vez de esto, solicite la reparación a un centro de servicio autorizado de Ma...
Page 36 - Makita Corporation
Some dust created by power sanding, sawing, grinding, drilling, and other construction activities contains chemicals known to the State of California to cause cancer, birth defects or other reproductive harm. Some examples of these chemicals are: • lead from lead-based paints, • crystalline silica f...