Page 2 - ENGLISH; TABLE OF CONTENTS
2 TABLE OF CONTENTS ENGLISH TABLE OF CONTENTS 3 PRODUCT FEATURES 4 IMPORTANT SAFETY INSTRUCTIONS 7 COMPONENTS 7 Refrigerator Exterior 8 Refrigerator Interior 9 INSTALLATION 9 Installation Overview 10 Specifications11 Unpacking the Refrigerator11 Choosing the Proper Location11 - Flooring12 - Ambient ...
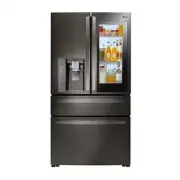
Page 3 - PRODUCT FEATURES; FILTERED WATER AND ICE DISPENSER
3 PRODUCT FEATURES ENGLISH PRODUCT FEATURES * Depending on the model, some of the following functions may not be available. FILTERED WATER AND ICE DISPENSER The water dispenser dispenses fresh, chilled water. The ice dispenser dispenses cubed and crushed ice. DOOR ALARM The Door Alarm function is de...
Page 4 - IMPORTANT SAFETY INSTRUCTIONS; READ ALL INSTRUCTIONS BEFORE USING THE APPLIANCE.; read and obey; WARNING; Power; Installation
4 IMPORTANT SAFETy INSTRUCTIONS ENGLISH IMPORTANT SAFETY INSTRUCTIONS READ ALL INSTRUCTIONS BEFORE USING THE APPLIANCE. This guide contains many important safety messages. Always read and obey all safety messages. WARNING You can be killed or seriously injured if you do not follow instructions. CAUT...
Page 5 - Wash hands after handling.
5 IMPORTANT SAFETy INSTRUCTIONS ENGLISH This product is not to be used for special purposes such as the storage of medicine or test materials y or for use on ships, etc. Unplug the power plug before cleaning or repairing the refrigerator. y When you replace the light bulb in the refrigerator, unplug...
Page 6 - SAVE THESE INSTRUCTIONS
6 IMPORTANT SAFETy INSTRUCTIONS ENGLISH CAUTION Installation The refrigerator must be properly installed in accordance with the Installer Instructions that were y taped to the front of the refrigerator.Be careful when you unpack and install the refrigerator. Immediately dispose of plastic and other ...
Page 7 - COMPONENTS; Refrigerator Exterior
7 COMPONENTS ENGLISH COMPONENTS Use this page to become more familiar with the parts and features of your refrigerator. *The appearance and specifications of the actual product may differ depending on the model. Refrigerator Exterior Button Handle Opens and closes the door. Filtered Water and Ice Di...
Page 8 - Refrigerator Interior
8 COMPONENTS ENGLISH Refrigerator Interior Door-in-Door Case A convenient storage area for frequently-used items that require easy access. Adjustable Refrigerator Shelf The shelves in your refrigerator are adjustable to meet your individual storage needs. Pullout Drawer Used for extra storage within...
Page 9 - INSTALLATION; Installation Overview; NOTE
9 INSTALLATION ENGLISH INSTALLATION Installation Overview Please read the following installation instructions first after purchasing this product or transporting it to another location. 1 Unpacking your refrigerator 2 Choosing the proper location 3 Disassembling/Assembling 4 Connecting the water sup...
Page 10 - Specifications
10 INSTALLATION ENGLISH Specifications The appearance and specifications listed in this manual may vary due to constant product improvements. Bottom-freezer refrigerator model LMXS30796* Description French door refrigerator Dimensions 35 3/4" (W) X 39 1/8" (D) X 70 1/4" (H). 51"(D w/...
Page 11 - Choosing the Proper Location; Unpacking the Refrigerator; Flooring
11 INSTALLATION ENGLISH Choosing the Proper Location Select a place where a water supply can y be easily connected for the automatic icemaker. Unpacking the Refrigerator WARNING Use two or more people to move and y install the refrigerator. Failure to do so can result in back or other injury.Your re...
Page 12 - Ambient Temperature; Removing/Assembling the; Removing the Handles; Assembling the Handles
12 INSTALLATION ENGLISH Ambient Temperature Install this appliance in an area where the temperature is between 55°F (13°C) and 110°F (43°C). If the temperature around the appliance is too low or high, cooling ability may be adversely affected. Measuring Clearances Too small of a distance from adjace...
Page 13 - Removing the Handle; Assembling the Handle
13 INSTALLATION ENGLISH WARNING If your entrance door is too narrow for the y refrigerator to pass through, remove the refrigerator doors and move the refrigerator sideways through the doorway.Use two or more people to remove and y install the refrigerator doors. Failure to do so can result in back ...
Page 14 - Removing the Left Refrigerator Door; CAUTION
14 INSTALLATION ENGLISH Removing the Left Refrigerator Door 1 The water supply is connected to the upper right part of the rear surface of the refrigerator. Remove the ring in the joint area. Hold the water supply connection and gently push the collet to detach the water supply line as shown in . NO...
Page 15 - Removing the Right Refrigerator
15 INSTALLATION ENGLISH Removing the Right Refrigerator Door 1 Remove the top hinge cover screw . Lift the hook (not visible), located at the bottom of the front side of the cover , with a flat-head screwdriver. 2 Detach the wire harnesses . Unscrew the ground wire . CAUTION When lifting the hinge f...
Page 16 - Assembling the Right Refrigerator
16 INSTALLATION ENGLISH Install the right-side door first. 1 Make sure that the plastic sleeve is inserted in the bottom of the door. Lower the door onto the middle hinge pin as shown in the figure. 2 Fit the hinge over the hinge lever latch and slot it into place. Rotate the lever counterclockwise ...
Page 17 - Assembling the Left Refrigerator; Screw the ground wire .
17 INSTALLATION ENGLISH Install the left refrigerator door after the right door is installed. 1 Make sure that the plastic sleeve is inserted in the bottom of the door. Install the refrigerator door onto the middle hinge. 2 Fit the hinge over the hinge lever latch and slot it into place. Rotate the ...
Page 18 - Removing the CustomChillTM Drawer
18 INSTALLATION ENGLISH NOTE 1) Gently insert the tube until only one line shows on the tube. (Correct) (Incorrect) 2) Pull the tube to make sure that the tube is tightly fastened. Collet Tube Insert Line Removing the CustomChill™ Drawer 1 Pull the drawer open to full extension. Remove the basket by...
Page 19 - Assembling the CustomChillTM Drawer; Removing the Freezer Drawer
19 INSTALLATION ENGLISH Assembling the CustomChill™ Drawer 1 Grasp the door on each side and lower it into place on the rail system. 3 Pull the drawer open to full extension. Lower the basket onto the rail system. 2 Reconnect the wire harness to the connection at the end of the right rail by alignin...
Page 21 - Assembling the Freezer Drawer
21 INSTALLATION ENGLISH 3 Lower the door into final position and tighten the screws located on both sides. 4 Insert the the top pullout drawer into the frame, and push the drawer back into place until you hear a click. 5 Slightly tilt up the front of the middle drawer, insert the drawer into the fra...
Page 22 - Connecting the Water Line; Before You Begin
22 INSTALLATION ENGLISH CAUTION Wear eye protection during installation to prevent injury. Connecting the Water Line Before You Begin This water line installation is not covered by the refrigerator warranty. Follow these instructions carefully to minimize the risk of expensive water damage. Water ha...
Page 23 - Shutoff valve; Water Line Installation Instructions
23 INSTALLATION ENGLISH NOTE A self piercing saddle type water valve should not be used. NOTE The hookup line cannot be white, plastic tubing. Licensed plumbers must use only copper tubing (NDA tubing #49595 or #49599) or Cross Link Polyethylene (PEX) tubing. If your existing copper water line has a...
Page 25 - ON; Turning On The Power
25 INSTALLATION ENGLISH 10 TURN THE WATER ON AT THE SHUTOFF VALVE Tighten any connections that leak. 11 PLUG IN THE REFRIGERATOR Arrange the coil of tubing so that it does not vibrate against the back of the refrigerator or against the wall. Push the refrigerator back to the wall. 12 START THE ICEMA...
Page 26 - Leveling and Door Alignment; Leveling; Door Alignment
26 INSTALLATION ENGLISH Leveling and Door Alignment Leveling After installing, plug the refrigerator’s power cord into a 3-prong grounded outlet and push the refrigerator into the final position. The refrigerator has two front leveling legs—one on the right and one on the left. Adjust the legs to al...
Page 27 - HOW TO USE; Before use
27 HOW TO USE ENGLISH HOW TO USE Before use Clean the refrigerator. Clean your refrigerator thoroughly and wipe off all dust that accumulated during shipping. NOTE Remove adhesive residue by wiping it off with your thumb or dish detergent. CAUTION Do not scratch the refrigerator with a sharp object ...
Page 28 - Control Panel; Control Panel Features; Ice Type
28 HOW TO USE ENGLISH NOTE The displayed temperature is the target temperature, and not the actual temperature of the refrigerator. The actual refrigerator temperature depends on the food inside the refrigerator. Control Panel * Depending on the model, some of the following functions may not be avai...
Page 30 - Connect; Power Saving
30 HOW TO USE ENGLISH Connect The Connect button, when used with the LG Smart Refrigerator smart phone app, allows the refrigerator to connect to your home’s Wi-Fi network. Refer to the following page for information on the initial setup of the application.The Connect icon allows you to check the st...
Page 31 - Smart Features; Setting Up the Smart App and Connecting the Refrigerator
31 HOW TO USE ENGLISH Smart Features To use the Smart Features on the refrigerator, you will need the following devices and apps:1. a wireless router and home Wi-Fi network2. the LG Smart Grid refrigerator3. an Android-based smart phone4. the LG Smart Refrigerator app from the Google Play Store. Set...
Page 32 - Smart Grid Function; Using the Smart Grid Function
32 HOW TO USE ENGLISH LG Smart Refrigerator App - What’s Included Food Manager Allows you to keep track of items in your refrigerator and freezer, so you can be alerted when they are near their use-by dates, generate grocery lists, and link to related recipes. Recipes Features recipes from the Food ...
Page 33 - Override Smart Grid Mode; LG Open API; Smart Grid Application Features; Smart Saving_Demand Response; Energy monitoring
33 HOW TO USE ENGLISH Smart Features (continued) Override Smart Grid Mode If you want the refrigerator to ignore the Demand Response signal from the utility company, you can override the Smart Grid function by pushing the Smart Grid button while the refrigerator is in Smart Grid mode. When you overr...
Page 34 - FCC RF Radiation Exposure Statement
34 HOW TO USE ENGLISH FCC Notice (For transmitter module contained in this product) This equipment has been tested and found to comply with the limits for a Class B digital device, pursuant to Part 15 of the FCC Rules. These limits are designed to provide reasonable protection against harmful interf...
Page 35 - Detaching the In-Door Ice Bin; Assembling the In-Door Ice Bin
35 HOW TO USE ENGLISH Ice-detecting sensor CAUTION When handling the ice bin, keep hands away from the icemaker tray area to avoid personal injury. In-Door Ice Bin * Depending on the model, some of the following functions may not be available. Detaching the In-Door Ice Bin 1 Gently pull the handle t...
Page 36 - Automatic Icemaker; Turning the Automatic Icemaker; Personal Injury Hazard; Water fills the ice tray.
36 HOW TO USE ENGLISH Automatic Icemaker * Depending on the model, some of the following functions may not be available. Ice is made in the automatic icemaker and sent to the dispenser. The icemaker will produce 70~182 cubes in a 24-hour period, depending on freezer compartment temperature, room tem...
Page 37 - When You Should Turn the; Normal Sounds You May Hear; Preparing for Vacation; OFF
37 HOW TO USE ENGLISH Automatic Icemaker (continued) The first ice and water dispensed may y include particles or odor from the water supply line or the water tank.Throw away the first few batches of ice. y This is also necessary if the refrigerator has not been used for a long time.Never store beve...
Page 38 - Ice and Water Dispenser; Dispenser; Using the Dispenser; cold; Incorrect Way; Locking the Dispenser
38 HOW TO USE ENGLISH Ice and Water Dispenser * Depending on the model, some of the following functions may not be available. CAUTION Keep children away from the dispenser to prevent children playing with or damaging the controls. Dispenser Ice switch Stand Water switch Using the Dispenser To dispen...
Page 39 - Storing Food; Food Preservation Location
39 HOW TO USE ENGLISH Storing Food Food Preservation Location Each compartment inside the refrigerator is designed to store different types of food. Store your food in the optimal space to enjoy the freshest taste. NOTE If you are leaving home for a short period of time, like a short vacation, the r...
Page 40 - Food Storage Tips; Food; Storing Frozen Food; Freezing
40 HOW TO USE ENGLISH Food Storage Tips * The following tips may not be applicable depending on the model. Wrap or store food in the refrigerator in airtight and moisture-proof material unless otherwise noted. This prevents food odor and taste transfer throughout the refrigerator. For dated products...
Page 41 - Packaging
41 HOW TO USE ENGLISH Storing Frozen Food (continued) Packaging Successful freezing depends on correct packaging. When you close and seal the package, it must not allow air or moisture in or out. If it does, you could have food odor and taste transfer throughout the refrigerator and could also dry o...
Page 42 - Glide‘N’AccessTM; Humidity Controlled Crisper; Vegetable; Vegetable; Fruit
42 HOW TO USE ENGLISH Glide‘N’Access™ (on some models) The Glide’N’Access™ slides out for easy loading of large items, like sheet cakes or deli trays, and to give you easy access to items stored at the back of the shelf. To slide out, grasp the handle at the front of the shelf and gently pull forwar...
Page 43 - Detaching and Assembling the; Glide‘N’AccessTM Crisper
43 HOW TO USE ENGLISH Detaching and Assembling the Storage Bins Glide‘N’Access™ Crisper (on some models) To remove the Glide‘N’Access™ Crisper, pull out the Crisper to full extension, lift the front up, and pull straight out. To install, slightly tilt up the front, insert the drawer into the frame a...
Page 44 - Door Bins
44 HOW TO USE ENGLISH Door Bins The door bins are removable for easy cleaning and adjustment. 1 To remove the bin, simply lift the bin up and pull straight out. 2 To replace the bin, slide it in above the desired support and push down until it snaps into place. NOTE Some bins may vary in appearance ...
Page 45 - InstaView Function
45 HOW TO USE ENGLISH 1 To remove the Door-in-Door case, lift up and pull out. 2 To replace the Door-in-Door case, line the tabs on the Door-in-Door case with the slots on the door and push down until it snaps into place. Door-in-Door Case To open the Door-in-Door case, slightly push the marked area...
Page 46 - CustomChillTM Drawer; Setting the Temperature
46 HOW TO USE ENGLISH CustomChill™ Drawer The CustomChill™ Drawer provides storage space with a variable temperature control that can be adjusted to keep the compartment either colder or warmer than the refrigerator. Setting the Temperature Press the Select/Lock button repeatedly to toggle through t...
Page 47 - Adjusting the Refrigerator; Detaching the Shelf
47 HOW TO USE ENGLISH Adjusting the Refrigerator Shelves The shelves in your refrigerator are adjustable to meet your individual storage needs. Your model may have glass or wire shelves. Adjusting the shelves to fit items of different heights will make finding the exact item you want easier. Doing s...
Page 48 - MAINTENANCE; Cleaning; General Cleaning Tips; Exterior
48 MAINTENANCE ENGLISH MAINTENANCE Cleaning Both the refrigerator and freezer sections defrost automatically; however, clean both y sections about once a month to prevent odors. Wipe up spills immediately. y Always unplug the refrigerator before cleaning. y General Cleaning Tips Unplug refrigerator ...
Page 49 - Install a New Air Filter.; Replacing the Fresh Air Filter; Remove the Old Filter; Replacing the Water Filter
49 MAINTENANCE ENGLISH 2 Install a New Air Filter. Place the new filter inside of the cover with the side that says “Front” facing outward. Turn the filter cover to the right to attach to the refrigerator wall. After changing the filter, push and hold the Air Filter button for three seconds to reset...
Page 50 - Performance Data Sheet
50 MAINTENANCE ENGLISH Performance Data Sheet Use Replacement Cartridge: MDJ64844601(LT1000P) The concentration of the indicated substances in water entering the system was reduced to a concentration less than or equal to the permissible limit for water leaving the system as specified in NSF/ANSI St...
Page 51 - SAFETY INFORMATION; Service Flow
51 MAINTENANCE ENGLISH Application Guidelines / Water Supply Parameters Note that while testing was performed under standard laboratory conditions, actual performance may vary. NSF System Trade Name Code : MDJ64844601(LT1000P) It is essential that the manufacturer’s recommended installation, mainten...
Page 52 - Using Smart DiagnosisTM; SMART DIAGNOSIS
52 SMART DIAGNOSIS ENGLISH 3 Hold the mouthpiece of your phone in front of the speaker that is located on the right hinge of the refrigerator door, when instructed to do so by the call center. 4 Press and hold the Freezer button for three seconds while continuing to hold your phone to the speaker. 5...
Page 53 - TROUBLESHOOTING; Problem
53 TROUBLESHOOTING ENGLISH TROUBLESHOOTING Review the Troubleshooting section before calling for service; doing so will save you both time and money. Problem Possible Causes Solutions Refrigerator and Freezer section are not cooling. The refrigerator control is set to OFF (some models). Turn the con...
Page 63 - WARRANTY PERIOD
63 WARRANTy ENGLISH Should your LG Refrigerator (“Product”) fail due to a defect in materials or workmanship under normal home use, during the warranty period set forth below, LG will at its option repair or replace the product. This limited warranty is valid only to the original retail purchaser of...
Page 64 - THIS LIMITED WARRANTY DOES NOT COVER:
64 WARRANTy ENGLISH For complete warranty details and customer assistance, please call or visit our website: Call 1-800-243-0000 (24 hours a day, 365 days a year) and select the appropriate option from the menu, or visit our website at http://www.lg.com Or by mail: LG Customer Information Center: P....
Page 65 - WARRANTY; Freezer
65 WARRANTy ENGLISH WARRANTY (Canada) WARRANTY : Should your LG Refrigerator (“Product”) fail due to a defect in material or workmanship under normal home use during the warranty period set forth below, LG Canada will at its option repair or replace the Product upon receipt of proof of original reta...
Page 67 - For inquiries or comments,; Register your product Online!
1-800-243-00001-888-865-30261-888-542-2623 USA, Consumer User USA, Commercial User CANADA For inquiries or comments, visit www.lg.com or call; www.lg.com Register your product Online! LG Customer Information Center