Page 3 - TABLE OF CONTENTS
3 English Version Spanish Version Important Safety Instructions - Requirements for Ground Connection Parts and Features -7 Refrigerator Installation 8-15 Unpacking 8 Installation 8 How to remove and install Handle 9 How to remove and Install the Refrigerator Doors 10 How to remove and Install Pull-O...
Page 4 - KEEP THESE INSTRUCTIONS
IMPORTANT SAFETY INSTRUCTIONS 4 This manual contains several important safety notices. Always read and obey all of the following safety messages. This is the safety alert symbol. This symbol is a warning to potential dangers that could cause death, injury or damage to you, others or the product. All...
Page 5 - TO CONNECT ELECTRICITY; ELECTRICAL SHOCK HAZARD; , this appliance must; RECOMMENDED GROUNDING METHOD; Before installation, cleaning or replacing light; USE OF EXTENSION CABLES; We do not recommend the use of extension cables.; REPLACING ELECTRICAL CABLE; CHILDREN MAY BECOME TRAPPED; Do not sit or climb on drawers.; ţ4NBMMDIJMESFODBO
5 This appliance is not intended for use by children, persons with physical or mental disabilities, persons with reduced sensory or mental capacity, or persons with lack of experience or know-how, unless they have supervision or instruction in relation to the use of the appliance by the person respo...
Page 6 - PARTS AND FEATURES; temperature control
6 PARTS AND FEATURES SPECIAL FEATURES CONTROL PANEL LED DISPLAY SCREEN Simple electronic controls are user-friendly. The LED screen shows refrigerator and freezer temperatures, displays water filter status, dispenser information, and more. ICE PLUS When this feature is activated, the freezer section ...
Page 7 - Refrigerator interior is lit by the LED array.
7 PARTS AND FEATURES KEY PARTS AND COMPONENTS In addition to the special features and components outlined in the Special Features section , there are several other important components that are referenced in this manual. ADJUSTABLE REFRIGERATOR SHELVING The refrigerator compartment shelves areadjust...
Page 8 - EXCESSIVE WEIGHT HAZARD; “Important Safety Instructions”; WARNING; EXPLOSION HAZARD; Install the refrigerator in an area between 55 °F; ONCE INSTALLED
8 REFRIGERATOR INSTALLATION WARNING EXCESSIVE WEIGHT HAZARD Use the assistance of two or more persons to move or install the refrigerator. Not following these instructions may cause injury to the back and other parts of the body. UNPACKING Before installing your refrigerator, remove any tape or temp...
Page 9 - TOOLS YOU MAY NEED; DOOR HANDLE REMOVING; Loosen the set screws with the; Mounting; Removing Freezer Drawer Handle; REFRIGERATOR INSTALLATION
9 TOOLS YOU MAY NEED 1 /4 in (6 mm) 3 /8 in (10 mm) Hex Socket Wrench Phillips Screwdriver Flat Head Screwdriver Allen Wrench NOTE: It is always recommended that the doors be removed when it is necessary to move the refrigerator through a narrow opening. If it is necessary to remove the handles foll...
Page 10 - HOW TO REMOVE AND INSTALL REFRIGERATOR DOOR; Removing Refrigerator Doors; Left Door; picture and pull the tube out by direction of arrow.; Right Door; Place the door on a non-scratching surface with the inside up.
10 REFRIGERATOR INSTALLATION HOW TO REMOVE AND INSTALL REFRIGERATOR DOOR 1. Removing Refrigerator Doors Remove the left-side door first. NOTE: Handle, top hinge and hinge cover appearance may vary from illustrations on this page. WARNING ţ Disconnect electrical supply to the refrigerator before insta...
Page 12 - CAUTION; Correct
12 ţ Insert the water supply tube into the connector. ţ Insert the tube at least 5/8 in. (15 mm) into the connector. ţ Hook the tab on the door-switch side of the cover under the edge of the wire opening in the cabinet top. ţ Position the cover into place. ţ Insert and tighten the cover screw. CAUTI...
Page 13 - Removing Pull out Drawer; To avoid possible injury, product or; Durabase; Remove the screws of the rail on both sides.; screw; When removing drawer door, do not; Rail tabes
13 HOW TO REMOVE AND INSTALL THE PULL OUT DRAWER (3 DOORS MODELS). 1. Removing Pull out Drawer IMPORTANT: To avoid possible injury, product or property damage, you will need two persons to perform the following instructions. ţ Pull the drawer open to full lower extension. Remove the durabase by lift...
Page 14 - Installing Pull out Drawer; Screws; To prevent accidental child and pet
14 ţ Push the rails back into drawer cavity. With both hands, hold the center of the bar and push it in so that both rails go back simultaneously. (Fig.7) (Fig. 8) Fig. 7 Fig. 8 HOW TO REMOVE AND INSTALL THE PULL OUT DRAWER (CONT.) 2. Installing Pull out Drawer IMPORTANT: To avoid possible injury, p...
Page 15 - CLOSING AND ALIGNING THE DOORS
15 CLOSING AND ALIGNING THE DOORS Closing the Doors Your refrigerator has two front leveling screws, one on the right and one on the left. If your refrigerator seems unstable or if you would like the doors to close more easily, simply adjust the inclination of the refrigerator by following the instr...
Page 16 - The shape of the buttons may not match your model.; USING YOUR REFRIGERATOR
16 NOTE: The shape of the buttons may not match your model. LED DISPLAY ICE TYPE / ICE PLUS FREEZER BUTTON REFRIGERATOR BUTTON AIR FILTER BUTTON(in some models) LIGHT/WATER FILTER BUTTON DOOR ALARM/LOCK BUTTON 1 2 5 6 7 1 2 3 4 5 6 7 CONTROL PANEL FEATURES USING YOUR REFRIGERATOR 3 4 The LED display...
Page 17 - THE LED DISPLAY; ţ8JUIUIFSFGSJHFSBUPSEPPSPQFOLFFQQSFTTJOHUIF
17 CAUTION Display mode setting and its cancellation USING YOUR REFRIGERATOR THE LED DISPLAY The LED display shows the temperature settings, dispenser options, water filter, door alarm, and locking status messages. DISPENSER SELECTION INDICATOR Shows Cubed ice or Crushed Ice selection that will be di...
Page 18 - or; CAUTION WHEN CLOSING THE DOOR
18 ADJUSTING THE TEMPERATURES AND DISPLAY Adjust Freezer Temperature To adjust the temperature in the freezer compartment, press the FREEZER button to cycle through the the range of available settings. To adjust the temperature in the refrigerator compartment, press the REFRIGERATOR button to cycle ...
Page 19 - OPERATING THE DISPENSER; WATER SWITCH; Incorrect
19 USING YOUR REFRIGERATOR OPERATING THE DISPENSER DISPENSING CRUSHED ICE Press the ICE TYPE button to illuminate the Crushed Ice icon.Press the push ice switch with a glass or other con-tainer and crushed ice will be dispensed. DISPENSING CUBED ICE Press the ICE TYPE button to illuminate the Cubed ...
Page 20 - SETTING THE FUNCTIONS; replaced. After replacing the air filter, press and hold the Air
20 SETTING THE FUNCTIONS SETTING THE DISPENSER LOCK Press and hold the ALARM/LOCK button for three seconds to lock the dispenser and all of the other control panel functions.Press and hold again for 3 seconds to unlock. NOTE: The function lock in models without Energy Saving do not lock water and Ic...
Page 21 - SPACEPLUS ICE SYSTEM; Storing cans or other items in the ice bin may; To open or close the ice
21 USING YOUR REFRIGERATOR SPACEPLUS ICE SYSTEM CAUTION ţ Keep hands and tools out of the ice compartment door and dispenser chute. You could break some-thing or injure yourself. The icemaker will stop producing ice when the ice bin is full. If you need more ice, empty the ice bin into the ex-tra ic...
Page 22 - AUTOMATIC ICEMAKER; Icemaking stops when the ice storage bin is full.; Personal Injury Hazard; Such glasses or containers may break, and
22 AUTOMATIC ICEMAKER Ice is made in the automatic icemaker and sent to thedispenser. The automatic icemaker can make 10 or 12ice cubes (depending on your device) at a time, above100 cubes per 24-hour period. This quantity may varyby circumstance, including freezer compartmenttemperature, room tempe...
Page 23 - FOOD STORAGE GUIDE
23 USING YOUR REFRIGERATOR ADJUSTING CONTROL SETTINGS Give the refrigerator time to cool down completely before adding food. It is best to wait 24 hours before adding food to the refrigerator. The mid-settings indicated in the previous section should be correct for normal household refrigerator usag...
Page 24 - REFRIGERATOR SHELVES
24 Packaging Recommendations: ţ Use sealed plastic containers. ţ Use plastic containers with a smooth surface. ţ Package with aluminum foil of high resistance. ţ Wrap with paper layered with plastic. ţ Use water proof plastic. ţ Use recommended plastic bags to store frozen foods. Follow these packag...
Page 25 - In order to remove a shelf from a metal frame; Pull the shelf until it stops.; Functional Shelves; CRISPER HUMIDITY CONTROL (in some models); “High”; To remove or replace Glide‘N’Serve drawer; Removing the fixed door bin is recommended to
25 USING YOUR REFRIGERATOR Sliding Shelves (in some models) You can slide some of the shelves in your refrigerator towards inside or outside like explained below. ţ To slide the shelf towards the outside: Pull towards you, figure A. ţ To slide the shelf towards the inside: Push until it stops, figure ...
Page 26 - Selection Button; DOOR RACKS; NOTE
26 USING YOUR REFRIGERATOR Selection Button ţ8IFOŞ.&"5şJTTFMFDUFEUIFUFNQFSBUVSFPGUIF Glide‘N’Serve can be kept around 34°F(1°C). This feature helps keep meat or fish fresh for a longer time. The Glide‘N’Serve temperature can be main- tained under recommended temperature setting Freezer : 0°F ...
Page 27 - To reinstall Ice Bin:; Take the drawer off as much as possible and put the; ice bin in the right position.; To put it back , insert the Durabase in the rail
27 USING YOUR REFRIGERATOR FREEZER SECTION ICE BIN (In some models) To remove Ice Bin: ţ Pull the drawer as much as possible (1). ţ Raise the ice box and take it out carefully (2). To reinstall Ice Bin: ţ Take the drawer off as much as possible and put the ice bin in the right position. DURABASE (in...
Page 28 - For best results, do not move the phone while
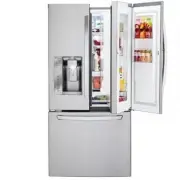
USING YOUR REFRIGERATOR DOOR-IN-DOOR The Door-in-Door cmpartment allows for easy access for commonly used food items. The outer Door-in-Door includes two door bins, the Cheese&Butter and Condiments bins, that are specially designed for food, this makes spreading butter and slicing cheese easier....
Page 29 - REFRIGERATOR CARE AND CLEANING
29 WARNING EXPLOSION HAZARD Do not use flammable cleaners. Not following these instructions can cause death, explosion or fire. The refrigerator, as well as the freezer, do their own de-freezing. This process does not prevent the build up of contaminants, therefore it is suggested that you clean both ...
Page 30 - “Closing and Aligning Doors”.
30 POWER INTERRUPTIONS 1. In case of a black out, call your electric company and ask how long it will last. 2. In case of a 24 hour or less black out, do not open the refrigerator; this will keep the food fresh. 3. In case of a longer black out, do one of the following options: ţ Pull out all of the...
Page 31 - Remove the old cartridge.; Press the push button to open the filter cover.
31 REPLACING THE WATER FILTER (TYPE 1) It is recommended that you replace the filter approximately every 6 months, when the water filter indicator reaches 0 months, or when the ice and water dispenser noticeably decreases out-put. Remove the old cartridge. 1. Press the push button to open the filter co...
Page 32 - Take the new cartridge out of its packing and; NOTE: Filter Bypass Plug; Filter Bypass Plug; USA
32 REPLACING THE WATER FILTER Replace with a new cartridge. 1. Take the new cartridge out of its packing and remove the protective cover from the o-rings. With cartridge ears in the horizontal position,push the new filter cartridge into the manifoldhole until it stops. 2. Firmly lock in the cartridge...
Page 33 - Performance Data Sheet; * Based on the use of Cryptosporidium parvum oocysts.
33 REFRIGERATOR CARE AND CLEANING Performance Data Sheet Model: LG ADQ36006101-S Use Replacement Cartridge: ADQ36006101 The concentration of the indicated substances in water entering the system was reduced to a concentration less than or equal to the permissible limit for water leaving the system a...
Page 34 - Do not install
34 Application Guidelines/Water Supply Parameters Service Flow 0.5 gpm (1.9 lpm) Water Supply Potable Water Water Pressure 20-120Psi (138~ 827kPa) Water Temperature 33°F ~ 100°F (0.6°C ~38°C) It is essential that the manufacturer’s recommendedinstallation, maintenance and filter replacementrequiremen...
Page 35 - WATER FILTER; State of California; Water Treatment Device; s o t s e b s
35 WATER FILTER State of California Department of Public Health Water Treatment Device Certificate Number Date Issued: December 15, 2009 Trademark/Model Designation Replacement Elements - 9 0 8 1 0 2 ADQ36006101-S ADQ36006101 Manufacturer: Cuno Inc. The water treatment device(s) listed on this certi...
Page 36 - Bypass valve; INSTALLATION INSTRUCTIONS; CONNECTING THE WATER LINE
36 BEFORE START The water source is not guaranteed by the refrigerator manufacturer. Follow instructions carefully in order to reduce damage. Air located inside the water pipes can cause hammering or tapping causing damage to the inner pipes or water spillage in the inside of the refrigerator. Call ...
Page 38 - OPEN THE BYPASS VALVE; Turn ice maker switch into the; position. Ice maker; ON
38 ţ Remove the ring plug (1) from the valve located at the top of such device. ţ Place compression nut and the ferule at the end of the pipeline. Insert pipeline into the connection valve as far as possible. Hold tightly while holding pipeline. Compression Nut 1/4” Ferule Hold on to the pipe from t...
Page 39 - UNDERSTANDING SOUNDS YOU MAY HEAR; Problem; The plug is correctly positioned.; TROUBLESHOOTING GUIDE
39 UNDERSTANDING SOUNDS YOU MAY HEAR Your new refrigerator might produce certain noises that your previous refrigerator did not. It is normal if you worry. Most of the new sounds you will be hearing are actually normal and expected. Hard surfaces like walls or floor can increase sounds and make them ...
Page 42 - SMART DIAGNOSIS; Using Smart Diagnosis; For best results, do not move the phone while the
42 SMART DIAGNOSIS SMART DIAGNOSIS (In some models). Using Smart Diagnosis NOTE For best results, do not move the phone while the tones are being transmitted.If the call center agent is not able to get an accurate recording of the data, you may be asked to try again. TM TM TM TM TM TM Should you exp...
Page 43 - WARRANTY
43 WARRANTY LG ELECTRONICS U.S.A., INC. LG REFRIGERATOR LIMITED WARRANTY - U.S.A. Should your LG Refrigerator (“Product ”) fail due to a defect in materials or workmanship under normal home use, during the warranty period set forth below, LG will at its option repair or replace the product. This lim...
Page 44 - LG REFRIGERATOR LIMITED WARRANTY - Canada; Sealed System
44 WARRANTY LG ELECTRONICS CANADA, INC. LG REFRIGERATOR LIMITED WARRANTY - Canada WARRANTY: Should your LG Refrigerator (“Product”) fail due to a defect in material or workmanship under normal home use during the warranty period set forth below, LG Canada will at its option repair or replace the Pro...