LG CP40NG10 - User Manual
LG CP40NG10 Drive – User Manual, read for free online in PDF format. We hope this helps you resolve any issues you may have. If you have further questions, please contact us through the contact form.


Table of Contents:
- Page 2 – Location and function of controls; Removing the USB converter cable (For Windows); Stop the application software being currently used.; Front
- Page 3 – Specifications
- Page 4 – Safety Instructions
• Please pay attention to handling Electrostatic
Sensitive Devices, you may use anti-static
products such as wrist straps, heel straps, mats
to protect your body from electrostatic.
• Make sure you have a personal computer with
one or two open USB ports before connecting
the drive to your computer.
• Power for all other devices should be turn off
before attaching the cables.
Connect the drive to the computer as shown in
figure.
1
Connect the USB 2.0 (Y type) cable to
the drive.
2
Connect the other end of the USB 2.0
cable to your computer.
3
The drive may get its power from the PC
USB power. All systems may not meet
USB power requirements and full
performance may not be achieved.
In this case, connect to the USB power
cable.
When the computer is ready, confirm that the
drive is detected. And then, insert the supplied
software CD into the drive and install the
software.
• Please do not connect the USB cables by any means other than specified above.
Using the wrong type of cable with this drive can cause it to malfunction.
• The appliance is not intended for use by young children or infirm persons without supervision.
Young Children should be supervised to ensure that they do not play with appliance.
• If the appliance is supplied from a cord extension set or an electrical portable outlet device, the cord
extension set on electrical portable outlet device must be positioned so that it is not subject to splashing
or ingress of moisture.
Installation
NOTES
Connecting to computer
Hardware Installation
NOTES
USB Power cable
1
2
3
"Loading the manual" means you need to wait until the file loads and becomes available for online reading. Some manuals are very large, and the time they take to appear depends on your internet speed.
Was this manual helpful?
About this manual
- Brand
- LG
- Model
- CP40NG10
- Document type
- User Manual
- Category
- Drive
- Language(s)
- English
- Pages
- 4
- File size
- 144.8 KB
- Format
Summary
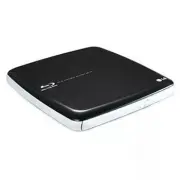
1. Disc Tray 2. Drive activity indicator The LED is used to indicate the operation ofdrive. 3. Eject Button 4. Emergency Eject Hole 1. USB Connector (mini) This connector is used to connect to the USB 2.0 cable. Location and function of controls Removing the USB converter cable (For Windows) The dri...
Features • Universal Serial Bus (USB) 2.0 interface for high-speed data transfer.• Buffer Under Run error protection technology• Emergency eject support• Combination of CD-R/RW, DVD-R/RW, DVD+R/RW, DVD+R DL, DVD-R DL, DVD-RAM, M-Disc (DVD+R SL), BD-R (SL/DL,LTH)/RE (SL/DL) andBD-R/RE XL (3 Layer) dr...
Safety Instructions CLASS 1 LASER PRODUCT LASER KLASSE 1 PRODUKTLUOKAN 1 LASER LAITE KLASS 1 LASER APPARAT CLASE 1 PRODUCTO LÁSER CLASSE 1 PRODOTTO LASER CAUTION : CLASS 3B VISIBLE AND INVISIBLE LASER RADIATION WHEN OPEN AND INTERLOCKS DEFEATED.AVOID EXPOSURE TO THE BEAM. ADVARSEL : KLASSE 3B SYNLIG...
Ask a question
Related manuals
Popular LG Drives
More LG Drives models
 LG BP40NB30 User Manual
 LG BP40NS20 User Manual
 LG BP50NB40 User Manual
 LG BT30N User Manual
 LG CH08LS10 User Manual
 LG CH10LS20 User Manual
 LG GE24NU40 User Manual
 LG GH20NS10 User Manual
 LG GH20NS15 User Manual
 LG GH22LP20 User Manual
 LG GH22LS50 User Manual
- LG GH22NP20 User Manual
 LG GH22NS30 User Manual
 LG GH22NS40 User Manual
- LG GH22NS50 User Manual
 LG GH24NS50 User Manual
 LG GH24NS90 User Manual