Page 2 - READ BEFORE INSTALLTAION; Thoroughly inspect the unit for any shipping damages, cosmetic; IF THERE IS ANY PROBLEMS:; Contact your merchant for product replacement due to shipping
IMPORTANT READ THIS FIRST READ BEFORE INSTALLTAION 1. Carefully check all contents of package(s). 2. Thoroughly inspect the unit for any shipping damages, cosmetic damages or defects. 3. Have a certified contractor/electrician test the unit before installation. IF THERE IS ANY PROBLEMS: 1. DO NOT IN...
Page 3 - CONTENTS; - READ ALL INSTRUCTIONS CAREFULLY BEFORE STARTING -; ALL WIRING MUST BE DONE BY A PROFESSIONAL AND IN
[ENGLISH] - READ AND SAVE THESE INSTRUCTIONS - CONTENTS IMPORTANGE SAFETY INSTRUCTIONS ..................................................................... 1 COMPONENTS OF PACKAGE ...................................................................................... 3 INSTALLATION ....................
Page 4 - IMPORTANGE SAFETY INSTRUCTIONS; - PLEASE READ THIS SECTION CAREFULLY BEFORE INSTALLATION -; TO REDUCE THE RISK OF PERSONAL INJURY IN THE EVENT OF A RANGE
1 IMPORTANGE SAFETY INSTRUCTIONS - PLEASE READ THIS SECTION CAREFULLY BEFORE INSTALLATION - WARNING: TO REDUCE THE RISK OF FIRE, ELECTRIC SHOCK OR PERSONAL INJURY, OBSERVE THE FOLLOWING: 1. Installation and electrical wiring must be done by qualified professionals and in accordance with all applicab...
Page 5 - What to Do in the Event of a Range Top Grease Fire; What to Do If You Smell Gas; CAUTION; ELECTRICAL SHOCK HAZARD
2 What to Do in the Event of a Range Top Grease Fire 1. SMOTHER FLAMES with a tight fitting lid, cookie sheet, or metal tray, and then turn off the burner. KEEP FLAMMABLE OR COMBUSTIBLE MATERIAL AWAY FROM FLAMES. If the flames do not go out immediately, EVACUATE THE AREA AND CALL THE FIRE DEPARTMENT...
Page 6 - COMPONENTS OF PACKAGE; (Must keep all materials for returns or refunds); Opening
3 COMPONENTS OF PACKAGE (Must keep all materials for returns or refunds) Range Hood Box Duct Cover Box (For Wall Mount Application Models Only) {A} KOBE Range Hood {B} Warranty Registration Card {C} Quick Reference Guide {D} 6” Round Vent Exhaust (Pre-Installed) {E} 3- 1/4” x 10” Exhaust {F} Top Ven...
Page 7 - INSTALLATION; PLEASE READ ENTIRE INSTRUCTIONS BEFORE PROCEEDING; Calculation before Installation; SAFETY WARNING
4 INSTALLATION PLEASE READ ENTIRE INSTRUCTIONS BEFORE PROCEEDING Calculation before Installation To calculate installation, please refer to TABLE 1 and TABLE 2. (All calculation in inches). - FOR UNDER THE CABINET - TABLE 1 A = Height of Floor to Ceiling B = Height of Floor to Counter Top (Standard:...
Page 8 - UNDER CABINET INSTALLATION; Before Installation
5 UNDER CABINET INSTALLATION Before Installation 1. Read any provided document(s). 2. Test the range hood by temporarily connecting it to an outlet and turning ON the fan and lights. 3. If you run into any problems, contact KOBE Range Hoods. Venting Options and Requirements 4. The range hood has 3 e...
Page 10 - WALL MOUNT INSTALLATION
7 WALL MOUNT INSTALLATION Before Installation 1. Read any provided document(s). 2. Test the range hood by temporarily connecting it to an outlet and turning ON the fan and lights. 3. If you run into any problems, contact KOBE Range Hoods. Venting Options and Requirements 4. The range hood has 3 exha...
Page 12 - OPERATING INSTRUCTIONS; To operate the fan function; Press button to choose from speed; To operate the light function; Press the Light Control to turn lights on and off
9 OPERATING INSTRUCTIONS 3-Speed Mechanical Push Button NOTE: For best results, turn fan on prior to any preparation or cooking and keep fans running while cooking. Adjust speed as needed. To operate the fan function • Press button to choose from speed o Q = QuietMode ™ speed o L = Low speed o H = H...
Page 13 - MAINTENANCE; To Clean Hood Surface; Use soft towel to wipe off the cleaning solution, gently; For Baffle Filter models only: to Clean Baffle Filter / Oil Tunnel
10 MAINTENANCE For optimal performance, clean the range hood surface and filters regularly. To Clean Hood Surface CAUTION: NEVER USE ABRASIVE CLEANERS, PADS, OR CLOTHS. ***Regular care will help preserve its fine appearance. 1. Use only mild soap or detergent solutions. Dry surfaces using soft cloth...
Page 14 - SPECIFICATIONS
11 SPECIFICATIONS MODEL / SIZE CHX9130SQB-1 (30”) CHX9136SQB-1 (36”) CHX9130SQB- 2 (30”) CHX9136SQB- 2 (36”) COLOR Commercial Grade Stainless Steel CONSUMPTION / AMPERE 106W / 1.17A VOLTAGE / Hz 110V / 60Hz NUMBER OF BLOWER 2 DESIGN Seamless / Satin Finish BLOWER TYPE Twin Vertical Turbine Impeller ...
Page 15 - MEASUREMENTS & DIAGRAMS
12 MEASUREMENTS & DIAGRAMS ***All inch measurements are converted from millimeters. Inch measurements are estimated. ***All measurements in ( ) are millimeters. - FOR UNDER THE CABINET - MODEL NO.: CHX9130SQB-1 (30”) / CHX9136SQB-1 (36”) CHX9130SQB- 2 (30”) / CHX9136SQB-2 (36”) - FOR WALL MOUNT ...
Page 17 - PARTS LIST; DESCRIPTION
14 PARTS LIST MODEL NO.: CHX9130SQB-1 (30”) / CHX9136SQB-1 (36”) CHX9130SQB- 2 (30”) / CHX9136SQB-2 (36”) NO. DESCRIPTION MODEL / SIZE PART NO. 1 6” Round Exhaust Plate 02-030 2 3- 1/4” x 10” Rectangular Exhaust 02-031 3 3- 1/4” x 10” Top Vent Cover 02-032 4 Control Switch 02-006 5 LED Light 02-005 ...
Page 18 - CIRCUIT DIAGRAM
15 CIRCUIT DIAGRAM MODEL NO.: CHX9130SQB- 1 (30”) / CHX9136SQB-1 (36”) CHX9130SQB- 2 (30”) / CHX9136SQB-2 (36”)
Page 19 - TROUBLE SHOOTING; Issue
16 TROUBLE SHOOTING Issue Possible Cause Solution After installation, both motors and lights are not working. The power is not on. Make sure the circuit breaker and the unit’s power is ON. Use a voltage meter to check the power supply. The wire connection is not secure. Check and tighten wire connec...
Page 20 - WARRANTY; WARRANTY CERTIFICATE; ONE-YEAR LIMITED LABOR WARRANTY ON KOBE BRILLIA SERIES:; abrasive cleaning products.
17 WARRANTY WARRANTY CERTIFICATE In order to obtain warranty service, you must provide proof of original purchase from a KOBE authorized Dealer. Please keep a copy of your original invoice as proof of purchase. ONE-YEAR LIMITED LABOR WARRANTY ON KOBE BRILLIA SERIES: For one year from the date of you...
Page 21 - THIS WARRANTY WILL BE VOIDED BY:; residential indoor usage.
18 THIS WARRANTY WILL BE VOIDED BY: 1. Improper installation and failure to follow installation instructions. 2. Any repair, alternation, modification not authorized by KOBE. 3. Duct alternation, modification, and connection. 4. Incorrect electric current, voltage, or wiring. 5. Improper usage of th...
Page 22 - WARRANTY INFORMATION FORM; Fills in the blanks and keep this paper with the; original invoice; in a; For warranty service or spare parts purchase in US, contact:
19 WARRANTY INFORMATION FORM Fills in the blanks and keep this paper with the original invoice in a safe place for future service purpose. 1. Date of purchase : _______________________________ 2. Model No. :_______________________________ 3. Serial No. :_______________________________ For warranty s...
Page 23 - Using a KOBE hood overseas is at your own risk and; L’usage
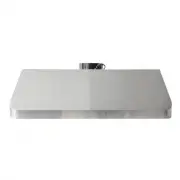
KOBE Range Hoods 11775 Clark Street Arcadia, CA 91006 USA www.koberangehoods.com This KOBE hood is made for use in the USA and CANADA only. We do not recommend using this hood overseas as the power supply may not be compatible and may violate the electrical code of that country. Using a KOBE hood ov...