JennAir JGS1450ML - User Manual
JennAir JGS1450ML Range – User Manual, read for free online in PDF format. We hope this helps you resolve any issues you may have. If you have further questions, please contact us through the contact form.


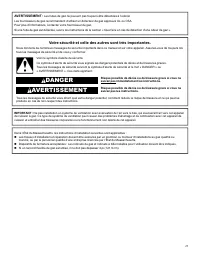
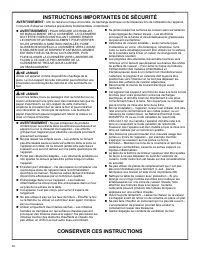
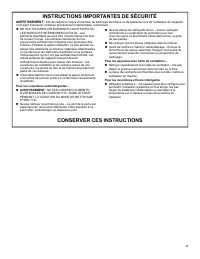
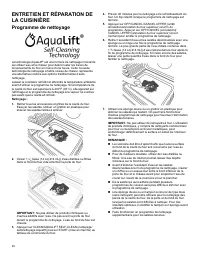
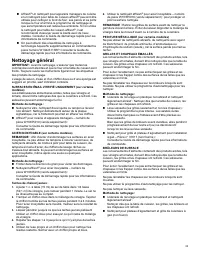
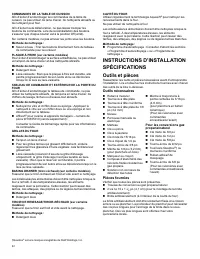
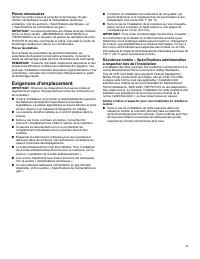
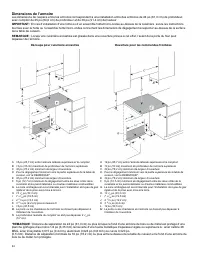
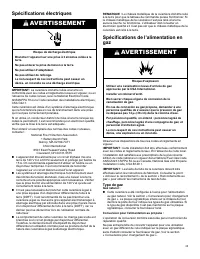
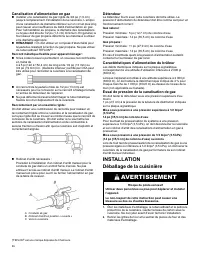

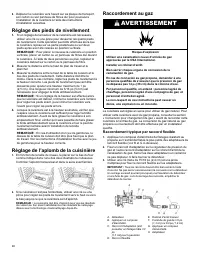
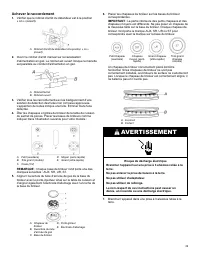
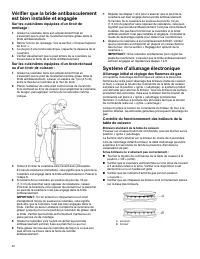

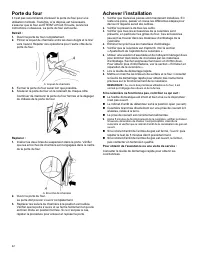
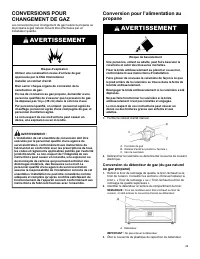
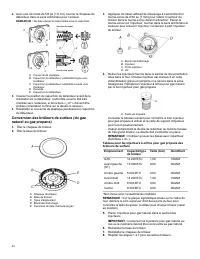
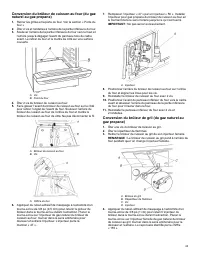
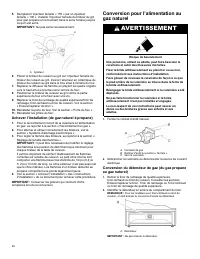
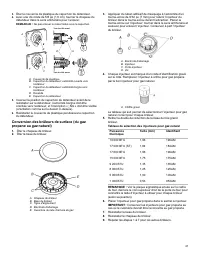
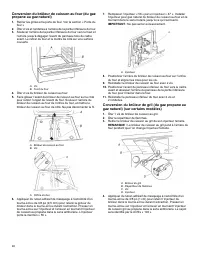
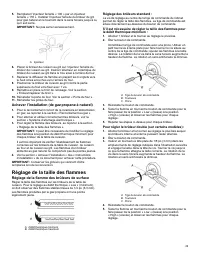
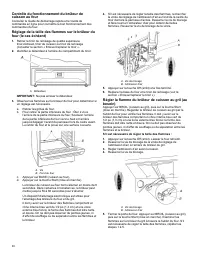


Table of Contents:
- Page 2 – RANGE SAFETY; WARNING
- Page 3 – Your safety and the safety of others are very important.; DANGER
- Page 4 – IMPORTANT SAFETY INSTRUCTIONS; SAVE THESE INSTRUCTIONS
- Page 6 – Clean Cycle
- Page 7 – General Cleaning
- Page 8 – Tools and Parts; Tools Needed; Location Requirements
- Page 9 – Mobile Home - Additional Installation Requirements; Cabinet Dimensions
- Page 10 – Electrical Requirements; Gas Supply Requirements; Type of Gas
- Page 11 – Gas Pressure Regulator; INSTALLATION; Unpack Range
- Page 12 – Install Anti-Tip Bracket; Adjust Leveling Legs
- Page 13 – Level Range; Make Gas Connection; Typical flexible connection; Complete Connection
- Page 15 – Electronic Ignition System; Initial Lighting and Gas Flame Adjustments; Power Failure; Check Operation of Oven Broil Burner
- Page 16 – Oven Door
- Page 17 – Complete Installation; GAS CONVERSIONS
- Page 18 – Propane Gas Conversion
- Page 21 – Natural Gas Conversion
- Page 23 – Adjust Flame Height; Adjust Surface Burner Flame; To Adjust Standard Burner:
- Page 24 – If the “Low” Flame Needs to Be Adjusted:; Check Operation of Oven Bake Burner
- Page 25 – Adjust Oven Broil Burner Flame (If Needed); Moving the Range
- Page 26 – SÉCURITÉ DE LA CUISINIÈRE; AVERTISSEMENT
- Page 27 – Votre sécurité et celle des autres sont très importantes.
- Page 28 – INSTRUCTIONS IMPORTANTES DE SÉCURITÉ; NE JAMAIS; CONSERVER CES INSTRUCTIONS
- Page 30 – Programme de nettoyage
- Page 31 – Nettoyage général
- Page 32 – Outils et pièces; Outils nécessaires
- Page 33 – Pièces nécessaires; Exigences d’emplacement
- Page 34 – Dimensions de l’armoire
- Page 35 – Spécifications électriques; Type de gaz
- Page 36 – Canalisation d’alimentation en gaz; Détendeur; Déballage de la cuisinière
- Page 38 – Réglage des pieds de nivellement; Réglage de l’aplomb de la cuisinière; Raccordement au gaz; Raccordement typique par raccord flexible
- Page 39 – Achever le raccordement
- Page 40 – Système d’allumage électronique; Allumage initial et réglage des flammes de gaz
- Page 41 – Panne de courant; Contrôle du fonctionnement du brûleur du gril
- Page 42 – Porte du four; Achever l’installation
- Page 46 – Achever l’installation (de gaz naturel à propane)
- Page 49 – Achever l’installation (de gaz propane à naturel); Réglage de la taille des flammes; Réglage de la flamme des brûleurs de surface; Réglage des brûleurs standard :
- Page 51 – Déplacement de la cuisinière
- Page 52 – NOTES
W11602522A
SLIDE-IN GAS RANGES OWNER’S MANUAL
GUIDE D’UTILISATION DE LA CUISINIÈRE À GAZ
ENCASTRÉE
Table of Contents/Table des matières
. . . . . . . . . . . . . . . . . . . . . . . . . . . . . . . . . . . 6
Clean Cycle . . . . . . . . . . . . . . . . . . . . . . . . . . . . . . . . . . . . . . . . . . . . . . . . . . . . . . . . . . . . . . . . . . 6
General Cleaning . . . . . . . . . . . . . . . . . . . . . . . . . . . . . . . . . . . . . . . . . . . . . . . . . . . . . . . . . . . 7
. . . . . . . . . . . . . . . . . . . . . . . . . . . . . . . . . . . . . . . . 8
Tools and Parts . . . . . . . . . . . . . . . . . . . . . . . . . . . . . . . . . . . . . . . . . . . . . . . . . . . . . . . . . . . . . 8
Location Requirements . . . . . . . . . . . . . . . . . . . . . . . . . . . . . . . . . . . . . . . . . . . . . . . . . . . 8
Electrical Requirements . . . . . . . . . . . . . . . . . . . . . . . . . . . . . . . . . . . . . . . . . . . . . . . . 10
Gas Supply Requirements . . . . . . . . . . . . . . . . . . . . . . . . . . . . . . . . . . . . . . . . . . . . . 10
Unpack Range . . . . . . . . . . . . . . . . . . . . . . . . . . . . . . . . . . . . . . . . . . . . . . . . . . . . . . . . . . . . 11
Install Anti-Tip Bracket . . . . . . . . . . . . . . . . . . . . . . . . . . . . . . . . . . . . . . . . . . . . . . . . . . 12
Adjust Leveling Legs . . . . . . . . . . . . . . . . . . . . . . . . . . . . . . . . . . . . . . . . . . . . . . . . . . . . 12
Level Range . . . . . . . . . . . . . . . . . . . . . . . . . . . . . . . . . . . . . . . . . . . . . . . . . . . . . . . . . . . . . . . 13
Make Gas Connection . . . . . . . . . . . . . . . . . . . . . . . . . . . . . . . . . . . . . . . . . . . . . . . . . . 13
Verify Anti-Tip Bracket Is Installed and Engaged . . . . . . . . . . . . . . . . . 14
Electronic Ignition System . . . . . . . . . . . . . . . . . . . . . . . . . . . . . . . . . . . . . . . . . . . . . . 15
Remove/Replace Drawer (On some models) . . . . . . . . . . . . . . . . . . . . . 16
Oven Door. . . . . . . . . . . . . . . . . . . . . . . . . . . . . . . . . . . . . . . . . . . . . . . . . . . . . . . . . . . . . . . . . . 16
Complete Installation . . . . . . . . . . . . . . . . . . . . . . . . . . . . . . . . . . . . . . . . . . . . . . . . . . . . 17
Propane Gas Conversion . . . . . . . . . . . . . . . . . . . . . . . . . . . . . . . . . . . . . . . . . . . . . . 18
Natural Gas Conversion . . . . . . . . . . . . . . . . . . . . . . . . . . . . . . . . . . . . . . . . . . . . . . . . 21
Adjust Flame Height . . . . . . . . . . . . . . . . . . . . . . . . . . . . . . . . . . . . . . . . . . . . . . . . . . . . . 23
Moving the Range . . . . . . . . . . . . . . . . . . . . . . . . . . . . . . . . . . . . . . . . . . . . . . . . . . . . . . . . 25
. . . . . . . . . . . . . . . . . . . . . . . . . . . . . . . . . . . . . . . . 26
.............................................
général......................................................
.........................................................
pièces..........................................................
..........................................
............................................
..........................................................
cuisinière ............................................
...............................
gaz .....................................
Vérifier que la bride antibasculement est bien installée et
engagée
..................................................................
..............................
four ............................................................
l’installation ...........................................
...............................
cuisinière ................................
IMPORTANT:
Save for local electrical inspector's use.
Installer:
Leave installation instructions with the homeowner.
Homeowner:
Keep installation instructions for future reference.
IMPORTANT
:
À conserver pour consultation par l’inspecteur local des installations électriques.
Installateur :
Remettre les instructions d’installation au propriétaire.
Propriétaire :
Conserver les instructions d’installation pour référence ultérieure.
"Loading the manual" means you need to wait until the file loads and becomes available for online reading. Some manuals are very large, and the time they take to appear depends on your internet speed.
Summary
2 RANGE SAFETY WARNING: If the information in these instructions is not followed exactly, a fire or explosion may result causing property damage, personal injury or death. − Do not store gasoline or other flammable vapors and liquids in the vicinity of this or anyother appliance. − WHAT TO DO IF YOU...
3 WARNING: Gas leaks cannot always be detected by smell. Gas suppliers recommend that you use a gas detector approved by UL or CSA. For more information, contact your gas supplier. If a gas leak is detected, follow the “What to do if you smell gas” instructions. Your safety and the safety of others ...
4 IMPORTANT SAFETY INSTRUCTIONS WARNING: To reduce the risk of fire, electric shock, or injury to persons when using the appliance, follow basic precautions, including the following: � WARNING: TO REDUCE THE RISK OF TIPPING OF THE RANGE, THE RANGE MUST BE SECURED BYPROPERLY INSTALLED ANTI-TIP DEVICE...