Ikea FHGA5K 502-007-04- User Manual
Ikea FHGA5K 502-007-04– User Manual, read for free online in PDF format. We hope this helps you resolve any issues you may have. If you have further questions, please contact us through the contact form.


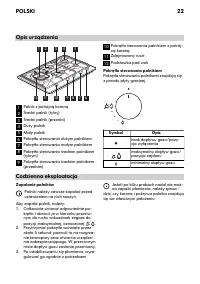
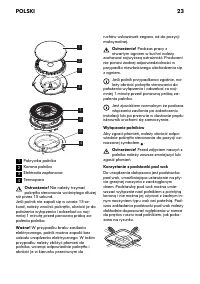
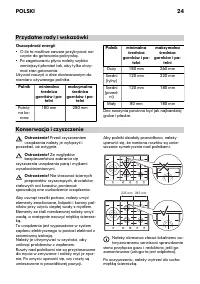
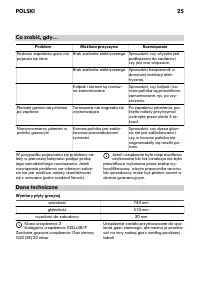
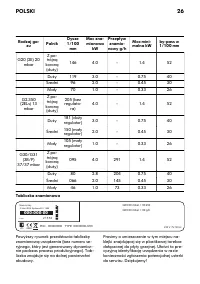
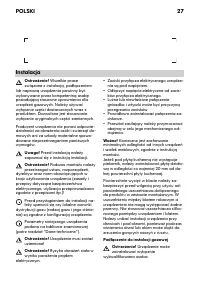


Table of Contents:
- Page 3 – zyk
- Page 4 – Contents; Children and vulnerable people safety; ENGLISH
- Page 5 – Safety instructions; Installation
- Page 7 – Product description; Burner control knob; Daily use; Ignition of the burners
- Page 8 – Helpful hints and tips; Energy savings
- Page 12 – Gas Connection
- Page 14 – Adjusting flame level
- Page 15 – Environment concerns; Packaging materials; IKEA GUARANTEE; How long is the IKEA guarantee valid?
- Page 18 – ść; łą; Bezpiecze; Ostrze; POLSKI
- Page 19 – Wskazówki dotycz; Instalacja
- Page 22 – Pokr; Codzienna eksploatacja; Zapalanie palników
- Page 24 – Przydatne rady i wskazówki; Konserwacja i czyszczenie
- Page 30 – Ochrona
FRAMTID
HGA5K
GB
PL
PL
"Loading the manual" means you need to wait until the file loads and becomes available for online reading. Some manuals are very large, and the time they take to appear depends on your internet speed.
Summary
PLPL ENGLISH 4 POLSKI 18 Language, J ę zyk Country, Kraj
Contents Safety instructions 5 Product description 7 Daily use 7 Helpful hints and tips 8 Care and cleaning 9 What to do if… 10 Technical data 10 Installation 12 Environment concerns 15 IKEA GUARANTEE 15 Subject to change without notice. Before the installation and use of the appliance, carefully re...
• Never try to extinguish a fire with water, but switch off the appliance and then cover flame e.g. with a lid or a fire blan- ket. • Do not store items on the cooking surfaces. • Do not use a steam cleaner to clean the appliance. • Metallic objects such as knives, forks, spoons and lids should not ...