Husqvarna ST 330T - Manual

Husqvarna ST 330T – Manual, read for free online in PDF format. We hope this helps you resolve any issues you may have. If you have further questions, please contact us through the contact form.


Table of Contents:
- Page 2 – IMPORTANT; Safe Operation Practices for Walk-Behind Snow Throwers
- Page 3 – CONGRATULATIONS; CUSTOMER RESPONSIBILITIES; TABLE OF CONTENTS; PRODUCT SPECIFICATIONS; Gasoline Capacity; Clearing a Clogged Discharge Chute
- Page 4 – PARTS PACKED SEPARATELY IN CARTON
- Page 6 – INSTALL TRACTION DRIVE CONTROL ROD
- Page 8 – OPERATION; KNOW YOUR SNOW THROWER
- Page 10 – TRANSPORT AND HEIGHT ADJUSTMENT
- Page 11 – HOW TO USE YOUR SNOW THROWER
- Page 13 – BEFORE STARTING THE ENGINE; TO TRANSPORT
- Page 15 – SNOW THROWING TIPS
- Page 16 – MAINTENANCE; LUBRICATION CHART; SAE 30 Motor Oil; SNOW THROWER; TRACKS
- Page 17 – ENGINE
- Page 18 – SERVICE AND ADJUSTMENTS
- Page 20 – CARBURETOR
- Page 21 – INSTRUCTIONS FOR ADJUSTING POWER STEERING
- Page 22 – STORAGE
- Page 23 – TROUBLESHOOTING; PROBLEM
- Page 26 – Consumer Wheeled Limited Warranty Chart 2013
English
115 68 31-27
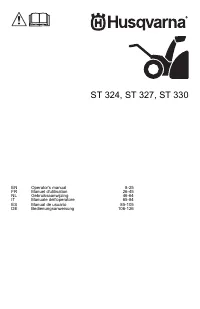
Operator’s Manual
ST 330T
Gasoline containing up to 10% ethanol (E10) is acceptable for use in this machine.
The use of any gasoline exceeding 10% ethanol (E10) will void the product warranty.
Please read the owner's manual carefully and make sure you
understand the instructions before using the machine.
"Loading the manual" means you need to wait until the file loads and becomes available for online reading. Some manuals are very large, and the time they take to appear depends on your internet speed.
Was this manual helpful?
About this manual
- Brand
- Husqvarna
- Model
- ST 330T
- Document type
- Manual
- Language(s)
- English
- Pages
- 28
- Format
Summary
2 IMPORTANT Safe Operation Practices for Walk-Behind Snow Throwers This snow thrower is capable of amputating hands and feet and throwing objects. Failure to observe the following safety instructions could result in serious injury. WARNING: This snow thrower is for use on sidewalks, driveways and ot...
3 CONGRATULATIONS on your purchase of a new snow thrower. It has been designed, engineered and man u fac - tured to give best possible dependability and per for mance.Should you experience any problem you cannot easily remedy, please contact your nearest authorized service center. We have competent,...
4 PARTS PACKED SEPARATELY IN CARTON (1) RETAINER SPRINGS (169675) (1) WASHER 3/8 (19131316) (1) LOCKNUT 3/8 (73800600) SAFTEY IGNITION KEY (S) (443059) (1) MULTI- WRENCH (180684) (1) LOCKNUT 5/16-18 (751153) (1) CARRIAGE BOLT 5/16-18 x 5/8 (72250505) (1) LOCKNUT 1/4-20 (191730) (1) SHOULDER BOLT 1/4...
Ask a question
Related manuals
Popular Husqvarna Other
More Husqvarna Other models
 Husqvarna ST 324 User Manual
 Husqvarna ST 324P Manual
- Husqvarna ST 327 User Manual
 Husqvarna ST 327P Manual
 Husqvarna ST 330 User Manual
 Husqvarna ST 330P User Manual
 Husqvarna ST 424T User Manual
 Husqvarna ST 427T User Manual
 Husqvarna ST 430 User Manual
 Husqvarna ST 430T User Manual
 Husqvarna ST624E Manual
 Husqvarna ST724 Manual