Hoover WindTunnel vacuum cleaner - User Manual

Hoover WindTunnel vacuum cleaner – User Manual, read for free online in PDF format. We hope this helps you resolve any issues you may have. If you have further questions, please contact us through the contact form.


Table of Contents:
- Page 2 – Review this manual before; Important Safeguards!; Save these instructions!; Index
- Page 3 – Continued; Assembling cleaner
- Page 4 – STEP II Attach hose; NOTE: Hose must be connected as shown for all
- Page 5 – Cleaner description; STEP III Position tools; Polarized plug
- Page 6 – Settings; Handle positions; Handle position
- Page 7 – Cleaning tools
- Page 8 – Filter bag; When to replace; How to clean tools; Check bag indicator
- Page 9 – Cleaning final filter; Cleaning secondary filter; Reattaching filter door
- Page 10 – Belt replacement; Headlight replacement; What to buy
- Page 11 – How to replace; The agitator brush roll; Lubrication
- Page 12 – problem; Clearing blockages
WindTunnel
™
by HOOVER
®
Congratulations
on your purchase!
This WindTunnel
™
vacuum cleaner
uses HOOVER
®
HEPA Filtration
Type “Y” filter bags
This product was designed for
easy assembly (See page 3)
www.hoover.com
"Loading the manual" means you need to wait until the file loads and becomes available for online reading. Some manuals are very large, and the time they take to appear depends on your internet speed.
Was this manual helpful?
About this manual
- Brand
- Hoover
- Model
- WindTunnel vacuum cleaner
- Document type
- User Manual
- Language(s)
- English
- Pages
- 12
- File size
- 452.3 KB
- Format
Other Manuals for Hoover WindTunnel vacuum cleaner
Summary
Fill in and retain The model and serial number are located on the bottom of the cleaner as shown. For your personal records, please enter the COMPLETE model and serial numberin the spaces provided and retain this information. Your cleaner is model___________________________________ and has serial nu...
3 STEP 1 Attach rack and handle Carton contents Remove all parts from carton and identify each itemshown. Make sure all parts are located before disposingof packing. A. Handle sectionB. Cleaner bodyC. Hose rackD. Hose, cleaning tools and wandsE. Handle bolts and nuts packet (in bag with owner’s manu...
Align end of hose with projections(A) over slots (B) in dirt duct. STEP II Attach hose 1-8 1-11 1-13 1-9 1-10 Place nuts in recessed areas onfront of handle. Hold each nut inplace while tightening each boltsecurely with a Phillips screw driver. Reposition bag door by fitting tabson bottom of door in...
Ask a question
Related manuals
Popular Hoover Other
More Hoover Other models
 Hoover Wh20440pc User Manual
 Hoover Widepath User Manual
 Hoover Wind Tunnel User Manual
 Hoover WindTunnel User Manual
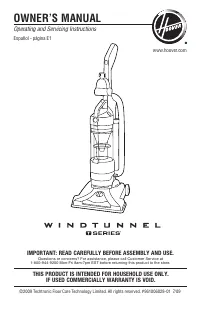 Hoover Windtunnel UH70120 User Manual
 Hoover Wind Tunnel vacuum cleaner Manual
 Hoover 2 Manual
 Hoover 120 V 60 HZ Manual
 Hoover 500 User Manual
 Hoover 800 User Manual
 Hoover 1100 User Manual
 Hoover 2300S Manual