Hoover WindTunnel - User Manual

Hoover WindTunnel – User Manual, read for free online in PDF format. We hope this helps you resolve any issues you may have. If you have further questions, please contact us through the contact form.


Table of Contents:
- Page 2 – Owner’s Manual; ENGLISH; Review this manual before; Fill in and retain; READ ALL INSTRUCTIONS BEFORE USING THIS APPLIANCE; Save these instructions!
- Page 3 – Index; Carton contents; sure all parts are located before; Continued
- Page 4 – NOTE: Hose must be connected as shown for all; back of
- Page 5 – Cleaner description; Transporting cleaner
- Page 6 – BRUSH ROLL; O N O F F; C A R P E T H A R D
- Page 7 – Cleaning tools; C o n t i n u e d
- Page 8 – When to replace; even; Where to buy; by; Changing filter bag; Removing bag door
- Page 9 – Replacing bag door; Secondary and final filters; Removing lens
- Page 10 – Removing belt; Belt replacement; Positioning back of belt; Replacing flat belt; Removing bottom plate; Brush roll replacement
- Page 11 – Replacing brush roll; Removing brush roll; Positioning belt on; Powered hand tool; Agitator brush roll; How to replace
- Page 12 – Edge groomer; Lubrication; Thermal protector
- Page 13 – Clearing blockages; cleaner from electri-; Checking airflow path
- Page 14 – Full Two Year
W A R R A N T Y
(See Copy Where Product Sold)
l
This
vacuum cleaner
takes
Type
Allergen
Filtration filter bags
This product was designed for
easy Assembly (See page 3)
"Loading the manual" means you need to wait until the file loads and becomes available for online reading. Some manuals are very large, and the time they take to appear depends on your internet speed.
Was this manual helpful?
About this manual
- Brand
- Hoover
- Model
- WindTunnel
- Document type
- User Manual
- Language(s)
- English
- Pages
- 14
- File size
- 844 KB
- Format
Other Manuals for Hoover WindTunnel
Summary
Owner’s Manual ENGLISH 15-22 23-30 Review this manual before operating cleaner Fill in and retain The model and serial number are located on the back of the handle as shown. For your personal records, please enter the COMPLETE model and serial number in the spaces provided and retain this informatio...
Index Assembling Cleaner ............................................................ 3-4 Carton Contents .................................................................. 3 How To Use Cleaner Descriptions .......................................................... 5 Cleaning Tools ....................
Looking at the back of the cleaner, make sure switch (A) is in the OFF position. Slide handle into back of cleaner. Push screws into holes on back ofhandle. Using a Phillips screw driver, tighten screws securely. Remove switch lock (B) above OFF switch (C) on front of handle by pulling it straight o...
Ask a question
Related manuals
Popular Hoover Other
More Hoover Other models
 Hoover WDYN D Manual
 Hoover WDYN D8P Manual
 Hoover Wh20420pc User Manual
 Hoover Wh20440pc User Manual
 Hoover Widepath User Manual
 Hoover Wind Tunnel User Manual
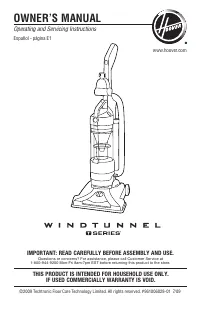 Hoover Windtunnel UH70120 User Manual
 Hoover Wind Tunnel vacuum cleaner Manual
 Hoover WindTunnel vacuum cleaner User Manual
 Hoover 2 Manual
 Hoover 120 V 60 HZ Manual
 Hoover 500 User Manual