Hessaire DX4800S - User Manual
Hessaire DX4800S Evaporative Cooler – User Manual, read for free online in PDF format. We hope this helps you resolve any issues you may have. If you have further questions, please contact us through the contact form.


DAX Rooftop Coolers 030923 www.hessaire.com
I N S T AL L AT I O N I N S T R U C T I O N S
Rooftop Evaporative Coolers
Getting Started
Unpacking: Carefully unpack and inspect the entire unit prior to installing. Ensure there is no visible damage and all contents are
included.
Contents: Evaporative Cooler Unit(1), Manual(1)
Choosing Best Location: Ensure the unit location meets the following
•
Unit is a reasonable distance from sources of heat, smoke or fumes
—
and in accordance with any codes or regulations. It is
important that the air being drawn into your living space is clean and fresh.
•
Unit is positioned for optimal access for servicing requirements.
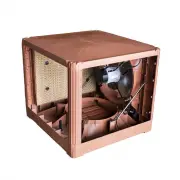
Note: This cooler is designed to be mounted in either a side discharge position
or
down discharge position. Assembled models are
shipped from the factory in the down discharge position. If side discharge is desired, it will be necessary to remove the motor/prop/
brackets from the down position and re-install in the non-
media side. For unassembled models, refer to “Assembly” sheet.
See
Fig. 1
below
This step should be performed with the cooler still on the ground level.
Installation
DO NOT connect power until installation is complete.
Down Discharge Installation:
DX4800: Designed for use with a 18”X18” adjustable pitch roof jack
(Hessaire PN: 12735)
and leg kit
(Hessaire PN: 12728)
.
Roof jack and leg kit sold separately.
DX6800: Designed for use with a 20”X20” adjustable pitch roof jack
(Hessaire PN: 12736)
and leg kit
(Hessaire PN: 12728)
.
Roof jack and leg kit sold separately.
Cut square opening according to roof jack size: 18”X18”
or
20”X20”
Ensure unit is securely mounted to roof and level. Roof jack tilt angle can be adjusted as needed and leg height can be adjusted as
needed. Ensure fasteners are secured and tightened once cooler is level and in final position.
See Fig. 2
.
Side Discharge Installation:
DX4800: Use leg kit
(Hessaire PN: 12728)
. Sold separately.
DX6800: Use leg kit
(Hessaire PN: 12728)
. Sold separately.
Side ducting must accommodate side discharge opening. See
Fig. 3
dimensions.
Ensure unit is securely mounted to roof and level. See
Fig. 2
. Ensure fasteners are secured and tight once cooler is level and in
final position.
Water Connection: 60psi Max Water Pressure
Connect water line to float fitting. Float fitting size:
Standard 1/4”
Electrical:
For use with Hessaire Thermostat (PN: HTH01). Sold separately.
Pg. 1
"Loading the manual" means you need to wait until the file loads and becomes available for online reading. Some manuals are very large, and the time they take to appear depends on your internet speed.