Page 2 - CONTENTS
CONTENTS Product DescriptionSafety Information Installation & Adjustment Before Starting Operation Cleaning and Maintenance Packing listSpecification Troubleshooting 1 2 2 2 4 45 56 7 88 10 24 7 8 2223 25 Symbol Description Warnings Installing the bottom plate Balancing the washing machine Insta...
Page 3 - Product description
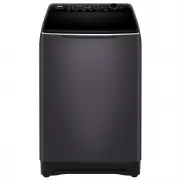
Product description Outer tub cover Top lid Inner tub Pulsator Detergent and softener tray Plinth Lid lock Adjustable feet (2 pieces) Top deck Cabinet Cold water inlet valve Fixed feet (2 pieces) Control panel Handle Hook Power cord Back cover Please understand that shapes of the washing machine and...
Page 4 - Symbol Description; Safety information; Warnings
Symbol Description Warning sign Forbidden sign Contents marked with this symbol are related to the safe use of the product and the personal safety of the user. Please operate the machine in acc ordance with the contents of this manual to avoid harm to the user or damage to the machine. Contents mark...
Page 5 - Forbidden
Safety information Forbidden 60 If you are using an extension cord or an electrical portable outlet device (not recommended), ensure that it is positioned so that it does not come into contact with water or moisture. Do not install this appliance in a damp or wet environment. Do not leave wet laundr...
Page 6 - Installation & Adjustment
If power cord or other parts of this machine are damaged or broken, please contact a technician to have it repaired . Do not attempt repairs by yourself as this may cause personal harm or void the warranty. Please install and adjust the machine according to the directions contained in this manual. I...
Page 7 - Balanc
Installation & Adjustment Drain hose 5 Drain hose clamp Drain hose joint 1. The height of the standpipe or washbasin should be between 0.8 - 1.2 m. Bracket 0 . 8 m h 1 . 2m 1. Remove the cap of the drain hose outlet. Note: A small amount of water may come out when the cap is removed. This is nor...
Page 8 - Connection between the water inlet hose and the; Check the inlet hose connections; Water inlet
Installation & Adjustment Connection between the water inlet hose and the washer the nut of the water inlet hose Thread of the water inlet valve Water absorption cushion 6 fastened and can be pivoted as required. Check the inlet hose connections Water inlet 1. Connect the cold hose (blue connect...
Page 9 - Preparation before washing; Check the following before washing; Before washing
Preparation before washing 1. Connect the water inlet hose. 3. Insert the power plug into the wall power socket. 4. Ensure that the drain hose is installed at the correct height. 5. When the water pressure in the user's home is too low, it may not be able to flush detergents and softeners effectivel...
Page 10 - Operation; Loading your laundry; How to use powdered detergent
Usage of detergent: Applicable only to HWT09AD1 How to use liquid detergent How to use softener The rated washing capacity refers to the largest dry weight of a load that can be washed. Before washing, please make sure that the water level covers the clothes. Adjust the number of clothes according t...
Page 11 - Usage of detergent:; How to use liquid detergent
Operation Usage of detergent: Washing powder Liquid detergent tray Softener inlet Smart-dose tray How to use liquid detergent How to use powdered detergent Remove the blue liquid tray and place the powder detergent directly into the detergent cavity.If you select“Express”cycle, it is recommended to ...
Page 12 - Operation and Wash Cycles; Explanation of buttons; B C
Operation and Wash Cycles 10 Explanation of buttons Indicator display Off : On : Indicates that the program is running and indcates the selected cycle and options. Flashing: When it pauses, it indicates the washing progress status of the current A B C D E F G H I J washing cycle. It also flashes to ...
Page 17 - For example, when you want to wash light soiled clothes quickly; Press the button to power on/off
Operation and Wash Cycles 15 After the power is turned on, the default is Mix program. Rotate the dial clockwise to select the Cotton, Delicate, Durable, Eco, Express, Bedding, Wool, Hygiene, Bulky, Drum Clean, and Downloaded programs. For example, when you want to wash light soiled clothes quickly ...
Page 19 - Press the button to start the cycle; Favourite; CHILD LOCK
Operation and Wash Cycles 17 6 Press the button to start the cycle 7 Press the button to select the delay wash program Delay display: After the delay is started, the remaining delay time is displayed. After the delay is started, it can be suspended, but parameters cannot be changed after the suspens...
Page 20 - POWER OFF & LOSS OF POWER
18 Operation and Wash Cycles Turning off the machine by pressing Power button or unplugging will not remove or delete any saved information in the machine, e.g. Favourites will not be removed in this case. If a loss of power occurs during a cycle, the machine will remember where the washing progress...
Page 21 - OTA UPDATE
19 Operation and Wash Cycles Wi-Fi & REMOTE To provision Wi-Fi, the user first needs to ensure the user interface is off. The user will then hold down the power button for 3 seconds until APP is displayed on the screen. The user will follow the prompts in the app. The machine will automatically ...
Page 22 - BEEP AND WARNING TONES
19 Operation and Wash Cycles 20 Display should show boot when OTA update enters the bootloader mode. It may show ERAS during the OTA erasing flash memories and may show counting time in seconds during the OTA writing flash memories. boot will show on the screen when OTA enters bootloader mode.The sc...
Page 24 - Cleaning and Maintenance; Maintenance
Remove Both lint filters must be used during washing. Must be cleaned after each wash. Clean the detergent box and set it on the control panel seat. 1. The method of dismantling: Tilt upward pull out and gently. 2. The method of cleaning: Use a brush and duster cloth to clean it, then flush it with ...
Page 25 - Troubleshooting; Problem
Is the water inlet hose loose? The water tap leaks. Redistribute the load evenly. Push the Start/Pause button once. Level the machine. Push the Start/Pause button once. The display shows E4. . Is the water tap closed or has the water supply been interrupted? Is the water inlet valve blocked? Is the ...
Page 26 - Common occurrences; Packing list
The display shows F2.The display shows E2-1. Overflow ErrorThe door lock alarm Troubleshooting Common occurrences The display shows FC2. 24 Packing list Problem Cause Solution Please contact Customer Care. The display shows FA The water level sensor has failed. Please contact Customer Care. Please c...
Page 27 - Technical data
25 Technical data TOP LOAD FULL-AUTOMATIC WASHING MACHINE TypeModelRated voltage/frequencyRated washing powerRated spinning powerNet weightGross weightDimensions(mm)Water inlet pressureRated Washing capacity 220-240V/50Hz420W320W65Kg73Kg 12Kg W 640 D 650 H 10930.03MPa-1.0MPa HWT12AD1 220-240V/50Hz35...