Graco 1D02JON- User Manual
Graco 1D02JON– User Manual, read for free online in PDF format. We hope this helps you resolve any issues you may have. If you have further questions, please contact us through the contact form.

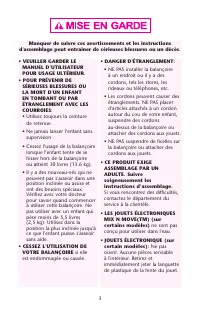

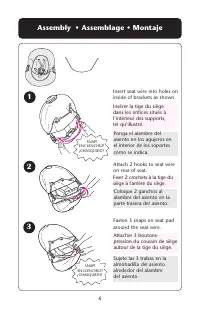

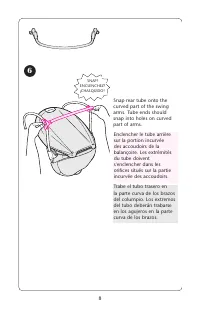
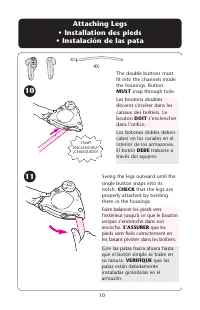
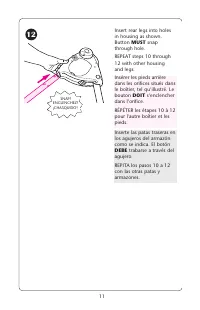

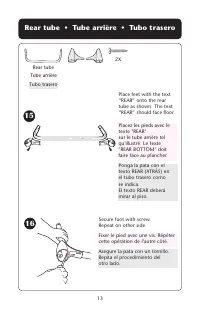
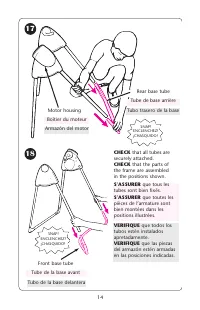
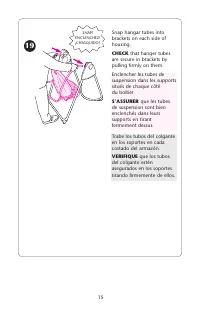
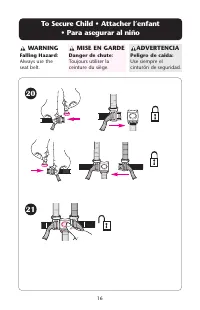
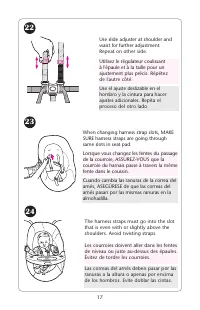
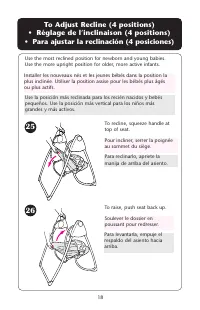
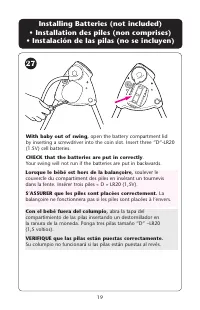


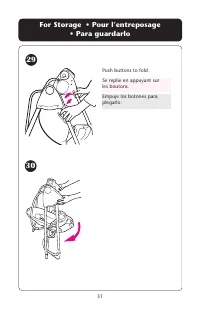
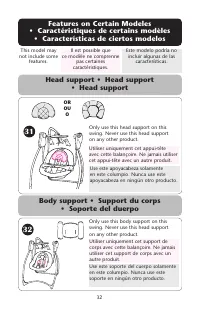
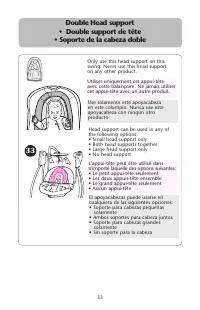
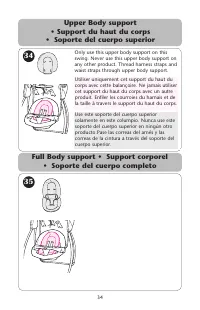
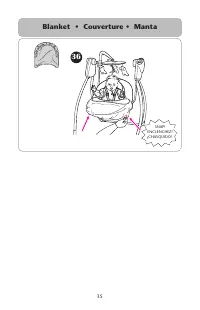

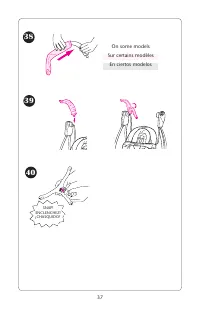

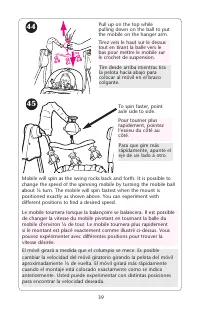


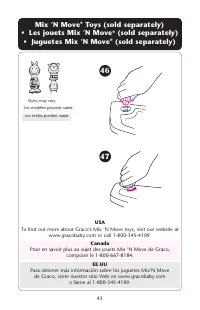


Table of Contents:
- Page 6 – Assembly • Assemblage • Montaje
- Page 10 – Attaching Legs
- Page 11 – MUST; snap; DEBE; trabarse a través del; DOIT; s’enclencher
- Page 12 – Front tube • Tube avant; Front tube
- Page 13 – Rear tube • Tube arrière • Tubo trasero; Rear tube
- Page 15 – CHECK; that hanger tubes; VERIFIQUE; que los tubos; S’ASSURER; que les tubes
- Page 16 – WARNING
- Page 18 – • Para ajustar la reclinación (4 posiciones)
- Page 20 – For Safe Battery Use; Keep the batteries out of children’s reach.
- Page 22 – Gardez les piles hors de la portée des enfants.; Pour un usage sécuritaire des piles
- Page 23 – MISE EN GARDE
- Page 24 – Mantenga las pilas fuera del alcance de los niños.; Para el uso seguro de las pilas
- Page 25 – ADVERTENCIA
- Page 27 – prevenga serias lesiones de caídas o resbalos.; PARA ACTIVAR EL COLUMPIO:; Oprima el botón de; Afin d’éviter que l’enfant ne se blesse; MISE EN MARCHE DE LA BALANÇOIRE :; appuyer sur le bouton
- Page 31 – Push buttons to fold.
- Page 32 – OR; Body support • Support du corps
- Page 33 – solamente
- Page 35 – Blanket • Couverture • Manta
- Page 36 – Motor housing
- Page 38 – On some models
- Page 40 – Problem Solving; Seat not pushed high enough for a good start.; SEAT DOESN’T SWING VERY HIGH:
- Page 41 – Solutions aux problèmes; LA BALANÇOIRE NE DÉMARRE PAS:; Siège poussé trop légèrement pour un bon départ.; LE SIÈGE NE BALANCE PAS TRÈS HAUT:
- Page 42 – Resolución de problemas; EL COLUMPIO NO FUNCIONA:
- Page 43 – USA; To find out more about Graco’s Mix ’N Move toys, visit our website at; Canada; Pour en savoir plus au sujet des jouets Mix ’N Move de Graco,
- Page 45 – NOTES • NOTAS
- Page 48 – Replacement Parts • Warranty Information (USA)
L
ov
in
' H
ug
www.gracobaby.com
OWNER'S MANUAL
MANUEL D'UTILISATEUR
MANUAL DEL PROPIETARIO
T
M
©2006 Graco ISPS038AC 10/06
"Loading the manual" means you need to wait until the file loads and becomes available for online reading. Some manuals are very large, and the time they take to appear depends on your internet speed.
Other Manuals for Graco 1D02JON
Summary
6 Assembly • Assemblage • Montaje Insert seat wire into holes oninside of brackets as shown. Ponga el alambre del asiento en los agujeros enel interior de los soportescomo se indica. Insérer la tige du siège dans les orifices situés à l’intérieur des supports, tel qu’illustré. Attach 2 hooks to seat...
10 4X SNAP! ENCLENCHEZ!¡CHASQUIDO! 10 11 The double buttons mustfit into the channels insidethe housings. Button MUST snap through hole. Los botones dobles debencaber en los canales en elinterior de los armazones.El botón DEBE trabarse a través del agujero. Les boutons doublesdoivent s’insérer dans ...
11 SNAP! ENCLENCHEZ!¡CHASQUIDO! 12 Insert rear legs into holesin housing as shown.Button MUST snap through hole. REPEAT steps 10 through12 with other housing and legs. Inserte las patas traseras enlos agujeros del armazóncomo se indica. El botón DEBE trabarse a través del agujero. REPITA los pasos 1...