Page 3 - Please retain this manual for future reference.; DANGER AND WARNINGS; You Must Read This Owner’s Guide Before Operating Your Gas Grill.; DANGER
User Guide for models: F27S & F36S Please retain this manual for future reference. DANGER AND WARNINGS You Must Read This Owner’s Guide Before Operating Your Gas Grill. DANGER If you smell gas: • Shut off gas to the appliance. • Extinguish any open flames. • Open lid. • If odor continues, keep a...
Page 5 - Thank you for your Fuego Gas Grill purchase.
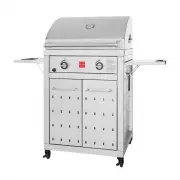
Thank you for your Fuego Gas Grill purchase. We are excited to present to you our new Fuego ALL 304 Stainless Steel Gas Grill. We set out to design a grill that eliminated all of the bulky features you see on most gas grills. We started with the shelves and recessed them into the side panels which c...
Page 8 - For Installation In Canada
• The pressure regulator supplied with the gas barbecue must be used. This regulator is set for 11 inches of water column (pressure). • This gas barbecue is designed for use with liquid propane (LP) gas by default. A NG conversion kit must be used when converting the LP unit to NG unit to use natura...
Page 9 - • Details of 20lb LP cylinder; Storage And / Or Non Use; and the LP cylinder stored outdoors in a well-ventilated space.; Operating
• Details of 20lb LP cylinder • Diameter: 12+1/4”~11+3/4” • Height: 17+15/16”~17+7/16” • Weight: 18lb, Empty • 38lb, Full WARNING: Do not leave items on or against the barbecue. Keep flammable products and sprays away. For outdoor use only. Storage And / Or Non Use • The gas must be turned off at th...
Page 15 - Installation
Installation Items Needed (Not Included) AA Battery Utility Knife / Box Cutter Two People Scissors Stainless Steel Cleaner Non Abrasive Towel
Page 16 - Step 1
Quick Set-up Guide Step 1 1A. Remove the outer carton from the pallet by lifting it vertically off the pallet*. 1B. Remove all of the foam, cardboard and plastic packing around the grill. *Please note that it is helpful to cut the tape on the top and open the flaps for easy removal.
Page 17 - Step 2
Step 2 Lift the grill off of the pallet. Please lift from the designated support bar lifting areas as noted in the images below.* *This item should be lifted off the pallet by a team of 2 or more people. To lighten the load we recommend opening the lid and removing the internal grates and diffuser p...
Page 18 - Step 3
Step 3 Install the diffuser panels onto the placement pins inside the firebox*. *Please note that the F27S will use x2 diffuser panels and the F36S will use x3 diffuser panels.
Page 19 - the flat edge towards the outside of the grill.
Step 4 Install the cooking grates into the the firebox*. The large grates should be installed with the flat edge towards the outside of the grill. *Please note that the F27S will use x2 grates and the F36S will use x3 grates with the smaller grate to be placed in the center.
Page 20 - forward to set the front legs into place.
Step 5 Install the warming rack into the firebox by installing the rear legs first then rotating forward to set the front legs into place.
Page 21 - Step 6
Step 6 Install the AA battery. Please ensure that the + end of the battery faces out towards the battery cap. The cap button can be removed by unscrewing by rotating counterclockwise.
Page 22 - Step 7; grease tray before operation.
Step 7 Remove the grease tray and discard the protective packaging material. Re-install the grease tray before operation.
Page 23 - Step 8; lock into the slot. The shelf is now sitting horizontal for use.
Step 8 Side shelf operation. The grill can be used with the side shelves in either the open or closed position. 8A. To open, pull the shelf upward from the black handle until the shelf support brackets lock into the slot. The shelf is now sitting horizontal for use. 8B. To close, lift up on the shel...
Page 24 - Step 9
Step 9 Remove the laser film from the lid. Clean the entire grill surfaces with a stainless steel cleaner and non-abrasive towel.
Page 25 - LP gas hose with regulator assembly to the LP cylinder.
Step 10 Gas hook up (LP gas is Standard). A. Open the front door and install a standard 20lb LP cylinder (Type 1) into the opening of the grill base (Note: the tank must be hanging from the tank hook) and connect the LP gas hose with regulator assembly to the LP cylinder. B. Connect the regulator to...
Page 26 - LP Gas Hook-Up for Type 1 or QCC1 Regulator; LP Tank Requirements:
LP Gas Hook-Up for Type 1 or QCC1 Regulator LP Tank Requirements: A dented or rusted LP tank may be hazardous and should be checked by your local supplier. Never use a cylinder with a damaged valve. The cylinder used must include a collar to protect the cylinder valve. Always check for leaks after e...
Page 27 - Leak Testing
Leak Testing To Test: Make sure all control valves are in the “OFF” position. Turn the gas supply “ON”. Check all connections from the supply line, or LP cylinder up to and including the manifold pipe assembly. Apply the soap solution around the connection, valve, tubing and end of the manifold. Soa...
Page 28 - Lighting Instruction Manual
Lighting Instruction Manual Warning : Before Lighting, please make sure that the control knob is in the off position and the regulator assembly is in good condition. Control Knob. IMPORTANT Do not leave items on or against the barbecue. Keep flammable product and sprays away. For outdoor use only. S...
Page 29 - Maintenance
Maintenance WARNING: IMPORTANT! General Instructions: Before lighting, inspect the gas supply piping or hose prior to turning the gas “on”. If there is evidence of cuts, wear or abrasion, it must be replaced prior to use. Replacement pressure regulators and hose assemblies must be those specified by...
Page 33 - Limited Warranty Information:
Limited Warranty Information: Fuego Living LLC (“Seller”) and the person or entity that acquires these goods from Seller (“Purchaser”) hereby agree to the following terms and conditions of the sale: Shipping fees are the responsibility of the Purchaser whether freight prepaid or freight collect. Sel...