Euromaid CP9BLB - User Manual
Euromaid CP9BLB Range Hood – User Manual, read for free online in PDF format. We hope this helps you resolve any issues you may have. If you have further questions, please contact us through the contact form.


Table of Contents:
- Page 2 – CONTENT
- Page 3 – NOTICE
- Page 4 – SAFETY WARNINGS
- Page 9 – If the model with Glass:
- Page 11 – remaining bits of broken wood and dust.
- Page 12 – Keep your children from using the cooker hood.
- Page 13 – Speed adjustment .See pictures
- Page 14 – Push stop button, and the motor will stop.; p i c6 C
- Page 17 – LCD Touch control
- Page 19 – Notice of cleaning cooker hood; Please do not use abrasive detergent for it will damage the body.
- Page 20 – Remove the filters, and push the light downwards.
- Page 21 – Abnormity and Solution; Cause
MODEL
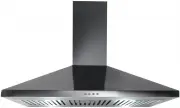
CP9BLB
900mm
Pyramid, Black
Canopy
Manual
Installation and Operation
"Loading the manual" means you need to wait until the file loads and becomes available for online reading. Some manuals are very large, and the time they take to appear depends on your internet speed.
Summary
Canopy Installation and Operation Manual Home Appliances – March 2012 1 Dear Customer, We thank you for choosing this quality appliance and hope you enjoy many years of reliable service. Please ensure this manual is read carefully before installation and use. Keep this manual in a safe and accessibl...
Canopy Installation and Operation Manual Home Appliances – March 2012 2 3 …………………………………………………. Caution 4 …………………………………………………. Feature 5-8 ……………………………………………….. Installation 9 ………………………………………………….. Notice of installation 10 ……………………………………………..….. Safety Warning 11-16 …………………………………………..… Use 17 …………………...
Canopy Installation and Operation Manual Home Appliances – March 2012 3 SAFETY WARNINGS Installation of this Integrated Canopy Rangehood must be carried by a qualified and competent installer. The manufacturer disclaims and liability for any damage or injury caused as a result of not following i...