Page 2 - CONTENT
Dear Customer, We thank you for choosing this quality appliance and hope you enjoy many years of reliable service. Please ensure this manual is read carefully before installation and use. Keep this manual in a safe and accessible location should future reference be required. Regards Home Appliances ...
Page 3 - NOTICE; manual carefully before use.
Canopy Installation and Operation Manual Home Appliances – Oct 2013 1 NOTICE 1. Thank you for choosing our canopy rangehood. Please read the instruction manual carefully before use. 2. The installation work must be undertaken by a qualified and competent fitter. 3. The manufacturer disclaims all lia...
Page 4 - SAFETY WARNINGS
Canopy Installation and Operation Manual Home Appliances – Oct 2013 2 SAFETY WARNINGS • Installation of this Integrated Canopy Rangehood must be carried by a qualified and competent installer. • The manufacturer disclaims and liability for any damage or injury caused as a result of not following ins...
Page 5 - absorbed in a second.
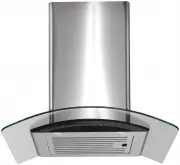
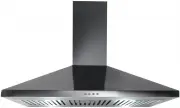
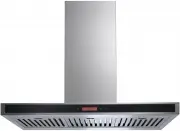
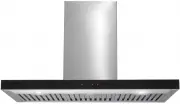
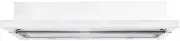
Canopy Installation and Operation Manual Home Appliances – Oct 2013 3 (2)FEATURE 1. The cooker hood uses high quality materials, and is made with a streamlined design. 2. Equipped with a large power low noise electric motor and centrifugal leaf, it produces strong suction, low noise, non stick greas...
Page 6 - If the model without Glass:
Canopy Installation and Operation Manual Home Appliances – Oct 2013 4 (3). Installation If the model without Glass: 3.1 The cooker hood shall be placed at a distance of 65-75cm (26-30inch) from the cooking surface. See Pic 1. 3.2 Install the hook on a suitable place once the installation height is f...
Page 7 - instructions may result in electrical hazards
Canopy Installation and Operation Manual Home Appliances – Oct 2013 5 Warning: Failure to install the screws or fixing device in accordance with these instructions may result in electrical hazards
Page 8 - If the model with Glass:
Canopy Installation and Operation Manual Home Appliances – Oct 2013 6 If the model with Glass: 3.1 The cooker hood shall be placed at a distance of 65-75cm (26-30inch) from the cooking surface. See Pic 1. 3.2 Install the hook on a suitable place once the installation height is fixed, and keep it in ...
Page 10 - remaining bits of broken wood and dust.
Canopy Installation and Operation Manual Home Appliances – Oct 2013 8 (4) NOTICE OF INSTALLATION 1. Before installation, please ensure the area is clean to avoid suction of the remaining bits of broken wood and dust. 2. It cannot share the same air ventilation tube with other appliance such as gas t...
Page 11 - Keep your children from using the cooker hood.
Canopy Installation and Operation Manual Home Appliances – Oct 2013 9 (5) SAFETY WARNING Keep your children from using the cooker hood. Your cooker hood is for domestic use only, not suitable for barbecue, roast shop and other commercial use. Any installation work must be carried out by a qual...
Page 12 - USE; appliance is powered.; will buzz one time.
Canopy Installation and Operation Manual Home Appliances – Oct 2013 10 ( 6 ) USE Electronic Button 1. Turn on the power; the buzzer will buzz five times. The sound shows that the appliance is powered. 2. Push the low button, the indicating light 1 on, the buzzer will buzz once, and the motor runs at...
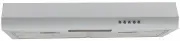
Page 13 - Push button; Push stop button, and the motor will stop.; p i c6 C
Canopy Installation and Operation Manual Home Appliances – Oct 2013 11 Push button 1. Push stop button, and the motor will stop. 2. Push the Low button, the buzzer will buzz once, and the motor runs at low speed. 3. Push the Mid button, the buzzer will buzz once, and the motor runs at mid speed. 4. ...
Page 14 - Touch control; stop and enter standby status in 10 minutes.
Canopy Installation and Operation Manual Home Appliances – Oct 2013 12 Touch control Pic 7 1. Power on: Connect the power, and then the machine enters standby status. 2. Press “light” key. The lights are on. And press it again. The lights are off. 3. Press “Add” key. The motor runs at the low speed....
Page 15 - LCD Touch control
Canopy Installation and Operation Manual Home Appliances – Oct 2013 13 LCD Touch control Pic 8 1. Power on: Switch on the power supply, and the backlight is lit, displaying “24- hour system”. The output is then blocked up,and the soot machine enters standby status. The backlight disappear automatica...
Page 17 - The cleaning of the carbon grease filter mesh
Canopy Installation and Operation Manual Home Appliances – Oct 2013 15 (7) MAINTENANCE 7.1 The cleaning of the carbon grease filter mesh The filter mesh is made of high-density stainless steel. Please do not use the corrosive detergent on it. Keeping this filter clean will keep the appliance running...
Page 18 - globe with a new one.
Canopy Installation and Operation Manual Home Appliances – Oct 2013 16 (8) LIGHT REPLACING 8.1 Halogen light: Use a small flat blade screwdriver to remove the inner stainless steel ring (when removing the inner ring, do so carefully so not to damage the range hood, as the glass lens could easily fal...
Page 19 - Abnormity and Solution; Cause
Canopy Installation and Operation Manual Home Appliances – Oct 2013 17 ( 9 ) Abnormity and Solution Fault Cause Solution Light on, but motor does not work The leaf blocked Get rid of the blocking The capacitor damaged Replace capacitor The motor jammed bearing damaged Replace motor The internal with...