Electrolux EWF7525DQWA - User Manual
Electrolux EWF7525DQWA Washing Machine – User Manual, read for free online in PDF format. We hope this helps you resolve any issues you may have. If you have further questions, please contact us through the contact form.


Table of Contents:
- Page 2 – Visit our website to:; General information and tips; Subject to change without notice.; WE’RE THINKING OF YOU
- Page 3 – CONTENTS
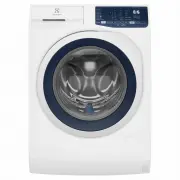
- Page 7 – PRODUCT DESCRIPTION
- Page 8 – Woolmark Apparel Care; Control Panel Description
- Page 9 – Program Description
- Page 11 – NOTE; Quick
- Page 15 – CAUTION; Loading The Laundry; IMPORTANT: Please read
- Page 17 – In case of emergency please
- Page 18 – Alternatively; When The Washing
- Page 19 – Sorting The Laundry
- Page 21 – solvents or chemical products.; INTERNATIONAL WASH CODE SYMBOLS; External Cleaning
- Page 22 – To run a maintenance wash:; Cleaning The Dispenser
- Page 23 – To clean the bottom of softener; Cleaning The Drawer Bottom
- Page 24 – Emergency Drain; Cleaning The Water Inlet
- Page 25 – Possible Failures
- Page 27 – Emergency Door Opening; Make sure that the water level inside
- Page 32 – Electrical Connection
- Page 33 – ENVIRONMENT CONCERNS; Packaging Materials
- Page 34 – WARRANTY
USER MANUAL
WASHING MACHINE
EWF7525DQWA
"Loading the manual" means you need to wait until the file loads and becomes available for online reading. Some manuals are very large, and the time they take to appear depends on your internet speed.
Summary
2 www.electrolux.com Visit our website to: Warning / Caution-Safety information. General information and tips Environmental information. Subject to change without notice. WE’RE THINKING OF YOU CUSTOMER CARE AND SERVICE Thank you for purchasing an Electrolux appliance. You’ve chosen a product that br...
3 CONTENTS 1. SAFETY INFORMATION ........... 4 1.1 Conditions Of Use ..................... 4 1.2 Child Safety ............................... 4 1.3 General Safety .......................... 5 1.4 Installation ................................. 6 1.5 Use ............................................ 6 ...
7 Detergent/Softener Dispenser 2 1 Worktop 2 Control Panel 3 Door 4 Emergency Door Opening 5 Front Feet (Level Adjustment) 6 Water Drain Hose 7 Water Inlet Hose 8 Rear Feet (Fixed) 9 Mains Cable 10 Transit Bolts 11 Transit Bolts, Hose Support 12 3 4 6 9 10 11 7 1 8 All transit bolts (3 pcs) must be ...