Eaton 3S - User Manual
Eaton 3S Uninterruptable Power Supply – User Manual, read for free online in PDF format. We hope this helps you resolve any issues you may have. If you have further questions, please contact us through the contact form.
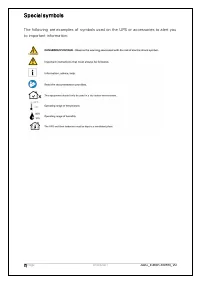
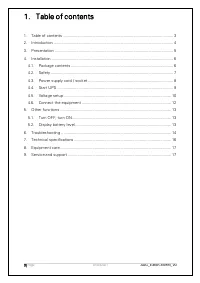
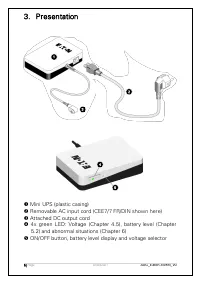
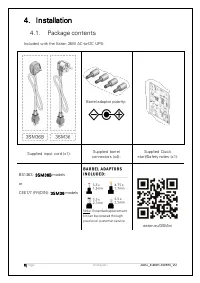
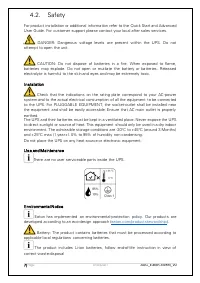
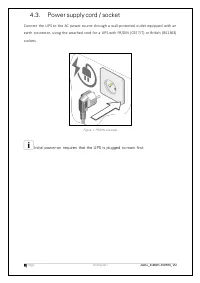
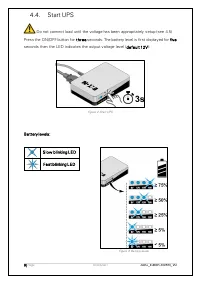
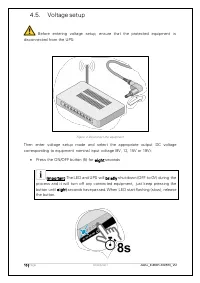
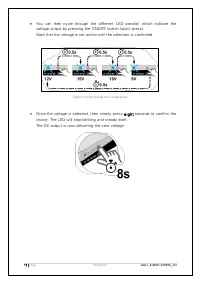
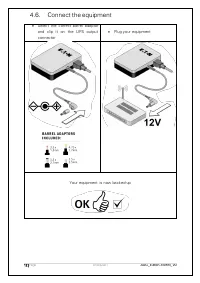
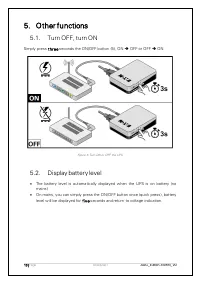
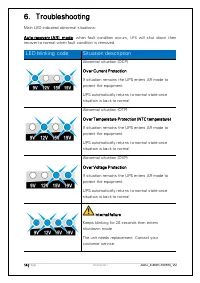
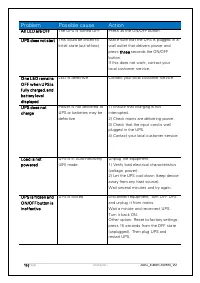
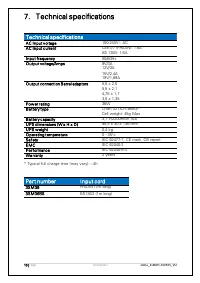
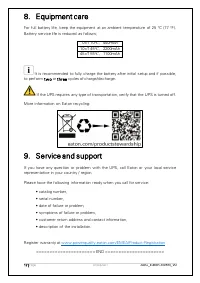
Table of Contents:
- Page 2 – Special symbols
- Page 3 – Table of contents
- Page 4 – Introduction
- Page 5 – Presentation; Attached DC output cord
- Page 6 – Installation; Package contents
- Page 7 – Safety
- Page 8 – Power supply cord / socket
- Page 9 – Start UPS
- Page 10 – Voltage setup
- Page 12 – Connect the equipment
- Page 13 – Other functions; Display battery level
- Page 14 – Troubleshooting; LED blinking code
- Page 15 – Problem
- Page 16 – Technical specifications
- Page 17 – Equipment care; Service and support
1 |
Page
01/03/2021
AUG_Eato n-3SMini_V0
X²
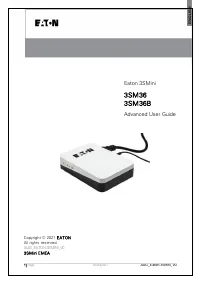
Eaton 3SMini
3SM36
3SM36B
Advanced User Guide
Copyright © 2021 EA TON
All rights reserved.
AUG_EATON-3SMINI_V0
3SMini EMEA
"Loading the manual" means you need to wait until the file loads and becomes available for online reading. Some manuals are very large, and the time they take to appear depends on your internet speed.
Was this manual helpful?
About this manual
- Brand
- Eaton
- Model
- 3S
- Document type
- User Manual
- Category
- Uninterruptable Power Supply
- Language(s)
- English
- Pages
- 17
- File size
- 1.1 MB
- Format
Summary
2 | Page 01/03/2021 AUG_Eato n-3SMini_V0 Special symbols The following are examples of symbols used on the UPS or accessories to alert you to important information:
3 | Page 01/03/2021 AUG_Eato n-3SMini_V0 1. Table of contents 1. Table of contents ...................................................................................................... 3 2. Introduction ...................................................................................................
4 | Page 01/03/2021 AUG_Eato n-3SMini_V0 2. Introduction Thank you for selecting an Eaton product to protect your equipment. The Eaton 3SMini range has been designed with the utmost care. We recommend that you take the time to read this advanced user guide and documentations provided to take full ad...