Page 2 - CONTENTS
Page 2 SAFETY INFORMATION Precautions to Avoid Possible Exposure to Excessive Microwave EnergyA Special Note on ArcingAddendumImportant Safety InstructionsGrounding InstructionsUtensil Guide for the Microwave 333 46 7 SET UP & USE SpecificationsInstallation GuideParts & FeaturesControl Panel...
Page 3 - SAFETY INFORMATION; PRECAUTIONS TO AVOID POSSIBLE EXPOSURE; A SPECIAL NOTE ON ARCING; WARNING; CAUTION
Page 3 SAFETY INFORMATION PRECAUTIONS TO AVOID POSSIBLE EXPOSURE TO EXCESSIVE MICROWAVE ENERGY 1. Do not attempt to operate this oven with the door open since open-door operation can result in harmful exposure to microwave energy. It is important not to defeat or tamper with the safety interlocks. 2...
Page 4 - IMPORTANT SAFETY INSTRUCTIONS
Page 4 SAFETY INFORMATION IMPORTANT SAFETY INSTRUCTIONS 1. Read all instructions before using the appliance.2. Read carefully and follow the specific “PRECAUTIONS TO AVOID POSSIBLE EXPOSURE TO EXCESSIVE MICROWAVE ENERGY” on page 3. 3. This appliance must be grounded. Connect only to properly grounde...
Page 5 - SAVE THESE INSTRUCTIONS; HOUSEHOLD USE ONLY; food. Pot holders may be needed to handle the utensil.
Page 5 FEDERAL COMMUNICATIONS COMMISSIONRADIO FREQUENCY INTERFERENCE STATEMENT SAFETY INFORMATION SAVE THESE INSTRUCTIONS HOUSEHOLD USE ONLY 12. The contents of feeding bottles and baby food jars should be stirred or shaken and the temperature should be checked before serving in order to avoid burns...
Page 6 - GROUNDING INSTRUCTIONS; ELECTRICAL REQUIREMENTS
Page 6 SAFETY INFORMATION GROUNDING INSTRUCTIONS ELECTRICAL REQUIREMENTS POWER SUPPLY CORD The electrical requirements are a 120 volt 60 Hz, AC only, 15 amp. It is recommended that a separate circuit serving only the oven be provided. The oven is equipped with a 3-wire cord having a 3-prong groundin...
Page 7 - CAN USE
Page 7 SAFETY INFORMATION UTENSIL GUIDE FOR THE MICROWAVE CAN USE CAN NOT USE LIMITED USE • Microwave browning dish : For browning the exterior of food such as steaks, chops, or pancakes. Follow the directions provided with your browning dish. • Microwaveable plastic wrap : For retaining steam. Leav...
Page 9 - RADIO OR TV INTERFERENCE
Page 9 SET UP & USE SPECIFICATIONS INSTALLATION GUIDE • Power Consumption: 120V~60Hz, 1500W• MWO Power: 1000W• Operation Frequency: 2450MHz• Outside Dimensions (H x W x D): 12 1/4 x 21 3/4 x 18 13/16 in.• Oven Cavity Dimensions (H x W x D): 9 13/16 x 15 3/4 x 17 in.• Oven Capacity: 1.6 cubic fee...
Page 11 - CONTROL PANEL
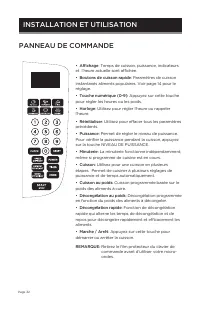
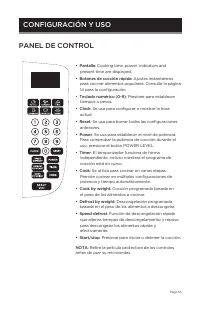
Page 11 SET UP & USE CONTROL PANEL • Display : Cooking time, power, indicators and present time are displayed. • Quick cook buttons : Instant settings to cook popular foods. See page 14 for setting. • Number pad (0-9) : Touch to set times or weights. • Clock : Use to set the time of day or recal...
Page 12 - OPERATION INSTRUCTIONS; SETTING THE CLOCK
Page 12 SET UP & USE OPERATION INSTRUCTIONS ONE SIGNAL: Oven accepts the entry. TWO SIGNALS: Oven does not accept the entry, check and try again. A. One-stage Cooking 1. Use the number pad to set a cooking time. You can set a cooking time from one second to 99 minutes and 99 seconds. 2. If you w...
Page 13 - SPEED DEFROST
Page 13 1. Touch SPEED DEFROST. 2. Enter desired defrosting time by touching correct number pad. 3. Touch START/STOP. NOTE : · The longest defrosting time is 99 minutes and 99 seconds. · After time has elapsed signals sound and END appears in display. Touch any button or open oven door to clear END ...
Page 14 - DEFROST BY WEIGHT; POTATO
Page 14 SET UP & USE 1. Touch DEFROST BY WEIGHT pad. 2. Use the number pad to enter weight. 3. Touch START/STOP pad. NOTE : · Weight must be in pounds and ounces. Ounce weights less than 10 must be preceded by a 0. If label gives weight in pounds only, change the fraction of a pound to ounces us...
Page 15 - POPCORN
Page 15 SET UP & USE 1. Touch POPCORN. POPCORN automatically sets the cooking time for a 3.5 oz. bag of microwave popcorn. 2. Touch START/STOP. NOTE : · To change the preset POPCORN time: Touch POPCORN twice. ENTER TIME is displayed. Touch number pad to enter minutes and seconds. Touch START/STO...
Page 16 - CLEANING AND CARE
Page 16 CLEANING AND CARE 1. When cleaning surfaces of door and oven that comes together on closing the door, use only mild, nonabrasive soaps, or detergents apply with a sponge or soft cloth. 2. Turn off the oven and remove the power plug from the wall socket before cleaning. 3. Keep the inside of ...
Page 17 - IMPORTANT; DO NOT RETURN THIS PRODUCT TO THE STORE
Page 17 TROUBLESHOOTING & WARRANTY BEFORE YOU CALL FOR SERVICE CUSTOMER SERVICE IF THE OVEN FAILS TO OPERATE: A) Check to make sure that the oven is plugged in securely. If it is not, remove the plug from the outlet, wait 10 seconds and plug it in again securely. B) Check for a blown circuit fus...
Page 22 - Manuel D’utilisateur
Page 22 Manuel D’utilisateur Micro-onde MODEL: CHM16110B6C, CHM16110S6C, CHM16110W6C
Page 23 - CONTENU
Page 23 INFORMATION DE SÉCURITÉ PRÉCAUTIONS À PRENDRE POUR ÉVITER UNE POSSIBLE EXPOSITION À UNE ÉNERGIE MICRO-ONDE EXCESSIVE ............................................................................................................................................... 24 Une Remarque Spéciale Sur L’...
Page 24 - UNE REMARQUE SPÉCIALE SUR L’ARCAGE
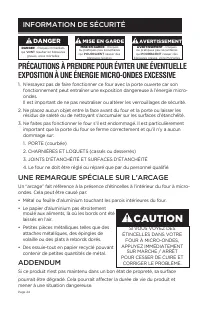
Page 24 PRÉCAUTIONS À PRENDRE POUR ÉVITER UNE ÉVENTUELLE EXPOSITION À UNE ÉNERGIE MICRO-ONDES EXCESSIVE 1. N’essayez pas de faire fonctionner ce four avec la porte ouverte car son fonctionnement peut entraîner une exposition dangereuse à l’énergie micro-ondes. Il est important de ne pas neutraliser ...
Page 25 - CONSIGNES DE SÉCURITÉ IMPORTANTES; doivent être suivies, y compris les suivantes; INFORMATION DE SÉCURITÉ
Page 25 CONSIGNES DE SÉCURITÉ IMPORTANTES 1. Lisez toutes les instructions avant d’utiliser l’appareil.2. Lisez attentivement et suivez les “Précautions particulières à prendre pour éviter toute exposition éventuelle à une énergie micro-ondes excessive” à la page 3. 3. Cet appareil doit être mis à l...
Page 26 - CONSERVEZ CES INSTRUCTIONS; USAGE DOMESTIQUE SEULEMENT
Page 26 COMMISSION FÉDÉRALE DES COMMUNICATIONS DECLARATION D’INTERFERENCE RADIOFREQUENCE AVERTISSEMENT : Cet équipement génère et utilise une fréquence d’énergie ISM et, s’il n’est pas installé et utilisé correctement, conformément aux instructions du fabricant, peut provoquer des interférences avec...
Page 27 - INSTRUCTIONS DE MISE À LA TERRE; EXIGENCES ÉLECTRIQUES
Page 27 INSTRUCTIONS DE MISE À LA TERRE EXIGENCES ÉLECTRIQUES Les exigences électriques sont 120 volts, 60 Hz, courant alternatif seulement, 15 ampères. Il est recommandé de prévoir un circuit séparé servant uniquement le four. Le four est équipé d’un cordon à 3 fils doté d’une fiche de mise à la te...
Page 28 - GUIDE D’UTENSILE POUR LE FOUR À MICRO-ONDES; PEUT UTILISER
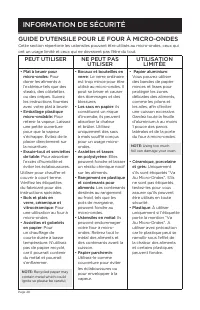
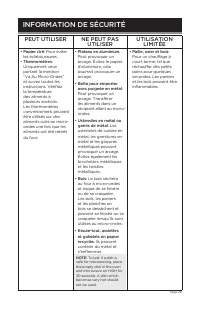
Page 28 GUIDE D’UTENSILE POUR LE FOUR À MICRO-ONDES Cette section répertorie les ustensiles pouvant être utilisés au micro-ondes, ceux qui ont un usage limité et ceux qui ne devraient pas l’être du tout. PEUT UTILISER NE PEUT PAS UTILISER UTILISATION LIMITÉE • Plat à brunir pour micro-ondes : Pour d...
Page 30 - INTERFÉRENCE RADIO OU TV
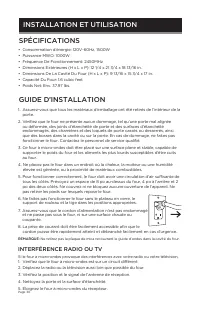
Page 30 INSTALLATION ET UTILISATION SPÉCIFICATIONS GUIDE D’INSTALLATION • Consommation d’énergie: 120V~60Hz, 1500W• Puissance MWO: 1000W• Fréquence De Fonctionnement: 2450MHz• Dimensions Extérieures (H x L x P): 12 1/4 x 21 3/4 x 18 13/16 in.• Dimensions De La Cavité Du Four (H x L x P): 9 13/16 x 1...
Page 33 - RÉGLER L’HORLOGE
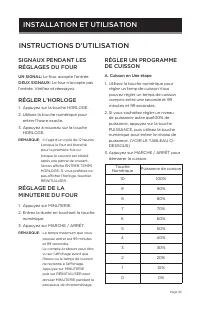
Page 33 INSTALLATION ET UTILISATION INSTRUCTIONS D’UTILISATION UN SIGNAL: Le four accepte l’entrée. DEUX SIGNAUX: Le four n’accepte pas l’entrée. Vérifiez et réessayez. A. Cuisson en Une étape 1. Utilisez la touche numérique pour régler un temp de cuisson.Vous pouvez régler un temps de cuisson compr...
Page 34 - DÉGIVRAGE RAPIDE; INSTALLATION ET UTILISATION
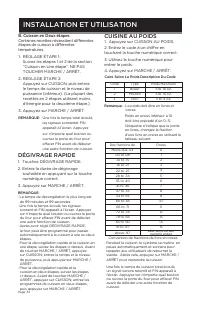
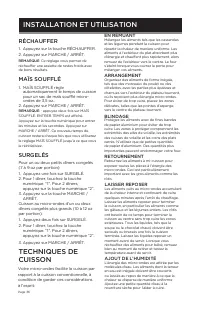
Page 34 1. Touchez DÉGIVRAGE RAPIDE. 2. Entrez la durée de dégivrage souhaitée en appuyant sur la touche numérique correct. 3. Appuyez sur MARCHE / ARRÊT. REMARQUE : · Le temps de décongélation le plus long est de 99 minutes et 99 secondes. · Une fois le temps écoulé, les signaux sonnent et FIN appa...
Page 35 - DÉCONGELER AU POIDS; POMME DE TERRE
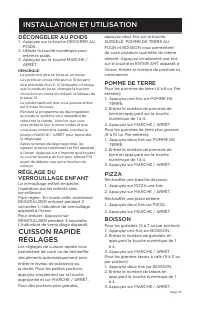
Page 35 INSTALLATION ET UTILISATION 1. Appuyez sur la touche DÉGIVRER AU POIDS. 2. Utilisez la touche numérique pour entrer le poids. 3. Appuyez sur la touche MARCHE / ARRÊT. REMARQUE : · Le poids doit être en livres et en onces. Les poids en onces inférieurs à 10 doivent être précédés d’un 0. Si l’...
Page 36 - MAÏS SOUFFLÉ
Page 36 INSTALLATION ET UTILISATION 1. MAÏS SOUFFLÉ règle automatiquement le temps de cuisson pour un sac de maïs soufflé micro-ondes de 3,5 oz.. 2. Appuyez sur MARCHE / ARRÊT. REMARQUE : · appuyez deux fois sur MAÏS SOUFFLÉ. ENTRER TEMPS est affiché. Appuyez sur la touche numérique pour entrer les ...
Page 37 - NETTOYAGE ET ENTRETIEN
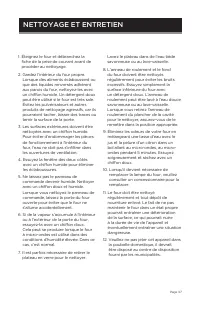
Page 37 NETTOYAGE ET ENTRETIEN 1. Éteignez le four et débranchez la fiche de la prise de courant avant de procéder au nettoyage. 2. Gardez l’intérieur du four propre. Lorsque des aliments éclaboussent ou que des liquides renversés adhèrent aux parois du four, nettoyez-les avec un chiffon humide. Un ...
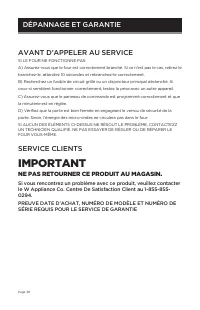
Page 38 - SERVICE CLIENTS; NE PAS RETOURNER CE PRODUIT AU MAGASIN.
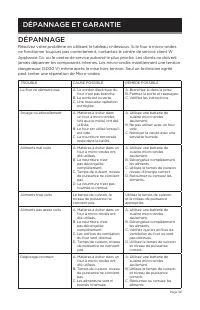
Page 38 DÉPANNAGE ET GARANTIE AVANT D’APPELER AU SERVICE SI LE FOUR NE FONCTIONNE PAS: A) Assurez-vous que le four est correctement branché. Si ce n’est pas le cas, retirez le branchez-le, attendez 10 secondes et rebranchez-le correctement. B) Recherchez un fusible de circuit grillé ou un disjoncteu...
Page 44 - REGISTRO DEL PRODUCTO; INFORMACIÓN DE SEGURIDAD; CONTENIDO
Page 44 Gracias por comprar nuestro producto Commercial Chef. Este manual fácil de usar le guiará para obtener el mejor resultado de uso de su unidad. Recuerde anotar los números de modelo y de serie. Están en una etiqueta en la parte posterior del producto. _____________________________ Número de m...
Page 45 - APÉNDICE; ADVERTENCIA; PRECAUCIÓN
Page 45 PRECAUCIONES PARA EVITAR LA POSIBLE EXPOSICIÓN EXCESIVA A LA ENERGÍA DE MICROONDAS 1. No intente usar este microondas con la puerta abierta ya que esto puede provocar una exposición peligrosa a la energía de microondas. Es importante no tratar de forzar los cierres de seguridad. 2. No coloqu...
Page 46 - INSTRUCCIONES DE SEGURIDAD IMPORTANTES
Page 46 INSTRUCCIONES DE SEGURIDAD IMPORTANTES 1. Lea todas las instrucciones antes de usar este electrodoméstico. 2. Lea y siga específicamente las “Precauciones para evitar la posible exposición excesiva a la energía de microondas” en la página 3. 3. Este electrodoméstico debe estar conectado a ti...
Page 47 - CONSERVE ESTAS INSTRUCCIONES; SOLO PARA USO DOMÉSTICO
Page 47 COMISIÓN FEDERAL DE COMUNICACIONES (FCC) DECLARACIÓN DE INTERFERENCIA DE RADIOFRECUENCIA ADVERTENCIA : Este equipo genera y utiliza energía por radiofrecuencia en las bandas ISM y de no ser instalado y utilizado adecuadamente, estrictamente de acuerdo con las instrucciones del fabricante, pu...
Page 48 - REQUISITOS ELÉCTRICOS
Page 48 INSTRUCCIONES DE CONEXIÓN A TIERRA REQUISITOS ELÉCTRICOS 120 Volt a 60 Hz, solamente CA (corriente alterna), 15 A. Se recomienda un circuito eléctrico independiente solo para el horno. El horno está equipado con un cable de 3 hilos con un enchufe de 3 clavijas con tierra. Debe conectarse a u...
Page 49 - GUÍA DE UTENSILIOS PARA EL MICROONDAS; PUEDE USAR
Page 49 GUÍA DE UTENSILIOS PARA EL MICROONDAS Esta sección enumera qué utensilios se pueden usar en el microondas, cuáles tienen un uso limitado y cuáles no se deben usar en absoluto en el microondas. PUEDE USAR NO USAR USO LIMITADO • Plato para dorar al microondas : Para dorar el exterior de los al...
Page 51 - INTERFERENCIA DE RADIO O TV
Page 51 CONFIGURACIÓN Y USO ESPECIFICACIONES • Consumo energético: 120V~60Hz, 1500W• Potencia MWO: 1000W• Frecuencia de funcionamiento: 2450MHz• Dimensiones exteriores (Al x An x P): 12 1/4 x 21 3/4 x 18 13/16 in.• Dimensiones de la cavidad del horno (Al x An x P): 9 13/16 x 15 3/4 x 17 in.• Capacid...
Page 55 - COCCIÓN POR PESO; CONFIGURACIÓN Y USO
Page 55 1. Presione SPEED DEFROST.2. Ingrese el tiempo de descongelamiento usando el teclado numérico. 3. Presione START/STOP. NOTA : · El tiempo de descongelación más largo es de 99 minutos y 99 segundos. · Una vez transcurrido el tiempo, sonarán alertas y END aparecerá en la pantalla. Presione cua...
Page 56 - DESCONGELAR POR PESO
Page 56 CONFIGURACIÓN Y USO 1. Presione el botón DEFROST BY WEIGHT. 2. Use el teclado numérico para ingresar el peso. 3. Presione START/STOP. NOTA : · El peso debe estar en libras y onzas. Los pesos inferiores a 10 onzas deben ser precedidos por un 0. Si la etiqueta da el peso solo en libras, cambie...
Page 57 - PALOMITAS DE MAÍZ
Page 57 CONFIGURACIÓN Y USO 1. POPCORN establece automáticamente el tiempo de cocción para una bolsa de palomitas para microondas de 3,5 oz. 2. Presione START/STOP. NOTA : · Para cambiar el tiempo de la función POPCORN presione POPCORN dos veces. Se mostrará ENTER TIME. Use el teclado numérico para ...
Page 58 - LIMPIEZA Y MANTENIMIENTO
Page 58 LIMPIEZA Y MANTENIMIENTO 1. Apague el horno y desenchúfelo antes de limpiarlo. 2. Mantenga limpio el interior del horno. Cuando las salpicaduras de alimentos o los líquidos derramados se adhieran a las paredes del horno, límpielo con un paño húmedo. Se puede usar un detergente suave si el ho...
Page 59 - SERVICIO AL CLIENTE; IMPORTANTE; NO DEVUELVA ESTE PRODUCTO A LA TIENDA
Page 59 SOLUCIÓN DE PROBLEMAS Y GARANTÍA ANTES DE LLAMAR AL SERVICIO TÉCNICO SI EL HORNO NO FUNCIONA: A) Verifique para asegurarse que el electrodoméstico esté enchufado de forma segura. Si no lo está, retire el enchufe de la toma de corriente, espere 10 segundos y conéctelo nuevamente de forma segu...