Page 3 - CONTENTS; SAFETY INFORMATION
Page 3 CONTENTS 1. READ these instructions carefully before installing and operating the appliance. Keep them for further reference. 2. Record in the space below the “SERIAL/MODEL NUMBER” found on the back or bottom of your appliance and retain this information for future reference. SERIAL NUMBER: M...
Page 4 - A SPECIAL NOTE ON ARCING; WARNING; CAUTION
Page 4 PRECAUTIONS TO AVOID POSSIBLE EXPOSURE TO EXCESSIVE MICROWAVE ENERGY 1. Do not attempt to operate this oven with the door open since open-door operation can result in harmful exposure to microwave energy. It is important not to defeat or tamper with the safety interlocks. 2. Do not place any ...
Page 5 - IMPORTANT SAFETY INSTRUCTIONS
Page 5 IMPORTANT SAFETY INSTRUCTIONS 1. Read all instructions before using the appliance. 2. Read carefully and follow the specific “Precautions to avoid possible exposure to excessive microwave energy” on page 3. 3. This appliance must be grounded. Connect only to properly grounded outlet. See “GRO...
Page 6 - SAVE THESE INSTRUCTIONS; HOUSEHOLD USE ONLY
Page 6 FEDERAL COMMUNICATIONS COMMISSION RADIO FREQUENCY INTERFERENCE STATEMENT WARNING : This equipment generates and uses ISM frequency energy and if not installed and used properly, that is in strict accordance with the manufacturer’s instructions, may cause interference to radio and television r...
Page 7 - GROUNDING INSTRUCTIONS; ELECTRICAL REQUIREMENTS
Page 7 GROUNDING INSTRUCTIONS ELECTRICAL REQUIREMENTS The electrical requirements are a 120 volt 60 Hz, AC only, 15 amp. It is recommended that a separate circuit serving only the oven be provided. The oven is equipped with a 3-wire cord having a 3-prong grounding plug. It must be plugged into a wal...
Page 8 - UTENSIL GUIDE FOR THE MICROWAVE; CAN USE
Page 8 UTENSIL GUIDE FOR THE MICROWAVE This section lists which utensils can be used in the microwave, which have limited use, and which should not be used in the microwave at all. CAN USE CAN NOT USE LIMITED USE • Microwave browning dish : For browning the exterior of food such as steaks, chops, or...
Page 10 - RADIO OR TV INTERFERENCE
Page 10 SPECIFICATIONS • Power Consumption: 120V~60Hz, 1350W• MWO Power: 900W• Operation Frequency: 2450MHz• Outside Dimensions (H x W x D): 11 1/16” x 19” x 14 3/4”• Oven Cavity Dimensions (H x W x D): 8 11/16” x 13 3/8” x 12 5/8”• Oven Capacity: 0.9 cubic feet • Cooking Uniformity: Turntable Syste...
Page 12 - CONTROL PANEL
Page 12 CONTROL PANEL • Menu action screen : Cooking time, power, indicators and present time are displayed. • Quick cook buttons : Instant settings to cook popular foods. See page 14 for setting. • Number pads (0-9) : Touch to set times or amount. • Power level : Use to set power levels other than ...
Page 13 - OPERATION INSTRUCTIONS; SETTING THE CLOCK; SETTING THE OVEN TIMER
Page 13 SET UP & USE OPERATION INSTRUCTIONS SIGNALS DURING OVEN SETTINGS ONE SIGNAL: Oven accepts the entry. TWO SIGNALS: Oven does not accept the entry, check and try again. SETTING THE CLOCK 1. Touch CLOCK pad. 2. Use the number pads to enter the correct time. 3. Touch CLOCK pad again. NOTE : ...
Page 14 - SPEED DEFROST; COOK BY WEIGHT
Page 14 B. Two-stage Cooking Some recipes require different stages of cooking at different temperatures. 1. SET STAGE 1: Follow steps 1 and 2 in “One-stage Cooking”. DO NOT TOUCH START/+30 SEC. 2. SET STAGE 2: Touch COOK then enter proper cooking time and (lower) power level. (Most 2-stage recipes u...
Page 15 - DEFROST BY WEIGHT; SETTING CHILD LOCK; QUICK COOK SETTINGS; POPCORN; BAKED POTATO
Page 15 SET UP & USE DEFROST BY WEIGHT 1. Touch DEFROST BY WEIGHT pad. 2. Enter weight. 3. Touch START/+30 SEC. pad. NOTE : · Weight must be in pounds and ounces. Ounce weights less than 10 must be preceded by a 0. If label gives weight in pounds only, change the fraction of a pound to ounces us...
Page 16 - BEVERAGE; PIZZA; REHEAT; COOKING TECHNIQUES
Page 16 SET UP & USE Microwaving one or two larger (10-12 oz. per share) frozen dinners: 1. Touch FROZEN twice. 2. For 1 entree, touch the number pad “1”. For 2 entrees, touch the number pad “2”. 3. Touch START/+30 SEC. BEVERAGE For 5 to 7 oz. cups: 1. Touch BEVERAGE once. 2. Enter number of cup...
Page 17 - CLEANING AND CARE
Page 17 1. When cleaning surfaces of door and oven that comes together on closing the door, use only mild, nonabrasive soaps, or detergents apply with a sponge or soft cloth. 2. Turn off the oven and remove the power plug from the wall socket before cleaning. 3. Keep the inside of the oven clean. Wh...
Page 18 - BEFORE YOU CALL FOR SERVICE; CUSTOMER SERVICE; IMPORTANT; DO NOT RETURN THIS PRODUCT TO THE STORE; TROUBLESHOOTING & WARRANTY
Page 18 BEFORE YOU CALL FOR SERVICE IF THE OVEN FAILS TO OPERATE: A) Check to make sure that the oven is plugged in securely. If it is not, remove the plug from the outlet, wait 10 seconds and plug it in again securely. B) Check for a blown circuit fuse or a tripped main circuit breaker. If these se...
Page 21 - CONTENU; INFORMATIONS DE SÉCURITÉ
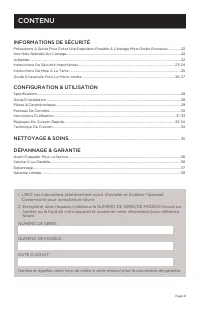
Page 21 CONTENU 1. LISEZ ces instructions attentivement avant d’installer et d’utiliser l’appareil. Conservez-le pour consultation future. 2. Enregistrer dans l’espace ci-dessous le NUMÉRO DE SÉRIE/DE MODÈLE trouvé sur l’arrière ou le fond de votre appareil et conserver cette information pour référe...
Page 22 - ATTENTION; ATTENTION
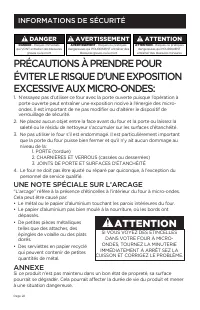
Page 22 PRÉCAUTIONS À PRENDRE POUR ÉVITER LE RISQUE D’UNE EXPOSITION EXCESSIVE AUX MICRO-ONDES: 1. N’essayez pas d’utiliser ce four avec la porte ouverte puisque l’opération à porte ouverte peut entraîner une exposition nocive à l’énergie des micro-ondes. Il est important de ne pas modifier ou d’alt...
Page 23 - INSTRUCTIONS IMPORTANTES DE SÉCURITÉ
Page 23 INSTRUCTIONS IMPORTANTES DE SÉCURITÉ 1. Lisez toutes les instructions avant d’utiliser l’appareil. 2. Lisez attentivement et suivez les “Précautions à suivre pour éviter une exposition possible à l’énergie mico-ondes excessive” spécifiques à la page 3. 3. Cet appareil doit être mis à la terr...
Page 24 - CONSERVEZ CES INSTRUCTIONS; USAGE DOMESTIQUE SEULEMENT
Page 24 Page 5 11. Les aliments aux peaux épaisses telles que les pommes de terre, la courge entière, les pommes et les châtaignes doivent être percés avec une fourchette ou la pointe d’un couteau pointu avant de cuire. 12. Le contenu des biberons et petits pots d’aliments pour bébés doit être agité...
Page 25 - INSTRUCTIONS DE MISE À LA TERRE; EXIGENCES ÉLECTRIQUES
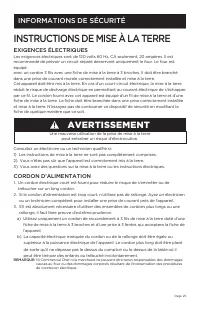
Page 25 INSTRUCTIONS DE MISE À LA TERRE EXIGENCES ÉLECTRIQUES Les exigences électriques sont de 120 volts 60 Hz, CA seulement, 20 ampères. Il est recommandé de prévoir un circuit séparé desservant uniquement le four. Le four est équipéavec un cordon 3 fils avec une fiche de mise à la terre à 3 broch...
Page 26 - PEUT UTILISER
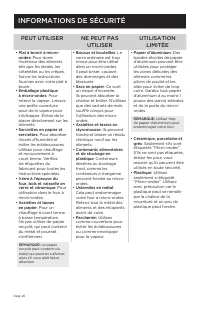
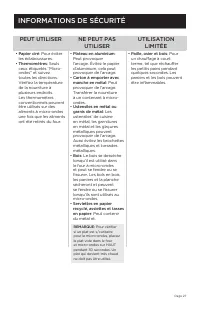
Page 26 INFORMATIONS DE SÉCURITÉ PEUT UTILISER NE PEUT PAS UTILISER UTILISATION LIMITÉE • Plat à brunir à micro-ondes: Pour dorer l’extérieur des aliments tels que les steaks, les côtelettes ou les crêpes. Suivre les instructions fournies avec votre plat à brunir. • Emballage plastique à micro-ondes...
Page 28 - BROUILLAGE RADIO OU TÉLÉVISION; CONFIGURATION & UTILISATION
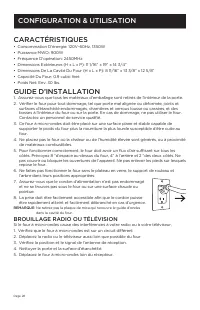
Page 28 CARACTÉRISTIQUES • Consommation D’énergie: 120V~60Hz, 1350W• Puissance MWO: 900W• Fréquence D’opération: 2450MHz• Dimensions Extérieures (H x L x P): 11 1/16” x 19” x 14 3/4”• Dimensions De La Cavité Du Four (H x L x P): 8 11/16” x 13 3/8” x 12 5/8”• Capacité Du Four: 0.9 cubic feet • Poids ...
Page 29 - PIÈCES & CARACTÉRISTIQUES
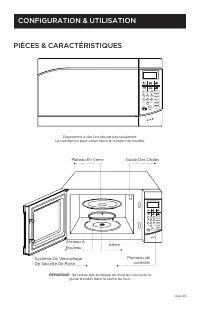
Page 29 POPCORN POTATO PIZZA BEVERAGE FROZEN FOOD REHEAT 1 2 3 4 5 6 7 8 0 9 POWER LEVEL COOK TIMER COOK BY WEIGHT DEFROST BY WEIGHT SPEED DEFROST CLOCK RESET START PAUSE CANCEL + 30SEC. PIÈCES & CARACTÉRISTIQUES Diagramme à des fins éducatives seulement. La conception peut varier selon le numér...
Page 30 - PANNEAU DE COMMANDE
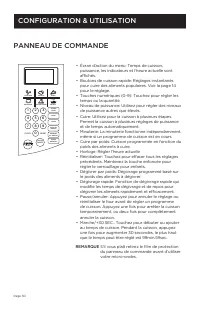
Page 30 PANNEAU DE COMMANDE • Écran d’action du menu: Temps de cuisson, puissance, les indicateurs et l’heure actuelle sont affichés. • Boutons de cuisson rapide: Réglages instantanés pour cuire des aliments populaires. Voir la page 14 pour le réglage. • Touches numériques (0-9): Touchez pour régler...
Page 31 - INSTRUCTIONS D’UTILISATION; RÉGLAGE DE L’HORLOGE
Page 31 INSTRUCTIONS D’UTILISATION SIGNAUX DURANT LES RÉGLAGES DU FOUR UN SIGNAL: Le four accepte l’entrée. DEUX SIGNAUX: Le four n’accepte pas l’entrée, vérifiez et réessayez. RÉGLAGE DE L’HORLOGE 1. Appuyez sur la touche HORLOGE. 2. Utilisez les touches numériques pour entrer l’heure correcte. 3. ...
Page 32 - DÉGIVRAGE RAPIDE
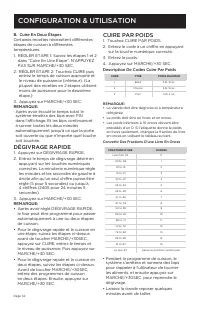
Page 32 B. Cuire En Deux Étapes Certaines recettes nécessitent différentes étapes de cuisson à différentes températures.1. RÉGLER ÉTAPE 1: Suivez les étapes 1 et 2 dans “Cuire En Une Étape”. N’APPUYEZ PAS SUR MARCHE/+30 SEC. 2. RÉGLER ÉTAPE 2: Touchez CUIRE puis entrez le temps de cuisson approprié ...
Page 33 - RÉGLAGES DE CUISSON RAPIDE; MAÏS SOUFFLÉ; POMME DE TERRE
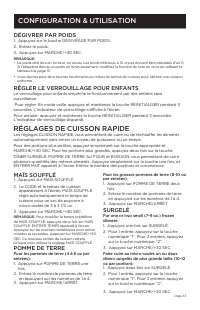
Page 33 DÉGIVRER PAR POIDS 1. Appuyez sur la touche DÉGIVRAGE PAR POIDS.2. Entrez le poids.3. Appuyez sur MARCHE/+30 SEC. REMARQUE: • Le poids doit être en livres et en onces. Les poids inférieurs à 10 onces doivent être précédés d’un 0. Si l’étiquette donne un poids en livres seulement, modifiez la...
Page 34 - BOISSON; RÉCHAUFFER; TECHNIQUES DE CUISSON
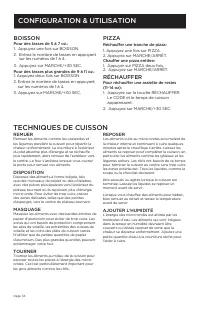
Page 34 BOISSON Pour des tasses de 5 à 7 oz.: 1. Appuyez une fois sur BOISSON.2. Entrez le nombre de tasses en appuyant sur les numéros de 1 à 4. 3. Appuyez sur MARCHE/+30 SEC. Pour des tasses plus grandes de 9 à 11 oz.: 1. Appuyez deux fois sur BOISSON.2. Entrez le nombre de tasses en appuyant sur ...
Page 36 - AVANT D’APPELER POUR LE SERVICE; SERVICE À LA CLIENTÈLE; NE PAS RETOURNER CE PRODUIT AU MAGASIN; DÉPANNAGE ET GARANTIE
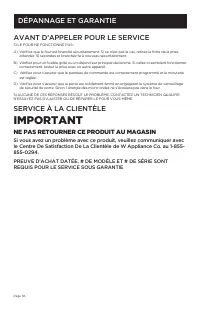
Page 36 AVANT D’APPELER POUR LE SERVICE SI LE FOUR NE FONCTIONNE PAS:: A) Vérifiez que le four est branché sécuritairement. Si ce n’est pas le cas, retirez la fiche de la prise, attendez 10 secondes et branchez-le à nouveau sécuritairement. B) Vérifiez pour un fusible grillé ou un disjoncteur princi...
Page 38 - GARANTIE LIMITÉE
Page 38 GARANTIE LIMITÉE La marque Commercial Chef est utilisée sous licence. Toute réparation, remplacement ou réparation sous garantie, et toutes les questions sur ce produit doivent être adressées à W Appliance Co. à 1 (855) 855-0294 depuis les États-Unis ou de Porto Rico. W Appliance Co. garanti...