Page 2 - Important Usage Instructions; DISCONNECT THE MAINS PLUG FROM THE SUPPLY SOCKET WHEN NOT IN USE.
2 Introduction Important Usage Instructions WARNING! TO REDUCE THE RISK OF ELECTRIC SHOCK, DO NOT REMOVE COVER (OR BACK). NO USER SERVICEABLE PARTS INSIDE. REFER SERVICING TO QUALIFIED SERVICE PERSONNEL. WARNING! TO REDUCE THE RISK OF FIRE OR ELECTRIC SHOCK, DO NOT EXPOSE THIS PRODUCT TO RAIN OR MOI...
Page 3 - In; Enjoying High-Definition Video; How to play back your HDV recordings?; HDV recordings will be played back in their original high quality.; What is the Cinema Mode?; Give your recordings a cinematic look by using the [
3 In troduction Enjoying High-Definition Video Preserve your most treasured memories, be it unforgettable scenery or cherished moments spent with family and friends, with high-definition video recordings of a quality second only to actually being there. What is High-Definition Video? High-definition...
Page 4 - Table of contents
4 Introduction Enjoying High-Definition Video ....................................................................... 3About this Manual ........................................................................................... 7 Getting to Know the Camcorder Supplied Accessories......................
Page 5 - Editing Functions
5 In troduction Adjusting the Picture: Exposure, Focus and Color Manual Exposure Adjustment and Automatic Backlight Correction ..............47Manual Focus Adjustment .............................................................................48Magnifying the Image on the Screen ......................
Page 6 - Trademark Acknowledgements; registered trademarks of HDMI Licensing LLC.
6 Do’s and Don’ts Handling Precautions .................................................................................... 91Maintenance/Others...................................................................................... 94Cleaning the Video Heads .............................................
Page 7 - Troubleshooting; Conventions Used in the Manual; IMPORTANT: Precautions related to the camcorder operation.; About this Manual
7 In troduction Thank you for purchasing the Canon LEGRIA HV40. Please read this manual carefully before you use the camcorder and retain it for future reference. Should your camcorder fail to operate correctly, refer to the Troubleshooting table ( 84). Conventions Used in the Manual IMPORTANT: Prec...
Page 8 - Operating Mode
8 About the Joystick and the Joystick Guide The mini joystick allows you to control many of the camcorder’s operations and to make selections and changes in the camcorder’s menus. The functions assigned to the joystick change according to the operation mode and the camcorder’s settings. Press ( ) to...
Page 9 - * Includes the electronic version of the; Supplied Accessories
Getting to Know the Camcorder 9 In troduction Getting to Know the Camcorder * Includes the electronic version of the Digital Video Software instruction manual on PDF file. Supplied Accessories CA-570 Compact Power Adapter (incl. power cord) BP-2L13 Battery Pack WL-D87 Wireless Controller Lithium But...
Page 10 - Components Guide; Left side view; CARD access indicator (
Getting to Know the Camcorder 10 Names of buttons and switches other than the joystick are indicated within a “ button ” frame (for example ). Components Guide Left side view Front view Right side view FOCUS lever ( 48) CUSTOM key ( 56) FOCUS button ( 48) SpeakerDISP. (display) button ( 56)/ LCD bac...
Page 11 - Back view; Serial number
11 Getting to Know the Camcorder In troduction Names of buttons and switches other than the joystick are indicated within a “ button ” frame (for example ). Back view Top view Bottom view LCD screen ( 20) Dioptric adjustment lever ( 19) Viewfinder ( 19) Terminal coverSTART/STOP button ( 24) switch (...
Page 12 - Wireless Controller WL-D87
Getting to Know the Camcorder 12 Wireless Controller WL-D87 WIRELESS CONTROLLER WL-D87 START/ STOP PHOTO ZOOM CARD DATE SEARCH REW PLAY FF STOP PAUSE SLOW DISP. TV SCREEN ZERO SET MEMORY START/STOP button ( 24) CARD –/+ buttons ( 31) DATE SEARCH / buttons ( 30) REW button ( 27) –/ button ( 27) PAUSE...
Page 13 - Screen Displays; Recording Movies
13 Getting to Know the Camcorder In troduction Screen Displays Recording Movies Magnification ( 42, 48) Self timer ( 59) Recording reminderInstant AF ( 35)/Manual focus ( 48) Recording standard (HDV or DV) ( 36) DV recording mode ( 37) Tape operationTime code (hours : minutes : seconds)Remaining tap...
Page 15 - Playing Movies; Quality/size for capturing still images (; Viewing Still Images; Image protection mark (
Getting to Know the Camcorder 15 In troduction Playing Movies Tape operationTime code (hours : minutes : seconds : frames)Remaining tapeData code ( 57) Search function displayEND SEARCH ( 30)/ DATE SEARCH ( 30) Quality/size for capturing still images ( 53) Audio level indicator ( 60) Viewing Still I...
Page 16 - Charging the Battery Pack; Slide; You may hear some noise from the compact; Getting Started; BATTERY RELEASE
Getting Started 16 PreparationsGetting Started Charging the Battery Pack The camcorder can be powered with a battery pack or directly using the compact power adapter. Charge the battery pack before use. 1 Connect the power cord to the compact power adapter. 2 Plug the power cord into a power outlet....
Page 17 - Prep; To prevent equipment breakdowns and; NOTES; The CHARGE indicator also serves as a; Charging, Recording and Playback Times; Battery Pack
Getting Started Prep arati o ns 17 To prevent equipment breakdowns and excessive heating, do not connect the supplied compact power adapter to voltage converters for overseas travels or special power sources such as those on aircraft and ships, DC-AC inverters, etc. NOTES The CHARGE indicator also s...
Page 18 - Inserting and Removing a Tape; Use only videocassettes marked with the; Do not interfere with the cassette; switch is set to; Inserting and Removing a Memory Card; REMOVE
Getting Started 18 Inserting and Removing a Tape Use only videocassettes marked with the logo. To record in HDV standard we recommend using tapes specifically designed for high definition. 1 Slide fully in the direction of the arrow and open the cassette compartment cover. The cassette compartment o...
Page 19 - Make sure to initialize all memory cards; Preparing the Camcorder; Turn on the camcorder.; The lens cover will open automatically.; Adjust the viewfinder.; The Wireless Controller; Inserting the Battery; The wireless controller may not work properly
Getting Started Prep arati o ns 19 IMPORTANT Make sure to initialize all memory cards before using them with this camcorder for the first time ( 65). Memory cards have front and back sides that are not interchangeable. Inserting a memory card facing the wrong direction can cause a malfunction of the...
Page 20 - Adjusting the LCD Screen; Rotating the LCD Panel; This setting does not affect the brightness of
Getting Started 20 Adjusting the LCD Screen Rotating the LCD Panel Open the LCD panel 90 degrees. You can rotate the panel 90 degrees downward. You can rotate the panel 180 degrees toward the lens (allowing the subject to monitor the LCD screen while you use the viewfinder). Rotating the panel 180 d...
Page 21 - Menu; Selecting an Option from the FUNC.; Using the Menus
Using the Menus Prep arati o ns 21 Using the Menus Many of the camcorder’s functions can be adjusted from the menus that open after pressing the FUNC. button ( ). For details about the available menu options and settings, refer to Menu Options Lists ( 33). Selecting an Option from the FUNC. Menu 1 P...
Page 22 - Changing the Language; Options; Time Zones; First Time Settings; LANGUAGE
First Time Settings 22 First Time Settings Changing the Language Options Default value 1 Press . 2 Select ( ) the icon and press ( ) to open the setup menus. 3 Select ( ) [DISPLAY SETUP/ ] and press ( ). 4 Select ( ) [LANGUAGE] and press ( ). 5 Select ( , ) the desired option and press ( ). 6 Pres...
Page 23 - icon and press
First Time Settings Prep arati o ns 23 Setting the Date and Time 1 Press . 2 Select ( ) the icon and press ( ) to open the setup menus. 3 Select ( ) [DATE/TIME SETUP] and press ( ). 4 Select ( ) [DATE/TIME] and press ( ). The first field of the date will be indicated with blinking up/down arrows. 5 ...
Page 24 - Press; Recording; Before You Begin Recording
Recording 24 Basic FunctionsRecording Recording Movies 1 Holding the lock button pressed down, set the switch to CAMERA. 2 Move the / switch to (tape). If necessary, you can change the recording standard (HDV or DV) ( 36). 3 Press to begin recording. Press again to pause the recording. T O REVIEW TH...
Page 25 - asic Fu; About the Power Save mode; Recording Still Images; switch to; on the; PHOTO
Recording B asic Fu ncti ons 25 become distorted or it may not be recorded at the actual levels. This is not a malfunction. About the Power Save mode : To save power when the camcorder is powered by a battery pack, the camcorder will automatically shut off if left without any operations for 5 minute...
Page 26 - Zooming; POINTS TO CHECK; 0x Optical Zoom
Recording 26 IMPORTANT Observe the following precautions while the card access display ( ) appears on screen and when the CARD access indicator is on or flashing. Failing to do so may result in permanent data loss.- Do not open the memory card slot cover and do not remove the memory card.- Do not di...
Page 27 - Playing Back Movies; URING; You can display the date and time of the; Playback; Special Playback Modes
Playback B asic Fu ncti ons 27 Playback Playing Back Movies Play back the tape on the LCD display or close the LCD panel to use the viewfinder. 1 Holding the lock button pressed down, set the switch to PLAY. 2 Move the / switch to (tape). 3 Locate the point where you want to begin the playback. Pres...
Page 28 - During the playback of HDV recordings:; Adjusting the Volume: Speaker and; Adjusting the Volume of the Speaker; icon changes to; Using Headphones; terminal, which is used for both the
Playback 28 During the playback of HDV recordings: Even though their icons will appear on screen, the following special playback modes are not available.- Reverse slow playback- Frame reverse- Double speed playback (forward or reverse) To protect the tape and video heads, the camcorder will enter th...
Page 29 - Returning to a Pre-marked Position; the
Playback B asic Fu ncti ons 29 6 Press . appears. Note that if the joystick guide appears on the screen, it will conceal the icon. Press ( ) to hide the joystick guide. * In mode, select [ PLAY/ OUT SETUP] instead. T O ADJUST THE VOLUME OF THE HEADPHONES In mode, adjust the volume of the headphones ...
Page 30 - Locating the End of the Last Scene; Locating Scenes by Recording Date
Playback 30 Locating the End of the Last Scene After playing back a tape, use this function to locate the end of the last scene recorded in order to continue recording from that point. POINTS TO CHECK Stop the playback before using this function. 1 Press . 2 Select ( ) [ END SEARCH] and press ( ). 3...
Page 31 - Observe the following precautions while the; Image Jump; RUN
Playback B asic Fu ncti ons 31 Viewing Still Images 1 Holding the lock button pressed down, set the switch to PLAY. 2 Move the / switch to (memory card). 3 Select ( ) the still image. You can use the joystick to move through the still images even if the joystick guide above does not appear on the sc...
Page 32 - SKIP; ) the number of images; Magnifying the Playback Image; Move the zoom lever toward
Playback 32 T O SKIP 10 OR 100 STILL IMAGES 1 If the joystick guide does not appear on screen, press ( ) to display it. 2 Push the joystick ( ) toward . 3 Select ( ) [ JUMP 10 IMAGES] or [ JUMP 100 IMAGES]. 4 Jump ( ) the number of images selected. Press ( ) to close the image jump screen and displa...
Page 33 - Advanced Functions; Menu Options Lists
Menu Options Lists Advanced Functions 33 Advanced FunctionsMenu Options Lists Menu items not available appear grayed out. For details about how to select an item, refer to Using the Menus ( 21). FUNC. Menu Options Mode switch: [ PROGRAM AE] , [ SHUTTER-PRIO. AE], [ APERTURE-PRIO. AE], [ CINE MODE]* ...
Page 34 - ) to enter the image selection
Menu Options Lists 34 When [HD STANDARD] is set to [ DV(NORMAL)]: [ STILL I.REC OFF] , [ M 1440x1080], [ S 640x480] Quality: [ SUPER FINE], [ FINE] , [ NORMAL] Size: [ LW 1920x1080], [L 2048x1536], [ M 1440x1080], [ S 640x480] Quality: [ SUPER FINE], [ FINE] , [ NORMAL] [CANCEL], [EXECUTE] [CANCEL],...
Page 35 - Setup Menus; CAMERA SETUP; ZOOM SPEED
Menu Options Lists Advanced Functions 35 Setup Menus CAMERA SETUP Mode switch: or P (only in the [ PROGRAM AE] recording program) [ ON] , [ OFF] The camcorder automatically uses slow shutter speeds to obtain brighter recordings in places with insufficient lighting. The camcorder uses shutter speeds ...
Page 36 - Playing back a widescreen recording:
Menu Options Lists 36 [ AUTO] , [ OFF] Mode switch: [ ON:AiAF] , [ ON:CENTER], [ OFF] Mode switch: [ ON] , [ OFF] The image stabilizer compensates for camcorder shake even at full telephoto. The image stabilizer is designed to compensate for a normal degree of camcorder shake. The image stabilizer m...
Page 38 - If the memory card you insert already; CARD OPERATIONS; mode, the following menu
Menu Options Lists 38 [ RESET], [ CONTINUOUS] Select the image numbering method to be used when you insert a new memory card.Images are automatically assigned consecutive image numbers from 0101 to 9900, and stored in folders containing up to 100 images. Folders are numbered from 101 to 998.[ RESET]...
Page 39 - OUTPUT CH
Menu Options Lists Advanced Functions 39 This setting will be unavailable while the camcorder is connected to an external device using the HDMI cable. [ L/R] , [ L/L], [ R/R] You can select the audio channel to use during the playback of a tape with audio recorded on two channels.[ L/R]: Left and Ri...
Page 40 - Settings for Video Output from the COMPONENT OUT Terminal
Menu Options Lists 40 This setting will be unavailable while the camcorder is connected to an external device using the HDMI cable. [ DV LOCKED], [ HDV/DV] You can select the video standard to use when connecting to an external device using the HDV/DV terminal. [ HDV/DV]: Switch automatically betwee...
Page 41 - DISPLAY SETUP; BRIGHTNESS
Menu Options Lists Advanced Functions 41 DISPLAY SETUP Adjust ( ) the brightness of the LCD display with the joystick. Changing the brightness of the LCD display does not affect that of the viewfinder or the recordings. [ OFF] , [ LEVEL(WHT)], [ LEVEL(GRY)], [ GRID(WHT)], [ GRID(GRY)] You can displa...
Page 42 - OFF
Menu Options Lists 42 [ DATE], [ TIME], [ DATE & TIME] , [ CAMERA DATA] [ ], [DEUTSCH], [ ], [ENGLISH] , [ESPAÑOL], [FRANÇAIS], [ITALIANO], [MAGYAR], [NEDERLNDS], [POLSKI], [ ], [TÜRKÇE], [ ], [ ], [ ], [ ], [ ], [ ], [ ], [ ], [ ] SYSTEM SETUP [ ON] , [ OFF ] Allows the camcorder to be operated...
Page 43 - Recording Programs; Auto; Special Scene Recording Programs (
Using the Recording Programs Advanced Functions 43 Using the Recording Programs Recording Programs Auto The camcorder adjusts the focus, exposure and other settings automatically, allowing you to just point and shoot. Special Scene Recording Programs ( 46) [ PORTRAIT] The camcorder uses a large aper...
Page 44 - Giving a Cinematic Look to your; CINE MODE] Recording; Setting the 25p Cinema Mode; Do not move the mode switch to; Flexible Recording: Changing the; Recording Program
Using the Recording Programs 44 Giving a Cinematic Look to your Recordings Give your recordings a cinematic look by using the [ CINE MODE] recording program. Combine this recording program with the 25 fps progressive frame rate [ HDV(PF25)] to get the enhanced effect of the 25p Cinema Mode. Using th...
Page 45 - ) the shutter speed or; When the mode switch is set to
Using the Recording Programs Advanced Functions 45 T O SET THE APERTURE VALUE OR SHUTTER SPEED When you select [ SHUTTER- PRIO.AE] or [ APERTURE-PRIO.AE], a numeric value will appear next to the recording program icon. 1 If the joystick guide appears on the screen, press ( ) to hide it. 2 Adjust ( )...
Page 46 - Special Scene: Recording Programs to; Do not change the position of the mode; Icon of the currently selected
Using the Recording Programs 46 [ SHUTTER-PRIO.AE] - If you use a slow shutter speed in dark places, you can obtain a brighter image, but the image quality may be lower, and the autofocus may not work well.- The image may flicker when recording with high shutter speeds. [ APERTURE-PRIO.AE] - The act...
Page 47 - Manual Exposure Adjustment and; Automatic Backlight Correction; Manual Exposure Adjustment; ) the brightness of the; Adjusting the Picture:
Adjusting the Picture: Exposure, Focus and Color Advanced Functions 47 Adjusting the Picture: Exposure, Focus and Color Manual Exposure Adjustment and Automatic Backlight Correction At times, backlit subjects may appear too dark (underexposed) or subjects under very strong lights may appear too brig...
Page 48 - Manual Focus Adjustment; Infinity Focus; Magnifying the Image on the Screen; FOCUS
Adjusting the Picture: Exposure, Focus and Color 48 Manual Focus Adjustment Autofocus may not work well on the following subjects. In such case, focus manually. Reflective surfaces Subjects with low contrast or without vertical lines Fast moving subjects Through wet windows Night scenes POINTS TO CH...
Page 49 - RECORD; This function can also be activated with the; White Balance; and continue instead with the
Adjusting the Picture: Exposure, Focus and Color Advanced Functions 49 Press . • The image at the center of the screen is magnified 1.8 times and “MAGN.” appears in yellow.• This will not affect the recordings on the tape. T O RECORD THE MAGNIFIED IMAGE 1 Set [MAGN.REC] to [ ON] ( 42). 2 Press . The...
Page 50 - SET; When the adjustment is completed; When you select the custom white balance; Image Effects; Flatter
Adjusting the Picture: Exposure, Focus and Color 50 T O SET THE CUSTOM WHITE BALANCE 1 Point the camcorder at a white object, zoom in until it fills the whole screen and press ( ). When the adjustment is completed stops flashing and stays on. The camcorder retains the custom setting even if you turn...
Page 51 - ) each of the custom; Selecting the Size and Quality of Still; On a 128 MB memory card; Still Image Recording; Image Size; Image Size
Still Image Recording Options Advanced Functions 51 T O SET THE CUSTOM IMAGE EFFECT 1 Press ( ). 2 Select ( ) each of the custom setting options and adjust ( ) as desired. 3 Press ( ) to save the custom image effect. 4 Press to close the menu. Still Image Recording Options Selecting the Size and Qua...
Page 52 - On a 1 GB memory card; Capturing a Still Image while Recording
Still Image Recording Options 52 On a 1 GB memory card * This size is only available for recording simultaneously on the tape and memory card ( 52) or for capturing a still image from the playback picture ( 53). **Approximate number of photos that can actually be recorded on the memory card. (The ma...
Page 53 - Capturing a Still Image from the; CAPTURE; Light Metering Mode; Still Image Simultaneous; Still Image Capturing
Still Image Recording Options Advanced Functions 53 * The number displayed on the right corner indicates the approximate number of images that can be recorded with the current quality/size setting. Press to capture the still image on the memory card. The still image is recorded on the memory card wh...
Page 54 - Automatic Focus Priority; FIREWORKS] recording
Still Image Recording Options 54 POINTS TO CHECK Mode switch: (except for the Special Scene recording programs) Options Default value Automatic Focus Priority When the focus priority is activated, the camcorder records a still image only after the focus has been adjusted automatically. POINTS TO C...
Page 55 - Continuous Shooting and Exposure
Still Image Recording Options Advanced Functions 55 NOTES In the [ FIREWORKS] recording program the focus priority is automatically set to [ OFF]. Continuous Shooting and Exposure Bracketing Take a series of pictures of a moving subject or record the same picture in 3 levels of exposure in order to ...
Page 56 - Using the CUSTOM Key; CUSTOM; CUSTOM
Other Functions 56 Other Functions Using the CUSTOM Key You can assign to the CUSTOM key one of four frequently used functions. You can then activate the selected function using the CUSTOM key, without having to access any menu. Options Default value Press to turn on/off the selected function. On-...
Page 57 - Tape related displays: Tape operation icon,; Selecting the Data Code; Reading the Histogram Display
Other Functions Advanced Functions 57 On-screen displays + Data code 2 on Æ Only on-screen displays on Æ Only tape-related displays (in stop mode or playback pause) or All displays off (during playback) On-screen displays + Histogram 3 /Data code on Æ Only on-screen displays on Æ All displays off 1 ...
Page 58 - Flash; • Repeatedly push the joystick (; will
Other Functions 58 Flash You can use the built-in flash for recording still images in dark places. The flash features the red-eye reduction function. POINTS TO CHECK Select a recording program other than [ FIREWORKS]. Options Default value 1 If the joystick guide does not appear on screen, press (...
Page 59 - Mini Video Light; USE; We do not recommend using the mini video; Self Timer
Other Functions Advanced Functions 59 - The brightness of the AF-assist lamp could be an inconvenience. Consider turning it off in public places such as restaurants or theaters. Mini Video Light You can turn on the mini video light (assist lamp) at any time regardless of the recording program. Press...
Page 60 - Audio Recording Level; Manual Adjustment of the Audio Recording; ) the audio level as; • Push the joystick (; ) to save the setting and; The audio recording level can be adjusted; Displaying the Audio Level Indicator
Other Functions 60 Audio Recording Level You can adjust the audio recording level for the built-in or for an external microphone. You can display the audio level indicator while recording or playing back the tape. Manual Adjustment of the Audio Recording Level POINTS TO CHECK Mode switch: 1 If the j...
Page 61 - Using an External Microphone
Other Functions Advanced Functions 61 Using an External Microphone When recording in very quiet surroundings, the built-in microphone may pick up the sound of the camcorder's internal machinery. In such case, we recommend using an external microphone. M ICROPHONES COMPATIBLE WITH THE A DVANCED A CCE...
Page 62 - Digital Effects; Setting; If
Other Functions 62 Digital Effects POINTS TO CHECK * : [ BLK&WHT], [ SEPIA] only.Mode switch: Options Default value NOTES You can preview the digital effects on the screen while making the selection. When you apply a fader, not only the picture but also the sound will fade in or out. When you ...
Page 64 - Erasing Still Images; Protected images cannot be erased.; Erasing a Single Image; Protecting Still Images; Initializing the memory card (; Still Image Options; MENU
Still Image Options 64 Editing FunctionsStill Image Options Erasing Still Images IMPORTANT Be careful when erasing images. Erased images cannot be recovered. NOTES Protected images cannot be erased. Erasing a Single Image 1 If the joystick guide does not appear on screen, press ( ) to display it. 2 ...
Page 65 - ing F; ROM; ) the still image you; Initializing the Memory Card; Initializing the memory card will erase all still
Still Image Options Edit ing F unc tio ns 65 [ PROTECT]: The image selection screen appears. F ROM THE IMAGE SELECTION SCREEN 1 Select ( ) the still image you want to protect. 2 Press ( ) to protect the still image. appears on the bottom bar and the image cannot be erased. Press ( ) again to cancel ...
Page 66 - Connection Diagrams; Connecting to a TV or VCR; COMPONENT OUT Terminal
Connecting to a TV or VCR 66 External Connections Connecting to a TV or VCR Connection Diagrams Turn off all the devices when making the connections and refer also to the instruction manual of the connected device. Connecting to a TV or VCR Open the terminalcover to access. AV/ Terminal COMPONENT OU...
Page 67 - External; Terminal on the Camcorder
Connecting to a TV or VCR External Connec tions 67 High Definition TV Sets (HDTV) Terminal on the Camcorder Connecting Cable Terminal on the Connected Device AUDIO R L Pr/Cr Pb/Cb Y 1 Output connection (Signal Flow ) to an HDTV with component video input terminals. Red Green Blue White Red CTC-100/S...
Page 68 - Terminal on the
Connecting to a TV or VCR 68 Standard Definition TV Sets Terminal on the Camcorder Connecting Cable Terminal on the Connected Device 2 Output connection (Signal Flow ) to a TV with a DV (IEEE1394) terminal. Input connection (Signal Flow ) from a TV or other digital video source with a DV (IEEE1394) ...
Page 69 - Playback on a TV Screen; Connecting; Connection; About the HDMITM connection
Connecting to a TV or VCR External Connec tions 69 Playback on a TV Screen The quality of the playback picture will vary depending on the connected TV and the type of connection used. POINTS TO CHECK Change the following settings as necessary before making the connections. Refer to the corresponding...
Page 70 - Recording to a VCR or Digital Video; connection; Settings for Recording Video Output using the HDV/DV Terminal
Connecting to a TV or VCR 70 - There will be no video or audio output from the HDMI OUT terminal while there is a video input connection to the HDV/DV terminal or the AV/ terminal.- To output audio dubbed later on a tape through the HDMI OUT terminal, set [AUDIO OUT] to [ MIX/VAR.] ( 39). - Audio ou...
Page 71 - to change the on-screen display; Analog Line-In Recording; shown in the previous section
Connecting to a TV or VCR External Connec tions 71 Recording 1 This camcorder: Load the recorded cassette. 2 Connected device: Load a blank cassette or disc and set the device to record pause mode. 3 This camcorder: Locate the scene you wish to copy and pause the playback shortly before the scene. W...
Page 72 - In record pause, press; Depending on the analog signal sent from the; Digital Video Dubbing; the previous section; Dubbing; depending on the video input signal.
Connecting to a TV or VCR 72 5 When the scene you wish to record appears, press . Recording starts. 6 While recording, press to pause the recording. In record pause, press again to resume recording. 7 Press to stop recording. 8 Connected device: Stop the playback. IMPORTANT Depending on the analog s...
Page 73 - Blank sections may be recorded as; Concerning Copyright; Analog/Digital Conversion; in the previous section
Connecting to a TV or VCR External Connec tions 73 6 When the scene you wish to record appears, press . Recording starts. 7 While recording, press to pause the recording. In record pause, press again to resume recording. 8 Press to stop recording. 9 Connected device: Stop the playback. IMPORTANT Bla...
Page 74 - Transferring Video Recordings
Connecting to a TV or VCR 74 Converting the Video 1 Set [AV DV] to [ ON] ( 37). 2 Start the playback on the video source and the recording on the recording device. Refer to the instruction manuals of the connected devices. IMPORTANT Depending on the signal sent from the connected device, the convers...
Page 75 - PC Connection Diagrams; Connecting to a Computer; USB Terminal; Output connection (Signal Flow; Output connection (Signal Flow
Connecting to a Computer External Connec tions 75 Connecting to a Computer PC Connection Diagrams Connecting to a Computer USB Terminal Open the LCD panel cover to access. HDV/DV Terminal • Check the type and orientation of the terminal and make sure you connect the DV cable properly.• Use the optio...
Page 76 - Equipment and System Requirements; A computer equipped with an; Start the video editing software.
Connecting to a Computer 76 Transferring Video Recordings You can transfer recordings to a computer using the HDV/DV terminal. Equipment and System Requirements A computer equipped with an IEEE1394 (DV) terminal or an IEEE1394 (DV) capture board A DV cable (Use the optional CV-150F (4 pin-4 pin) or ...
Page 77 - Transferring Still Images – Direct; Preparations; PC; Transferring Images
Connecting to a Computer External Connec tions 77 Transferring Still Images – Direct Transfer With the supplied USB cable and the Digital Video Software, you can transfer still images to a computer simply by pressing (print/share). Preparations The first time you connect the camcorder to the compute...
Page 78 - TRANSFER; ) a transfer option and; button will flash while the; instead of; Transfer Orders; Selecting Still Images to Transfer
Connecting to a Computer 78 A UTOMATIC TRANSFER OPTIONS When you select [ ALL IMAGES], [ NEW IMAGES] or [ TRANSFER ORDERS], all the relevant still images will be transferred to the computer in one batch and their thumbnails will be displayed on the computer. Select ( ) a transfer option and press . ...
Page 79 - Printing Still Images – Direct Print; Connecting the Camcorder to the Printer; will appear for images that cannot be; Connecting to a Printer
Connecting to a Printer External Connec tions 79 : The image selection screen appears. F ROM THE IMAGE SELECTION SCREEN 1 Select ( ) the still image you want to mark with a transfer order. 2 Press ( ) to set the transfer order. A checkmark appears in the box next to the transfer order symbol . Press...
Page 80 - We recommend powering the camcorder; Printing with the; • Printing starts. The; Selecting the Print Settings; Canon inkjet printers and SELPHY DS printers:
Connecting to a Printer 80 We recommend powering the camcorder using the compact power adapter. Refer also to the printer’s instruction manual. Printing with the (Print/Share) Button You can print a still image without changing the settings simply by pressing . 1 Select ( ) the still image you wish ...
Page 81 - Printing after Changing the Print Settings; mode and restore the connection.; The following still images may not be; Printing Multiple Images on the Same Sheet; You can also use the special photo sticker sheets.; Canon Printer Series
Connecting to a Printer External Connec tions 81 Printing after Changing the Print Settings 1 If the joystick guide does not appear on screen, press ( ) to display it. 2 Push the joystick ( ) toward . • The print setting menu appears.• Depending on the printer, the message “BUSY.” may appear before ...
Page 82 - Trimming Settings; In the print setting menu (; Print Orders; Selecting Still Images for Printing
Connecting to a Printer 82 - Images recorded with the camcorder but edited on a computer.- Images whose file names were changed.- Images not recorded with this camcorder. Observe the following precautions during printing:- Do not turn off the camcorder or the printer.- Do not change the position of ...
Page 83 - Printing the Still Images Marked with Print; Depending on the connected printer, you can; Erasing All Print Orders
Connecting to a Printer External Connec tions 83 : The image selection screen appears. F ROM THE IMAGE SELECTION SCREEN 1 Select ( ) the still image you want to mark with a print order. 2 Press ( ) to set the print order. The number of copies appears in orange in the box next to the print order symb...
Page 84 - Power Source; Problem
84 Trouble? Additional Information Trouble? If you have a problem with your camcorder, refer to this checklist. Consult your dealer or a Canon Service Center if the problem persists. Power Source Recording/Playback Troubleshooting Problem Solution • Camcorder will not turn on.• The camcorder switche...
Page 85 - io
Trouble? 85 Addi tional Info rmat io n Recording Video noise appears on screen. When using the camcorder in a room where a plasma TV is located, keep a distance between the camcorder and the plasma TV. – Video noise appears on the TV screen. When using the camcorder in a room where a TV is located, ...
Page 87 - Memory Card Operation
Trouble? 87 Addi tional Info rmat io n Memory Card Operation Printing Editing Others Problem Solution Memory card cannot be inserted. Memory card was not facing the correct direction. Turn the memory card over and reinsert it. 18 Cannot record on the memory card. Memory card is full. Erase still ima...
Page 88 - List of Messages; Message
88 Trouble? List of Messages Some error messages will disappear after being displayed for about 4 seconds. Message Explanation/Solution SET THE TIME ZONE, DATE AND TIME You have not set the time zone, date and time. This message appears each time you turn the power on until you set the time zone, da...
Page 89 - Direct Print Related Messages
Trouble? 89 Addi tional Info rmat io n Direct Print Related Messages NOTES About Canon inkjet printers and SELPHY DS Printers: If the printer’s error indicator flashes or an error message appears on the printer’s operation panel, refer to the printer’s instruction manual. IN CARD POSITION You presse...
Page 91 - Camcorder; Handling Precautions; Treat the battery pack with care.
Do’s and Don’ts 91 Addi tional Info rmat io n Do’s and Don’ts Camcorder Do not carry the camcorder by the LCD panel. Be careful when closing the LCD panel. Do not leave the camcorder in places subject to high temperatures (like the inside of a car under direct sunlight), or high humidity. Do not use...
Page 92 - Cassette; Protecting Tapes from Accidental Erasure; Memory Card
92 Do’s and Don’ts About the battery terminal cover The battery terminal cover has a [ ]- shaped hole. This is useful when you wish to differentiate between charged and uncharged battery packs. Back side of the battery pack Terminal cover attachedCharged Uncharged Cassette Rewind tapes after use. A ...
Page 93 - Lithium Button Battery; To recharge the built-in lithium battery:
Do’s and Don’ts 93 Addi tional Info rmat io n Do not attach any labels or stickers on the memory card. When you erase image files or initialize the memory card, only the file allocation table is altered and the data itself is not actually deleted. Take the necessary precautions when you dispose of t...
Page 94 - Cleaning the Video Heads; Camcorder Body; Storage; Condensation may form in the following
94 Do’s and Don’ts Cleaning the Video Heads In the following cases the video heads are dirty and need to be cleaned.- The message “HEADS DIRTY, USE CLEANING CASSETTE” appears.- During playback you notice frequent video problems (blocky video artifacts, banding, etc.).- When playing back a tape recor...
Page 95 - Using the Camcorder Abroad; Power Sources
Do’s and Don’ts 95 Addi tional Info rmat io n When the camcorder is moved from a cold place to a warm room When the camcorder is left in a humid room When a cold room is heated rapidly T O AVOID CONDENSATION Do not expose the camcorder to sudden or extreme changes in temperature. Remove the cassette...
Page 96 - System Diagram
96 General Information General Information System Diagram (Availability differs from area to area) BP-2L13*, BP-2L14, NB-2LH, BP-2L24H Battery Pack CB-2LWEBattery Charger DTC-100 D Terminal Cable CA-570 Compact Power Adapter SC-2000 SoftCarrying Case WS-20 Wrist Strap SS-600/SS-650 Shoulder Strap mi...
Page 97 - Battery Packs; * Charging time varies according to the charging condition.; • The minimum focusing distance with the; Optional Accessories; Use of genuine Canon accessories is recommended.
General Information 97 Addi tional Info rmat io n Battery Packs When you need extra battery packs, select one of the following models: BP-2L13, BP-2L14, NB-2LH, BP-2L24H. CB-2LWE Battery Charger Use the battery charger for charging the battery packs. * Charging time varies according to the charging ...
Page 98 - VFL-1 Video Flash Light
98 General Information FS-43U II Filter Set Neutral density and MC protector filters help you to control difficult lighting conditions. VFL-1 Video Flash Light This video flash light allows you to record still images and movies even at night or in dark places. It attaches to the camcorder’s advanced...
Page 99 - Shoulder Strap
General Information 99 Addi tional Info rmat io n Shoulder Strap You can attach a shoulder strap for more security and portability.Pass the ends through the strap mount and adjust the length of the strap. WS-20 Wrist Strap Use this for extra additional protection for active shooting. SC-2000 Soft Ca...
Page 100 - Specifications; System
100 General Information LEGRIA HV40 Specifications System Video Recording System 2 rotary heads, helical scanning HDV 1080i 1 DV system (consumer digital VCR SD system), digital component recording Audio Recording System MPEG-1 Audio Layer 2, 16 bit, 48 kHz; transfer rate 384 kbps (2 channels) PCM d...
Page 101 - CA-570 Compact Power Adapter; Input/Output Terminals
General Information 101 Addi tional Info rmat io n CA-570 Compact Power Adapter Memory Card Recording Media miniSD Card 2 Size of Still Images 2048 x 1536, 1920 x 1080, 1440 x 1080, 848 x 480, 640 x 480 pixels File Format Design rule for Camera File system (DCF), Exif 2.2 3 compliant, DPOF compliant...
Page 102 - Subject to change without
102 General Information BP-2L13 Battery Pack Weight and dimensions are approximate. Errors and omissions excepted. The information in this manual is verified as of February 2009. Subject to change without notice. Battery type Rechargeable Lithium Ion Battery Rated voltage 7.4 V DC Operating temperat...
Page 103 - Index
General Information 103 Addi tional Info rmat io n 16:9 aspect ratio . . . . . . . . . . . . . . . . . . 3625p Cinema Mode (25 fps progressive) . . . . . . . . . . . 36, 44 6-second auto date . . . . . . . . . . . . . . . 419 Point AiAF (Autofocus) . . . . . . . . . . . 54 A Abroad, using the camcor...


 Canon LEGRIA HF R506 User Manual
 Canon LEGRIA HF R706 User Manual
 Canon LEGRIA HF R806 User Manual
 Canon LEGRIA HF S10 User Manual
 Canon LEGRIA HF S21 User Manual
 Canon LEGRIA HF S100 User Manual
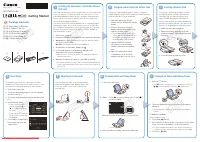 Canon Legria mini User Manual
 Canon LEGRIA mini X User Manual
 Canon LiDE 25 Manual
 Canon LIDE25 Manual
 Canon LiDE 35 User Manual