Page 2 - Important Usage Instructions; Downloaded From VideoCamera-Manual.com Manuals
2 Introduction Important Usage Instructions WARNING! TO REDUCE THE RISK OF ELECTRIC SHOCK, DO NOT REMOVE COVER (OR BACK). NO USER SERVICEABLE PARTS INSIDE. REFER SERVICING TO QUALIFIED SERVICE PERSONNEL. WARNING! TO REDUCE THE RISK OF FIRE OR ELECTRIC SHOCK, DO NOT EXPOSE THIS PRODUCT TO RAIN OR MOI...
Page 3 - Trademark Acknowledgements
3 European Union (and EEA) only. These symbols indicate that this product is not to be disposed of with your household waste, according to the WEEE Directive (2002/96/EC), the Battery Directive (2006/66/EC) and/or your national laws implementing those Directives. This product should be handed over t...
Page 4 - Exciting Features and New Functions; High-Definition Video; . Videos are then recorded in the; Dual Flash Memory
4 Exciting Features and New Functions High-Definition Video Your camcorder’s full high-definition image sensor (Full HD CMOS) captures video at a resolution of 1,920 x 1,080 pixels 2 . Videos are then recorded in the memory in high definition, using AVCHD specifications 3 . With your new HD camcorde...
Page 6 - Enjoying your Recordings on Other Devices
6 Enjoying your Recordings on Other Devices Eye-Fi SD AVCHD MPEG-2 Connect the camcorder to an HDTV ( 0 109) Play video directly from your recorded memory card AVCHD-compatible HDTVs and digital recorders with an SD memory card slot 4 . Use an Eye-Fi card ( 0 125) to wirelessly upload recordings to ...
Page 8 - Getting to Know the Camcorder; Preparations; Getting Started; Table of contents
8 Table of contents Introduction 4 Exciting Features and New Functions 12 About this Manual 14 Getting to Know the Camcorder 14 Supplied Accessories and CD-ROMs 16 Names of Parts Preparations 19 Getting Started 19 Charging the Battery Pack 22 Preparing the Accessories 24 Adjusting the Position...
Page 9 - Smart AUTO Mode; Basic Recording; Video; Basic Playback
Table of contents 9 Smart AUTO Mode 40 Basic Recording 40 Shooting Video and Taking Photos in Smart AUTO Mode 44 Zooming 46 Quick Start Function Video 48 Basic Playback 48 Playing Back the Video 52 3D Flip View 52 The Index Selection Screen: Selecting the Content to Play Back 54 Date Index Scr...
Page 10 - Photos
10 Table of contents 80 Onscreen Displays and Data Code 81 Rating Scenes 84 Gallery and Scene Operations 84 Managing Stories 88 Capturing Video Snapshot Scenes and Photos from a Movie 90 Dividing Scenes 92 Decorating Scenes Photos 98 Basic Playback 98 Viewing Photos 100 Deleting Photos 102 Addit...
Page 11 - Additional Information; 27 Appendix: Menu Options Lists
Table of contents 11 Additional Information 127 Appendix: Menu Options Lists 127 FUNC. Panel 131 Setup Menus 142 Appendix: Onscreen Icons and Displays 147 Trouble? 147 Troubleshooting 154 List of Messages 161 Do’s and Don’ts 161 Handling Precautions 165 Maintenance/Others 166 Using the Camcorder...
Page 12 - About this Manual; Troubleshooting
12 Introduction About this Manual Thank you for purchasing the Canon LEGRIA HF R28 / LEGRIA HF R27 / LEGRIA HF R26 / LEGRIA HF R206 / LEGRIA HF R205. Please read this manual carefully before you use the camcorder and retain it for future reference. Should your camcorder fail to operate correctly, ...
Page 14 - Supplied Accessories and CD-ROMs; The following accessories are supplied with the camcorder:
14 Introduction G et ting to Know the Camco rder Supplied Accessories and CD-ROMs The following accessories are supplied with the camcorder: X CA-110E Compact Power Adapter (incl. power cord) BP-110 Battery Pack W X IFC-300PCU/S USB Cable STV-250N Stereo Video Cable W Yellow • Red • White plugs X ...
Page 15 - PIXELA's Transfer Utility
Introduction 15 The following CD-ROMs and software are supplied with the camcorder:• PIXELA's Transfer Utility CD-ROM 1 and Installation Guide for PIXELA’s software- PIXELA’s Transfer Utility - Software for saving and transferring movies and music files you can use as background music. • PIXELA's ...
Page 16 - Names of Parts; Left side view
16 Introduction Names of Parts 1 RESET button ( 0 151) 2 button ( 0 27)/ / / WEB button ( 0 119) 3 2 (camera/play) button ( 0 28) 4 VIDEO SNAP (video snapshot) button ( 0 66) 5 DISP. (onscreen display) button ( 0 80)/ BATT. INFO button ( 0 146) 6 USB terminal ( 0 106, 109) 7 HDMI OUT terminal ( 0 ...
Page 17 - LCD panel
Introduction 17 A j Stereo microphone ( 0 73) A k Zoom lever ( 0 44) A l PHOTO button ( 0 40, 102) S q ACCESS indicator ( 0 40, 56, 102) S a POWER button S s ON/OFF (CHG) (charge) indicator:Green – ONOrange – Standby ( 0 46) Red – Charging ( 0 19) S d LCD touch screen ( 0 24, 26) LCD panel Top vie...
Page 18 - Bottom view
18 Introduction S f Speaker ( 0 50) S g START/STOP button ( 0 40, 56) S h Tripod socket ( 0 162) S j Serial number The serial number label is located on the battery compartment cover. S k Battery compartment cover ( 0 19) S l Battery compartment ( 0 19) Bottom view Back view Downloaded From VideoC...
Page 19 - Charging the Battery Pack; Connect the power cord to the
Preparations 19 Preparations This chapter describes basic operations, such as using the touch panel, navigating the menus, and first time settings to help you learn more about your camcorder. Getting Started Charging the Battery Pack The camcorder can be powered with a battery pack or directly usi...
Page 20 - • If the camcorder was on, the green
20 Preparations 4 Slide the battery compartment cover away from the lens and open it. 5 Insert the battery pack all the way into the compartment and press gently until it clicks. 6 Close the cover and slide it toward the lens until you hear a click. 7 Charging will start when the camcorder is turn...
Page 21 - To remove the battery pack; Slide the battery compartment
Preparations 21 To remove the battery pack 1 Slide the battery compartment cover away from the lens and open it. 2 Raise the edge of the battery pack in the direction of the arrow and pull out the battery pack. 3 Close the cover and slide it toward the lens until you hear a click. IMPORTANT • Turn...
Page 22 - • If remaining battery time is an issue, you can power the camcorder; Preparing the Accessories; Grip Belt; Fasten the grip belt.; To remove the grip belt; Lift the padded handgrip’s flap and detach the strap from the
22 Preparations • If remaining battery time is an issue, you can power the camcorder using the compact power adapter so the battery pack will not be con-sumed. • Charged battery packs continue to discharge naturally. Therefore, charge them on the day of use, or the day before, to ensure a full cha...
Page 23 - Stylus Pen; To attach an optional wrist strap
Preparations 23 Stylus Pen Straps To attach an optional wrist strap Pass the attaching end of the wrist strap through the rear bracket on the cam-corder, thread the wrist strap through the loop and fasten. You can also attach the wrist strap to the strap mount on the grip belt to use both for extr...
Page 24 - To attach an optional shoulder strap; Adjusting the Position and Brightness of the LCD Screen; Rotating the LCD Panel; Open the LCD panel 90 degrees.; About the LCD screen:; The screen is produced using extremely high-pre-
24 Preparations To attach an optional shoulder strap Pass the ends of the shoulder strap through the strap mount on the grip belt and adjust the length of the strap. Adjusting the Position and Brightness of the LCD Screen Rotating the LCD Panel Open the LCD panel 90 degrees. • You can rotate the p...
Page 25 - LCD Backlight; With the camcorder on, hold
Preparations 25 LCD Backlight When recording in bright places it may be difficult to use the LCD screen. Turn on the LCD backlight to make it brighter. With the camcorder on, hold h pressed down for more than 2 seconds. • Repeat this action to switch the LCD backlight between off (normal) and on (...
Page 26 - Basic Operation of the Camcorder; Using the Touch Screen; Touch
26 Preparations Basic Operation of the Camcorder Using the Touch Screen The control buttons and menu items that appear on the touch screen change dynamically depending on the operating mode and the task you are performing. You can easily operate the touch screen using your finger or the supplied s...
Page 27 - Operating Modes; Recording
Preparations 27 • In the following cases, you may not be able to perform touch operations correctly.- Operating the touch screen with wet or gloved hands or using your fingernails or other hard-tipped objects other than the stylus pen, such as ballpoint pens. - Applying excessive force or forceful...
Page 28 - Playback; Press the
28 Preparations Playback Press the S (camera/play) button to switch the camcorder between camera (recording) mode and playback mode. You can press S when the camcorder is off to turn it on directly in playback mode. NOTES • When switching to a playback mode, the memory selected for playback will b...
Page 29 - Using the Menus; Menu Options Lists; The FUNC. Panel and Edit Panel; In
Preparations 29 Using the Menus Many of the camcorder’s functions can be adjusted from the FUNC. panel and the setup menus. In mode, however, most menus can- not be accessed and, except in a few cases, most menu settings will return to their default values.For details about the available menu opti...
Page 30 - The Setup Menus; Touch the tab of the desired
30 Preparations The Setup Menus 1 mode only: Touch [FUNC.] 2 Touch [MENU] to open the setup menus. 3 Touch the tab of the desired menu. 4 Drag your finger up and down to bring the setting you want to change into the orange selection bar. • Menu items not available appear grayed out.• When the desi...
Page 31 - First Time Settings; Setting the Date and Time; Set the correct date and time by changing all the fields in the
Preparations 31 First Time Settings Setting the Date and Time You will need to set the date and time of the camcorder before you can start using it. The [Date/Time] screen will appear automatically when the cam-corder’s clock is not set.When the [Date/Time] screen appears, the year will be selecte...
Page 32 - Changing the Language; NOTES; Changing the Time Zone; ] to set the time zone; Desired language
32 Preparations Changing the Language The default language of the camcorder is English. You can set it to one of 27 languages. * Only when performing the procedure in a recording mode. NOTES • Some control buttons, such as [ZOOM], [FUNC.] or [MENU], will appear in English regardless of the languag...
Page 33 - Using a Memory Card; Memory Cards Compatible for Use with the Camcorder; About the SD Speed Class:; The SD Speed Class is a standard that indi-; SDXC Memory Cards
Preparations 33 Using a Memory Card Memory Cards Compatible for Use with the Camcorder You can use commercially available Secure Digital (SD) cards with this camcorder. However, depending on the memory card, you may not be able to record movies. Refer to the table below.As of October 2010, the mov...
Page 34 - Compatible operating systems for SDXC memory cards; IMPORTANT
34 Preparations Compatible operating systems for SDXC memory cards IMPORTANT • If you use an SDXC memory card with a computer OS that is not SDXC- compatible, you may be prompted to format the memory card. In such case, cancel the operation to prevent data loss . • After repeatedly recording, dele...
Page 35 - Inserting and Removing a Memory Card; Make sure to initialize (; To remove the memory card
Preparations 35 Inserting and Removing a Memory Card Make sure to initialize ( 0 38) all memory cards before using them with this camcorder. 1 Turn off the camcorder. Make sure the ON/OFF (CHG) indicator is off. 2 Open the double memory card slot cover. 3 Insert the memory card into one of the mem...
Page 36 - Selecting the Memory for the Recordings; ) or on a memory card. The default memory for
36 Preparations Selecting the Memory for the Recordings You can select to record your movies and photos in the built-in mem-ory ( / / ) or on a memory card. The default memory for recording both is the built-in memory ( / / ) or memory card X ( / ). POINTS TO CHECK • Be sure you understand the inf...
Page 37 - Relay Recording of Movies; , you can use memory card
Preparations 37 Relay Recording of Movies You can activate the relay recording so if the memory you are using becomes full while recording movies, the recording will continue auto-matically on a memory card.When recording on memory card X , you can use memory card Y for relay recording ( 497 ). / ...
Page 38 - Initializing the Memory; only) to permanently delete all the recordings it con-
38 Preparations Initializing the Memory Initialize memory cards when you use them with this camcorder for the first time. You can also initialize a memory card or the built-in memory ( / / only) to permanently delete all the recordings it con- tains. / / At the time of purchase, the built-in memor...
Page 40 - Shooting Video and Taking Photos in Smart AUTO Mode; Turn on the camcorder.
40 Smart AUTO Mode Smart AUTO Mode This chapter covers how to easily record video and photos in Smart AUTO mode, and how to use basic shooting functions like zoom and Quick Start. To enjoy full access to menus and more advanced functions, refer to the relevant chapters for video ( 0 56) and photos...
Page 41 - To record video; To take photos; Press; When you have finished recording; Make sure that the ACCESS indicator is off.; About the Smart AUTO mode
Smart AUTO Mode 41 To record video 3 Press g to begin recording. Press g again to pause the recording. To take photos 3 Press j halfway. If the subject is not in focus, h will flash in yellow. Adjust the camcorder's position and press j halfway again. Once the focus is automatically adjusted, h wi...
Page 42 - • When shooting in; Smart AUTO icons
42 Smart AUTO Mode • When shooting in mode, the camcorder will automatically detect certain characteristics of the subject, background, lighting conditions, etc. It will then adjust various settings (focus, exposure, color, image stabilization, image quality, among others), selecting the best sett...
Page 43 - About the Power Save mode:
Smart AUTO Mode 43 IMPORTANT • Observe the following precautions while the ACCESS indicator is on or flashing. Failing to do so may result in permanent data loss or damage to the memory.- Do not open the double memory card slot cover.- Do not disconnect the power source or turn off the camcorder.-...
Page 44 - Zooming; mode, select the type using the; Model
44 Smart AUTO Mode Zooming The camcorder offers three types of zoom - optical, advanced and dig-ital. For optical zoom, the camcorder uses the optical magnification ratio of the lens. For advanced zoom, the camcorder processes the image beyond the range of the optical zoom to obtain a larger zoom ...
Page 45 - Using the Zoom Lever; Move the zoom lever toward; Using the Touch Screen’s Zoom Controls; Display the zoom controls on the touch screen.
Smart AUTO Mode 45 Using the Zoom Lever Move the zoom lever toward Q (wide angle) to zoom out. Move it toward P (telephoto) to zoom in. By default, the zoom lever oper-ates at a variable speed – press gently for a slow zoom; press harder for faster zooms. Using the Touch Screen’s Zoom Controls 1 D...
Page 46 - • When recording at maximum advanced zoom, the video quality is; Quick Start Function; With the camcorder on and in a recording mode, close the LCD
46 Smart AUTO Mode • When recording at maximum advanced zoom, the video quality is equivalent to high definition. • In mode, you can also set 7 8 [Zoom Speed] to one of three constant speeds (3 is the fastest, 1 the slowest). • When [Zoom Speed] is set to [ I Variable], the zoom speed will be fast...
Page 47 - • About standby mode and auto power off:; to turn on the camcorder.
Smart AUTO Mode 47 • About standby mode and auto power off: - The camcorder will power off automatically if left in standby mode for 10 minutes. Press x to turn on the camcorder. - You can select the length of time until shut-off or turn off the Quick Start function altogether with the 6 8 [Power ...
Page 48 - Smart; Playing Back the Video; To play back scenes based on their rating, see
48 Video Video This chapter covers functions related to movies, including play-back, advanced shooting, advanced functions and scene oper-ations. For details about basic video shooting, refer to Smart AUTO Mode ( 0 40). Basic Playback Playing Back the Video To play back scenes based on their ratin...
Page 49 - Touch the desired scene to play it back.
Video 49 4 Touch the desired scene to play it back. • Playback will start from the scene selected and continue until the end of the last scene in the index screen. • Touch the screen during playback to display the playback controls for a few seconds. A Memory being read. B Recording date. C Drag y...
Page 50 - ] to increase the level of
50 Video During playback: A Stop the playback. B Jump to the beginning of the scene. Double-tap to jump to the previous scene. C Pause the playback. D Touch to show volume and audio balance controls. Drag your finger left and right along the bar to adjust. For [Music Balance], adjust toward [ c ] ...
Page 51 - During playback pause:
Video 51 During playback pause: IMPORTANT • Observe the following precautions while the ACCESS indicator is on or flashing. Failing to do so may result in permanent data loss.- Do not open the double memory card slot cover.- Do not disconnect the power source or turn off the camcorder.- Do not cha...
Page 52 - D Flip View; To return to the date index screen, touch [; The Index Selection Screen: Selecting the Content to Play Back; Touch the scene in the front to play it back.
52 Video 3D Flip View 3D Flip View is a fun way to display your video recordings (original scenes) in a 3D layout, organized by recording date. In the date index screen, touch [ ] . To return to the date index screen, touch [ Q ]. The Index Selection Screen: Selecting the Content to Play Back From...
Page 53 - Options
Video 53 In any index screen, touch [ b ]. During single photo view, touch the screen once to display the controls then touch [ Q ] to open the [Photos] index screen. Options NOTES • Fast/slow playback modes are not available for scenes converted to standard definition. Scenes in the [ u SD Movies...
Page 54 - Deleting Scenes; Deleting Scenes and Stories from the Gallery; Date Index Screen and Gallery Screen; Date] to display the date index screen,
54 Video Deleting Scenes You can delete those scenes that you are not interested in keeping. Deleting scenes allows you also to free up space on the memory. See also Deleting Scenes and Stories from the Gallery ( 0 84). 1 In the date index screen, open the screen that contains the scenes you want ...
Page 55 - Touch the desired option.; Touch the screen to display the playback controls.; Date
Video 55 3 Touch the desired option. If you selected [Select], touch the scenes to delete and then touch [OK]. A checkmark O will appear on selected scenes. Touch a selected scene again to remove the checkmark. You can also touch [Remove All] to remove all checkmarks. 4 Touch [Yes] 8 [OK]. Touch [...
Page 56 - Advanced Functions; Shooting Video in Flexible Recording Mode; When the camcorder is in; Reviewing Your Recording
56 Video Advanced Functions Shooting Video in Flexible Recording Mode When the camcorder is in (flexible recording) mode, you can enjoy full access to the menus and manually adjust the exposure, focus, white balance and many more of the camcorder's settings to your preference. The camcorder can ev...
Page 57 - Selecting the Video Quality (Recording Mode); Desired recording mode
Video 57 • Be sure to save your recordings regularly ( 0 111), especially after making important recordings. Canon shall not be liable for any loss or corruption of data. NOTES • The zoom, Quick Start function, power saving modes, etc. operate the same way in mode as in mode. For details, refer to...
Page 58 - Selecting the Frame Rate; Approximate recording times; Recording mode; Memory; Desired frame rate
58 Video Selecting the Frame Rate Select the frame rate before you make a recording to match your cre-ative intent. Changing the frame rate will change the “feel” of your recordings, for example, by giving them a more cinematic look. Approximate recording times Default value 1 Recorded in 1,920 ...
Page 59 - Special Scene Recording Programs and Programmed AE; 0 fields per second, interlaced. This is the; Desired recording program
Video 59 Options ( Default value) NOTES • When the frame rate is set to [ D PF25], you cannot take photos. Special Scene Recording Programs and Programmed AE Recording in a very bright ski resort or capturing the full colors of a sunset or a fireworks display becomes as easy as selecting a Speci...
Page 61 - Cinema Mode: Giving a Cinematic Look to your Recordings; PF25] to get the enhanced effect
Video 61 NOTES • [ F Portrait]/[ G Sports]/[ I Snow]/[ J Beach]: The picture may not appear smooth during playback. • [ F Portrait]: The blur effect of the background increases the more you zoom in ( P ). • [ I Snow]/[ J Beach]: The subject may become overexposed on cloudy days or in shaded places...
Page 62 - Image Stabilization; this function is set to [; Desired IS mode
62 Video Image Stabilization The image stabilizer reduces camcorder blur (blur due to the cam-corder moving) so you can get nice, stable shots. Select the image sta-bilization mode according to the shooting conditions. In mode, this function is set to [ Q Standard] and cannot be changed. * Availab...
Page 63 - The camcorder will start recording 3 seconds before you press
Video 63 Pre-Recording The camcorder will start recording 3 seconds before you press g , ensuring you do not miss important shooting opportuni- ties. This is especially useful when it is difficult to predict when to start recording. 1 Activate the pre-recording function. • d appears. • Repeat, sel...
Page 64 - Face Detection; POINTS TO CHECK; To select the main subject
64 Video Face Detection The camcorder automatically detects people’s faces and uses this information to select the optimal settings for beautiful videos and pho-tos. POINTS TO CHECK • Select a recording program other than [ q Night Scene], [ p Low Light] or [ M Fireworks]. By default, face detecti...
Page 65 - than 1/25 or when the digital zoom is activated at more than 80x zoom.
Video 65 • Face detection cannot be used when the shutter speed used is slower than 1/25 or when the digital zoom is activated at more than 80x zoom. • When face detection is activated, the slowest shutter speed used by the camcorder is 1/25. Touch & Track When recording people, face detection...
Page 66 - Video Snapshot; 7) to create your own fun music video. You; Recording Video Snapshot Scenes; Press
66 Video Video Snapshot Record a series of short scenes or capture short scenes from a movie you have previously recorded. Play your video snapshot scenes set to your favorite music ( 0 77) to create your own fun music video. You will be surprised how by changing the background music, you can give...
Page 67 - Digital Effects; Press
Video 67 Digital Effects * You can preview the digital effect on the screen. • The icon of the selected digital effect appears in green. Effects are applied immediately. To fade in/out Press g in record pause mode ( M ) to start recording with a fade in. Press g while recording ( N ) to fade out a...
Page 68 - Manual Exposure Adjustment
68 Video • Faders cannot be used when recording video snapshot scenes or when pre-recording is activated. Manual Exposure Adjustment At times, backlit subjects may appear too dark (underexposed) or sub-jects under very strong lights may appear too bright or glaring (overex-posed). To correct this,...
Page 69 - Manual Focus Adjustment
Video 69 NOTES • If the recording program is changed during exposure lock, the cam- corder will return to automatic exposure. • When shooting subjects with a strong light source behind them, the camcorder automatically corrects for the backlight. You can turn off the automatic backlight correction...
Page 70 - ] to lock the focus at the selected distance.
70 Video 3 Touch and hold [ l ] or [ W ] to adjust the focus. • The center of the screen will be magnified to help you focus more easily. You can also turn off this function with the 7 8 [Focus Assistance] setting. • The focusing distance displayed will change as you adjust the focus. You can chan...
Page 71 - White Balance; To set the custom white balance; When the adjustment is completed,
Video 71 NOTES • Any of the following actions will deactivate tele-macro. - Turning off the camcorder.- Changing the camcorder's operating mode.- Zooming out toward wide angle.- Setting the recording program to [ M Fireworks]. • Tele-macro cannot be activated or deactivated while recording.• You c...
Page 73 - Audio Recording Level; Open the manual audio recording level adjustment screen.
Video 73 For photos: Press j , first halfway to activate the autofocus and then fully. The camcorder will record the photo after a 10-second countdown. The countdown appears on the screen. NOTES • Once the countdown has begun, any of the following actions will cancel the self timer.- Pressing g (w...
Page 74 - ] to adjust the audio recording level as; To display the audio level indicator; Using Headphones
74 Video 2 Touch and hold [ y ] or [ A ] to adjust the audio recording level as necessary. As a guideline, adjust the audio recording level so that the audio level meter will go to the right of the -12 dB mark only occasionally. 3 Touch [ a ] to lock the audio recording level at the current level....
Page 75 - To adjust the volume during playback; To continue adjusting the volume:; Drag your finger left and right along
Video 75 * Only when performing the procedure in mode. • J appears. To adjust the volume during playback In mode, and in mode during slideshow playback, you can adjust the headphone's volume the same way you adjust the speaker's volume ( 0 50). IMPORTANT • When using headphones, make sure to lower...
Page 76 - Selecting the Playback Starting Point; Open the date index screen.; Desired scene
76 Video Selecting the Playback Starting Point If you have a very long scene, you may want to start playing back the scene from a certain point. You can use the movie timeline to break the scene to segments at fixed time intervals ranging from 6 seconds to 6 minutes. 1 Open the date index screen. ...
Page 77 - To change the interval between frames; Playing Back Scenes or Slideshow Set to Background Music; The music files; Desired interval
Video 77 To change the interval between frames Playing Back Scenes or Slideshow Set to Background Music You can play back scenes in the date index screen, stories in the gal-lery and photo slideshows set to background music using one of the supplied tracks. You can also mix the original sound with...
Page 78 - To play back scenes from the date index screen; To play back scenes by rating in a story; Select the story that contains the scenes to play back.; Orange frame that appears to the right of
78 Video To play back scenes from the date index screen 3 Touch a scene. To play back from a particular scene in a story 3 Select the story that contains the scenes to play back. Drag your finger right/left to bring the desired story to the front. 4 Play back the scenes. To play back scenes by rat...
Page 79 - Play back the scenes with a particular rating.; To play back a slideshow from the photo index screen; Touch a photo to go to single photo view and continue with the; To delete a music track; In the music track selection screen, touch [; Desired rating
Video 79 4 Play back the scenes with a particular rating. To play back a slideshow from the photo index screen 3 Touch a photo to go to single photo view and continue with the slideshow procedure ( 0 104). To delete a music track In the music track selection screen, touch [ Z ] or [ O ] to select ...
Page 80 - Onscreen Displays and Data Code; You can turn most onscreen displays on or off.
80 Video NOTES • Initializing a memory card will permanently erase any music files you may have transferred from the supplied Camcorder Supplemental Disc to the card. ( / / The music files that come pre-installed in the built-in memory will be restored after it is initialized.) - Windows users: Us...
Page 81 - Rating Scenes; Rating Scenes Right After Recording; Off] to deactivate rating scenes after recording.; About the Data Code
Video 81 * Pressing h will turn off most of the icons and displays that appear automati- cally but will not remove onscreen displays that were turned on manually (for example, onscreen markers or the audio level meter). ** Touch the screen to display the playback controls. Rating Scenes You can as...
Page 82 - Rating Scenes in the Gallery; Drag your finger right/left to bring the desired story to the front.; Rating Scenes During Playback; Touch the screen
82 Video Rating Scenes in the Gallery 1 From the gallery screen, select the story that contains the scenes to rate. Drag your finger right/left to bring the desired story to the front. 2 Touch [Scene List]. 3 When the desired scene appears in the orange bar, touch the frame on the right side. • Yo...
Page 83 - Playing Back Scenes by Rating; You can play back scenes that have a particular rating.
Video 83 Playing Back Scenes by Rating You can play back scenes that have a particular rating. 1 From the gallery screen, select the story that contains the scenes to play back. Drag your finger right/left to bring the desired story to the front. 2 Select a rating. 3 Touch the story's thumbnail. I...
Page 84 - Gallery and Scene Operations; Managing Stories; Creating a New Story; Open the gallery screen.
84 Video Gallery and Scene Operations Managing Stories The gallery initially contains two groups, [Unsorted] for your regular scenes and [Video Snapshot] for your video snapshot scenes. In addi-tion, you can create new groups, or “stories”, which contain scenes of your choosing, arranged in an ord...
Page 85 - To delete individual scenes; From the gallery screen, select the story that contains the scene; To delete scenes by rating; You can delete all the scenes in a story with a particular rating.; • The scenes are deleted and the gallery screen appears.
Video 85 To delete individual scenes 1 From the gallery screen, select the story that contains the scene to delete. 2 Delete the scene. • The scene is deleted and the gallery screen appears. To delete scenes by rating You can delete all the scenes in a story with a particular rating. 1 From the ga...
Page 86 - To delete a story; You can delete new stories that you have created.; • The story is deleted and the gallery screen appears.; Moving or Copying Scenes in the Gallery; To move individual scenes
86 Video To delete a story You can delete new stories that you have created. 1 From the gallery screen, select the story to delete. Drag your finger right/left to bring the desired story to the front. 2 Delete the story. * Touch [Stop] to interrupt the operation while it is in progress. Some scene...
Page 87 - Touch the thumbnail of the story where you want to move or copy; To move scenes by rating
Video 87 4 Touch [Move] or [Copy]. Thumbnails of each story (except for [Unsorted] and [Video Snapshot]) will appear. 5 Touch the thumbnail of the story where you want to move or copy the scenes. If you are moving or copying scenes to an empty story, skip to step 7. 6 Drag your finger up and down ...
Page 88 - • The scenes are moved and the gallery screen of the source story; Capturing Video Snapshot Scenes and Photos from a Movie; Capturing a Video Snapshot Scene; Thumbnail of the story where you want to move
88 Video 4 Move the scenes. • The scenes are moved and the gallery screen of the source story appears. IMPORTANT • You cannot move or copy scenes to [Unsorted] or [Video Snapshot]. Capturing Video Snapshot Scenes and Photos from a Movie You can capture video snapshot scenes or photos from a previo...
Page 89 - Capturing Photos; Play back the scene from which you want to capture the photo.
Video 89 • The captured video snapshot scene is saved to the same memory that contains the source scene. • In the gallery screen, a captured video snapshot scene is saved in [Video Snapshot] as the last scene. • Video snapshot scenes cannot be captured from any of the following types of scenes.- S...
Page 90 - Dividing Scenes; You can also divide a scene in a story.
90 Video IMPORTANT • When capturing photos on an Eye-Fi card in memory card slot Y , pho- tos will be uploaded automatically when the camcorder is in playback mode if you are within the range of a configured network. Always verify that Eye-Fi cards have been approved in the country/region of use. ...
Page 92 - Decorating Scenes; Decorating while Recording; Open the decoration screen.
92 Video Decorating Scenes Add a new level of enjoyment to scenes by decorating them. You can add animated graphics, stamps, even your own drawings with the sup-plied stylus pen, and more! Decorating while Recording 1 Open the decoration screen. • You can open the decoration screen when the LCD pa...
Page 93 - Use a tool from the toolbar.
Video 93 2 Use a tool from the toolbar. See below for an explanation of each tool. 3 Press g to record. The onscreen decorations will be included in the recording. A Canvas: This is the area on which you will draw and see your decorations in action. Items B to G collectively make up the toolbar an...
Page 94 - ] and select a color from the displayed; To clear the [Pens and Stamps] decorations
94 Video To use ([Pens and Stamps]) 1 Touch [ ]. The [Pens and Stamps] screen will appear. 2 Select the desired pen or stamp from [Tools]. You can also clear the canvas, save a canvas or load a canvas. See the following procedures. 3 Select white or black from [Colors]. Alternatively, you can touc...
Page 95 - Select the desired stamp number.; To use; • The selected option will appear on the screen. Touch both control; To use; : only when recording on or playing back scenes from a memory
Video 95 To use ([Animated Stamps]) 1 Touch [ ]. The [Animated Stamps] screen will appear. 2 Select the desired stamp number. 3 Touch a spot on the canvas to place the selected stamp. To use J ([Date and Time]) 1 Touch [ J ]. 2 Touch [Date] or [Time] and then touch [ f ]. • The selected option wil...
Page 96 - The control button will change to [; Decorating during Playback; tions will be superimposed on the SD movies*.
96 Video To use (freeze screen) 1 Touch [ ]. The control button will change to [ ] and the picture will be frozen. 2 Decorate the screen using the other tools in the palette. 3 Touch [ ]. The screen will return to normal. NOTES • If the memory that contains the canvas is initialized, the canvas wi...
Page 97 - MEMO
Video 97 MEMO . . . . . . . . . . . . . . . . . . . . . . . . . . . . . . . . . . . . . . . . . . . . . . . . . . . . . . . . . . . . . . . . . . . . . . . . . . . . . . . . . . . . . . . . . . . . . . . . . . . . . . . . . . . . . . . . . . . . . . . . . . . . . . . . . . . . . . . . . . . . . . ...
Page 98 - Smart AUTO; Viewing Photos
98 Photos Photos Refer to this chapter for details on taking and viewing photos. For details about basic photo shooting, refer to Smart AUTO Mode ( 0 40). Basic Playback Viewing Photos 1 Press S . 2 Open the [Photos] index screen. 3 Look for the photo you want to play back. Move the zoom lever tow...
Page 99 - Touch the photo you wish to view.; To return to the index screen from single photo view; Photo Jump Function; Drag your finger left and right along the scroll
Photos 99 4 Touch the photo you wish to view. • The photo is displayed in single photo view. • Drag your finger left/right to browse through the photos one by one. To return to the index screen from single photo view 1 Touch the screen to display the playback controls. 2 Touch [ Q ]. Photo Jump Fu...
Page 100 - Deleting Photos; You can delete those photos that you are not interested in keeping.; Deleting a Single Photo; In single photo view, select the photo you want to delete.
100 Photos IMPORTANT • Observe the following precautions while the ACCESS indicator is on or flashing. Failing to do so may result in permanent data loss.- Do not open the double memory card slot cover.- Do not disconnect the power source or turn off the camcorder.- Do not change the camcorder’s o...
Page 101 - Deleting Photos from the Index Screen; From the index screen, you can delete selected photos or all photos.; Desired option
Photos 101 Deleting Photos from the Index Screen From the index screen, you can delete selected photos or all photos. 1 Open the [Photos] index screen. 2 Select the photos to delete. If you selected [Select], touch the photos to delete and then touch [OK]. A checkmark O will appear on selected pho...
Page 102 - Additional Functions; Taking Photos in Flexible Recording Mode
102 Photos Additional Functions Taking Photos in Flexible Recording Mode 1 Turn on the camcorder. • / / By default, photos are recorded in the built-in memory. You can set the memory card as the recording media for photos ( 0 36). • Please read the IMPORTANT section ( 0 103) before using an Eye-Fi...
Page 103 - Selecting Photo Size; 920x1080], the photo will be recorded in a wide aspect ratio.
Photos 103 IMPORTANT • Observe the following precautions while the ACCESS indicator is on or flashing. Failing to do so may result in permanent data loss.- Do not open the double memory card slot cover.- Do not disconnect the power source or turn off the camcorder.- Do not change the camcorder’s o...
Page 104 - Slideshow; You can play a slideshow of all the photos and even set it to music.; To change the slideshow’s transition effects
104 Photos NOTES • The actual number of photos that can be recorded will vary depending on the subject and shooting conditions. • The camcorder retains the last setting used even if you set the cam- corder to mode. • When printing photos, use the following guidelines as a reference for selecting t...
Page 105 - • Recording programs (
Photos 105 - r Functio ns You Can Use w hen Taking P hotos You can also use the following functions... The following functions and features of the camcorder can be used either for shooting video or for taking photos. The way to set and use them was already explained in detail, so we refer you to t...
Page 106 - External Connections; Terminals on the Camcorder; USB Terminal
106 External Connections External Connections This chapter explains how to connect your camcorder to an external device such as a TV, VCR, or computer. Terminals on the Camcorder * When connecting a cable to the camcorder, make sure to align the cable so the tri- angle mark on the connector is fac...
Page 107 - Connection Diagrams; Connection; Type: Digital Quality: High definition Output only; About the HDMI; connection; Appendix: Menu Options Lists
External Connections 107 Connection Diagrams In the following connection diagrams, the left side shows the terminals on the camcorder and the right side shows (for reference only) an example of terminals on a connected device. Connection A HDMI Type: Digital Quality: High definition Output only Co...
Page 109 - Playback on a TV Screen; Turn off the camcorder and the TV.
External Connections 109 Playback on a TV Screen Connect the camcorder to a TV to enjoy your recordings with family and friends. Playback on an HDTV using one of the high-definition con-nections will ensure the best playback quality. 1 Turn off the camcorder and the TV. 2 Connect the camcorder to ...
Page 110 - Turn on the camcorder and set it to
110 External Connections 4 Turn on the camcorder and set it to or mode. Play back the movies or photos. NOTES • To correctly play back movies recorded with x.v.Color ( 0 135) on an HDTV compatible with this standard, additional settings may be required on the connected HDTV. Refer to the TV’s inst...
Page 111 - Saving and Sharing Your Recordings; Copying Recordings to a Memory Card; Copying Scenes from the Date Index Screen; Open the index page in the date index screen that contains the
External Connections 111 Saving and Sharing Your Recordings Copying Recordings to a Memory Card You can copy your recordings to a memory card but only to memory card Y . For / / , the recordings to be copied must be in the built-in memory or on memory card X . For / , the recordings must be on mem...
Page 112 - will appear on selected scenes. Touch a selected; Copying Scenes by Rating from the Gallery; Copying a Single Photo; In single photo view, select the photo you want to copy.; Desired rating marker
112 External Connections If you selected [Select], touch the scenes to copy and then touch [OK]. A checkmark O will appear on selected scenes. Touch a selected scene again to remove the checkmark. You can also touch [Remove All] to remove all checkmarks. 3 Touch [Yes] 8 [OK]. Touch [Stop] to inter...
Page 113 - Copying Photos from the Index Screen; From the index screen, you can copy selected photos or all photos.
External Connections 113 Copying Photos from the Index Screen From the index screen, you can copy selected photos or all photos. 1 Open the photo index screen. After pressing [ b ], select the f tab to copy photos from the built- in memory ( / / only) or the 4 tab to copy photos from memory card X...
Page 114 - Saving Recordings on a Computer; Saving Movies; Transfer Utility; Installation
114 External Connections NOTES • In the following cases, you will not be able to copy recordings to the memory card:- If the double memory card slot cover is open.- If the LOCK switch on memory card Y is set to prevent writing. - If there is no memory card in memory card slot Y . • Scenes that wer...
Page 115 - Connecting the Camcorder to a Computer; Saving Photos; With the supplied software; Photo Application; you can save photos to; Installing Photo Application.
External Connections 115 Connecting the Camcorder to a Computer 1 Power the camcorder using the compact power adapter. 2 Open the date index screen or gallery screen. 3 Connect the camcorder to the computer using the supplied USB cable. Connection D . Refer to Connection Diagrams ( 0 107). 4 Camco...
Page 116 - Using the software; Power the camcorder using the compact power adapter.; When the camcorder is connected to a computer:
116 External Connections Using the software 1 Power the camcorder using the compact power adapter. 2 Set the camcorder to mode, in single photo view. 3 Connect the camcorder to the computer using the supplied USB cable. Connection D . Refer to Connection Diagrams ( 0 107). 4 Save the photos onto t...
Page 117 - See the Installation Guide for PIXELA’s software.
External Connections 117 NOTES • Refer also to the computer’s instruction manual.• Users of Windows 7, Windows Vista, Windows XP and Mac OS X: Your cam- corder is equipped with the standard Picture Transfer Protocol (PTP) allowing you to transfer photos (JPEG only) simply by connecting the camcord...
Page 118 - Copying Recordings to an External Video Recorder; In High Definition; Connecting; In Standard Definition
118 External Connections Copying Recordings to an External Video Recorder In High Definition Connect the camcorder to Blu-ray Disc recorders and other AVCHD-compatible digital video recorders using the supplied USB cable to make perfect copies of your movies in high definition. If the external dig...
Page 119 - Connect the camcorder to the VCR using Connection; • We recommend powering the camcorder using the compact power; Uploading Movies to Video Sharing Web Sites; You can complete the conversion to standard defini-
External Connections 119 Connecting Connect the camcorder to the VCR using Connection C or 3 . Refer to Connection Diagrams ( 0 107). Recording 1 External device: Load a blank media and set the device to record pause mode. 2 Turn on the camcorder and set it to mode. • We recommend powering the cam...
Page 120 - Refer to the Software Guide (PDF file) of the supplied software.; Converting Scenes into Standard Definition from the
120 External Connections Installation See the Installation Guide for PIXELA’s software. Using the software Refer to the Software Guide (PDF file) of the supplied software. / / Converting Scenes into Standard Definition from the Date Index Screen You can convert scenes on a specific date, scenes yo...
Page 121 - When the conversion is completed, a confirmation screen will; Auto Divide
External Connections 121 6 Touch [Next] 8 [START]. • Before touching [Next], you can touch [ 5 ] to change the conversion settings as described below. • Before touching [START], you can add decorations or adjust the audio balance. Touch [ ] to decorate the scene ( 0 92) or [ ] to adjust the audio ...
Page 123 - • When converting scenes in a story:; - The scenes cannot be converted when their total playback time; Converting Only Part of a Scene or Story; Converting Scenes into Standard Definition from
External Connections 123 NOTES • When converting scenes in a story: - All the scenes are merged into one converted scene.- If the converted scene is too large, it will be split into smaller 10-minute long scenes. - The scenes cannot be converted when their total playback time exceeds 2 hours and 3...
Page 124 - Connecting to the Computer and Uploading your Videos
124 External Connections Connecting to the Computer and Uploading your Videos If you are connecting the camcorder to the computer immediately after the conversion described in the previous section, start this procedure from step 3 below. Otherwise, start this procedure from the beginning. 1 Power ...
Page 125 - Uploading your Videos Wirelessly; SD Movies] index screen to your favorite video sharing; Using an Eye-Fi Card
External Connections 125 / / Uploading your Videos Wirelessly If you are using an Eye-Fi card, you can automatically upload the mov-ies from the [ u SD Movies] index screen to your favorite video sharing Web site. You will need to have installed the software supplied with your Eye-Fi card and comp...
Page 126 - • About power saving:
126 External Connections NOTES • Depending on the amount of data to be uploaded and the network's wireless connection conditions, it can take some time to upload video files. If the wireless connection is too weak, the wireless upload may fail and the video files will be registered as incomplete u...
Page 127 - Open the menus
Additional Information 127 Additional Information This chapter contains troubleshooting advice, screen mes-sages, handling and maintenance tips, and other information. Appendix: Menu Options Lists Menu items not available appear grayed out. For details about how to select an item, refer to Using t...
Page 128 - Control Button
128 Additional Information * Not available for photos. [ e Exposure] [ y ] (manual exposure): Toggle on or off, Touch AE frame – z 68 [ZOOM] Zoom controls, [START]/[STOP] control,Tele-macro: Toggle on or off z z 44, 70 [ c Mic. Level]* [ z Automatic], [ y Manual] [Audio Level Indicator]: Toggle on...
Page 129 - Mode
Additional Information 129 Setup Menus Edit Panel - Mode * Not available for recordings on memory card B ( 7 tab). Control Button Date Index Screen [SD Movies] Index Screen Playback Pause 0 / / [Copy ( f97 )]* [Copy ( 497 )]* <date> , [Select], [All Scenes] – – 111 / / [Convert HD U SD ( f97...
Page 131 - Camera Setup
Additional Information 131 Edit Panel - Mode Setup Menus 7 Camera Setup * Not available for photos. Control Button Photo Index Screen Single Photo View 0 / / [Copy ( f97 )] [Copy ( 497 )] [Select], [All Photos] z 112 [Delete] [Select], [All Photos] z 100 Menu item Setting options 0 [Zoom Type] [Op...
Page 133 - Playback Setup; Displays the date and/or time when the scene was recorded.
Additional Information 133 y / z Playback Setup * Option not available when the camcorder is connected to an HDTV using the sup- plied HDMI cable. [Data Code]: Displays the date and/or time when the scene was recorded. [ L Camera Data]: Displays the aperture (f-stop) and shutter speed used when re...
Page 134 - Recording & Connections Setup; Menu item
134 Additional Information 8 Recording & Connections Setup Menu item Setting options 1 2 0 [Self Timer] [ A On n ], [ B Off] z – – 72 [Video Snapshot Length]* [ i 2 sec], [ j 4 sec], [ l 8 sec] z z – 66, 88 [Rate Scenes (Recording)]* [ A On], [ B Off] z – – 81 [Rec Media for Movies]* / / [ f ]...
Page 136 - Select the photo numbering method to be used on a
136 Additional Information [Photo Numbering]: Select the photo numbering method to be used on a new memory card. Photos are automatically assigned consecutive num-bers from 0101 to 9900, and stored in folders containing up to 100 pho-tos. Folders are numbered from 101 to 998.[ a Reset]: Photo numb...
Page 137 - System Setup; and
Additional Information 137 6 System Setup In this table, 4 and 3 refer to movies and photos in mode, respectively. Menu item Setting options 1 2 0 [Output Onscreen Displays] [ A On], [ B Off] z z z – [Language a ] [ ], [Dansk], [Deutsch], [ ], [English], [Español], [Français], [Italiano], [Magyar]...
Page 141 - The demonstration mode displays the camcorder's main
Additional Information 141 [Demo Mode]: The demonstration mode displays the camcorder's main features. It starts automatically when the camcorder is powered with the compact power adapter if you leave it turned on without a memory card for more than 5 minutes.• To cancel the demo mode once it has ...
Page 142 - Appendix: Onscreen Icons and Displays
142 Additional Information Appendix: Onscreen Icons and Displays Recording Movies (in Smart AUTO mode) 1 Control button: Open the FUNC. panel ( 0 29) 2 Smart AUTO mode ( 0 40) 3 Onscreen zoom controls ( 0 45) 4 Operating mode ( 0 27) 5 In record pause mode: Total number of scenes 6 Memory operatio...
Page 143 - Recording Movies (in Flexible Recording mode)
Additional Information 143 Recording Movies (in Flexible Recording mode) Top row of icons during record pause mode A g Recording program ( 0 59, 61) A h Manual exposure ( 0 68) A j N Autofocus, MF Manual focus ( 0 69) A k Face detection ( 0 64) A l White balance ( 0 71) S q Audio level indicator (...
Page 144 - Recording Photos (in Flexible Recording mode)
144 Additional Information Recording Photos (in Flexible Recording mode) D d Self timer ( 0 72) D f Number of available photos 4 , 7 On memory card X or Y / / f In the built-in memory D g Displays the aperture (f-stop) and shutter speed used. D h Focus and exposure lock ( 0 40, 102) Playing Movies...
Page 147 - CHECK THIS FIRST; Power supply; • Is the battery charged? Is the compact power adapter correctly con-; • Did you turn the camcorder on and correctly set it to a recording; • Did you turn the camcorder on and correctly set it to playback mode?
Additional Information 147 Trou ble? Troubleshooting If you have a problem with your camcorder, refer to this section. Some-times what you think is a malfunction of the camcorder may have the simplest of solutions - please read the “CHECK THIS FIRST” box before going on to the more detailed proble...
Page 150 - Indicators and Onscreen Displays
150 Additional Information - Music tracks will not play back correctly if the connection was interrupted while transferring the music files from the Camcorder Supplemental Disc. Delete the music tracks and transfer the music files again. - The transfer rate of the memory card used is too slow. Use...
Page 151 - Picture and Sound
Additional Information 151 o appears on the screen - The LOCK switch on the Eye-Fi card is set to prevent accidental erasure. Change the position of the LOCK switch. - An error occurred when trying to access control data on the Eye-Fi card. Turn the camcorder off then on again. If the icon appears...
Page 152 - Memory Card and Accessories
152 Additional Information Memory Card and Accessories Cannot insert the memory card. - The memory card was not facing the correct direction. Turn the memory card over and insert it. Cannot record on the memory card. - The memory card is full. Delete some recordings ( 0 54, 100) to free some space...
Page 153 - Connections with External Devices
Additional Information 153 Connections with External Devices Video noise appears on the TV screen. - When using the camcorder in a room where a TV is located, keep a distance between the compact power adapter and the power or antenna cables of the TV. Playback looks fine on the camcorder but there...
Page 154 - List of Messages
154 Additional Information List of Messages Accessing the memory card. Do not remove the memory card. - You opened the double memory card slot cover while the camcorder was accessing the mem- ory card or the camcorder started accessing the memory card as you opened the double memory card slot cove...
Page 161 - Handling Precautions; Camcorder; Save your recordings periodically.
Additional Information 161 Do ’s and Don ’ts Handling Precautions Camcorder Be sure to observe the following precautions to ensure maximum per-formance. • Save your recordings periodically. Make sure to transfer your record- ings to an external device such as a computer or digital video recorder (...
Page 162 - Battery Pack; Treat the battery pack with care.
162 Additional Information • Do not insert the supplied stylus pen into the mouth. If swallowed, seek medical assistance immediately. • Handle the supplied stylus pen with extreme care and keep it out of the reach of children. If mishandled, the stylus pen can present a risk of severe eye injury a...
Page 163 - Remaining battery time
Additional Information 163 Long-term storage • Store battery packs in a dry place at temperatures no higher than 30 ° C. • To extend the battery life of the battery pack, discharge it completely before storing it. • Charge and discharge all your battery packs fully at least once a year. Remaining ...
Page 164 - • Do not attach any labels or stickers on the memory card.; Built-in Rechargeable Lithium Battery; To recharge the built-in lithium battery:; Connect the compact power; Disposal; only) or memory card using the
164 Additional Information • Check the direction before inserting the memory card. Forcing a mem- ory card into the slot if it is not correctly oriented may damage the mem-ory card or the camcorder. • Do not attach any labels or stickers on the memory card. • Secure Digital (SD) memory cards have ...
Page 165 - Cleaning; Camcorder Body; treated cloths or volatile solvents such as paint thinner.; Lens; ature changes suddenly. Wipe it with a soft dry cloth.; Condensation; Condensation may form in the following cases:; • Do not expose the camcorder to sudden or extreme changes in tem-
Additional Information 165 Maintenance/Others Cleaning Camcorder Body • Use a soft, dry cloth to clean the camcorder body. Never use chemically treated cloths or volatile solvents such as paint thinner. Lens • If the lens surface is dirty, autofocus may not work properly.• Remove any dust or dirt ...
Page 166 - When condensation is detected; Using the Camcorder Abroad; Power Sources; All of Europe and Russia.
166 Additional Information When condensation is detected The camcorder automatically shuts off. The precise time required for water droplets to evaporate will vary depending on the location and weather conditions. As a general rule, wait for 2 hours before resuming use of the camcorder. Using the ...
Page 167 - Accessories; (Availability differs from area to area)
Additional Information 167 General I nformation Accessories * Supplied with the camcorder; not available as an optional accessory. (Availability differs from area to area) Optional accessories not listed below are described in more detail in the following pages. 1 SS-600/SS-650 Shoulder Strap A s ...
Page 168 - Optional Accessories; Battery Packs; Use of genuine Canon accessories is recommended.; Charging conditions
168 Additional Information Optional Accessories 4 Battery Packs When you need extra battery packs, select the BP-110. When you use battery packs bearing the Intelligent System mark, the camcorder will communicate with the battery and display the remaining usage time (accurate to 1 minute). You can...
Page 169 - Using the built-in memory; • The minimum focusing distance at full
Additional Information 169 playback conditions. The effective usage time of the battery pack may decrease when recording in cold surroundings, when using the brighter screen settings, etc. / / Using the built-in memory Using a memory card * Approximate times for recording with repeated operations ...
Page 170 - SC-2000 Soft Carrying Case
170 Additional Information 9 SC-2000 Soft Carrying Case A handy camcorder bag with padded compartments and plenty of space for accessories. This mark identifies genuine Canon video accessories. When you use Canon video equipment, we recommend Canon-brand accessories or products bearing the same ma...
Page 171 - Specifications; — Values given are approximate figures.; System
Additional Information 171 Specifications LEGRIA HF R28 / LEGRIA HF R27 / LEGRIA HF R26 / LEGRIA HF R206 / LEGRIA HF R205 — Values given are approximate figures. System • Recording System Movies: AVCHD Video compression: MPEG-4 AVC/H.264; Audio compression: Dolby Digital 2ch Photos: DCF (Design ...
Page 173 - Terminals
Additional Information 173 • Filter Diameter: 34 mm • Minimum Focusing Distance 1 m*; 1 cm at full wide angle* 40 cm at full-telephoto when tele-macro is on • White Balance Auto white balance, Custom white balance or Preset white balance settings:Daylight, Tungsten • Minimum Illumination 0.4 lx ([...
Page 175 - About the music files
Additional Information 175 About the music files The specifications of the music files compatible with the camcorder are as follows. Audio encoding: Linear PCM Audio sampling: 48 kHz, 16 bits, 2 channels Minimum length: 1 second File type: WAV The music data (WAV) and image files (JPG) are saved i...
Page 176 - Index
176 Additional Information Index 3D Flip View . . . . . . . . . . . . . . . . . 52 A Abroad, using the camcorder . . . . 166 Aspect ratio of a connected TV (TV type) . . . . . . . . . . . . . . . . . . 133 Audio recording level . . . . . . . . . . . 73 Auto slow shutter . . . . . . . . . . . . 132...


 Canon LEGRIA HF R76 User Manual
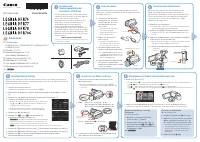 Canon LEGRIA HF R77 Manual
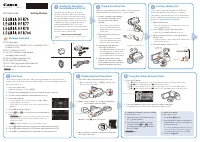 Canon LEGRIA HF R78 User Manual
 Canon LEGRIA HF R86 Manual
 Canon LEGRIA HF R87 User Manual
 Canon LEGRIA HF R88 User Manual
 Canon LEGRIA HF R406 User Manual
 Canon LEGRIA HF R506 User Manual
 Canon LEGRIA HF R706 User Manual
 Canon LEGRIA HF R806 User Manual
 Canon LEGRIA HF S10 User Manual
 Canon LEGRIA HF S21 User Manual