Page 2 - Important Usage Instructions; Downloaded From VideoCamera-Manual.com Manuals
2 Introduction Important Usage Instructions WARNING! TO REDUCE THE RISK OF ELECTRIC SHOCK, DO NOT REMOVE COVER (OR BACK). NO USER SERVICEABLE PARTS INSIDE. REFER SERVICING TO QUALIFIED SERVICE PERSONNEL. WARNING! TO REDUCE THE RISK OF FIRE OR ELECTRIC SHOCK, DO NOT EXPOSE THIS PRODUCT TO RAIN OR MOI...
Page 3 - Getting to Know the Camcorder; What is so special about recording on flash memory?
3 Getting to Know the Camcorder What is so special about recording on flash memory? Your videos and photos are recorded in the built-in memory ( / only) or on a memory card (SD or SDHC card). Recording on flash memory means that there are no moving parts in the recorder unit of the camcorder. To you...
Page 4 - Table of contents; Overview
4 Table of contents Introduction ______________________________ 3 Getting to Know the Camcorder 8 About this Manual 10 Overview 10 Supplied Accessories and CD-ROMs 11 Components Guide 13 Screen Displays Preparations _____________________________ 16 Getting Started 16 Charging the Battery Pack 18 Pre...
Page 5 - Basic Recording
5 Table of contents Video ____________________________________ 30 Basic Recording 30 Shooting Video 31 Selecting the Video Quality (Recording Mode) 31 Zooming: Optical, Advanced and Digital Zoom 33 Quick Start Function 34 Basic Playback 34 Playing Back the Video 35 Selecting What Recordings to Play ...
Page 7 - Appendix: Menu Options Lists
7 Table of contents Additional Information ______________________ 77 Appendix: Menu Options Lists 77 FUNC. Menu 79 Setup Menus 85 Trouble? 85 Troubleshooting 89 List of Messages 97 Do’s and Don’ts 97 Handling Precautions 100 Maintenance/Others 100 Using the Camcorder Abroad 101 Music Files 102 Gener...
Page 8 - Troubleshooting; Conventions Used in this Manual; About this Manual
Introduction 8 Thank you for purchasing the Canon LEGRIA FS37/FS36/FS307/FS306/FS305*. Please read this manual carefully before you use the camcorder and retain it for future reference. Should your camcorder fail to operate correctly, refer to Troubleshooting ( 85). * Availability differs from area ...
Page 9 - arrow is used to abbreviate menu selections.
9 Speci a l Scene Recording Progr a ms [ PRO G RAM AE] [ PORTRAIT] Pre ss to di s play the S pecial S cene ( S CN) recording program s De s ired recording program ( 25) FUNC. FUNC. Recording in a very bright sk i re s ort or capturing the full color s of a s un s et or a firewor ks di s play become ...
Page 10 - The following accessories are supplied with the camcorder.; Supplied Accessories and CD-ROMs; PIXELA Application - Disc 1; CD-ROM* and ‘PIXELA Applications Installation Guide’; PIXELA Application - Disc 2
Introduction 10 Ov erview The following accessories are supplied with the camcorder. The following CD-ROMs and software are supplied with the camcorder. * The CD-ROM includes the instruction manual of the software (electronic version on PDF file). Supplied Accessories and CD-ROMs CA-570 Compact Powe...
Page 11 - Components Guide; Left side view
11 Components Guide Left side view Front view Right side view RESET button ( 88) VIDEO SNAP (Video Snapshot) button ( 43)/ (print/share) button ( 64) DISP. (on-screen display) button ( 50, 61)/ BATT. INFO button ( 15) USB terminal ( 69) AV OUT terminal ( 69) Speaker ( 34) Strap mount ( 18) ACCESS (m...
Page 12 - Back view
Introduction 12 Back view Bottom view Top view LCD screen ( 19) ON/OFF(CHG) (power/charge) indicator ( 17) Camera mode dial ( 21) Start/Stop button ( 30) (camera/play) button ( 22) PLAYLIST button ( 51)/ Zoom in T (telephoto) button ( 31) (stop) button ( 34)/ Zoom out W (wide-angle) button ( 31) / (...
Page 13 - Recording Movies; Screen Displays
13 Recording Movies Playing Movies (During Playback) Screen Displays Operating mode ( 21) Recording program ( 40, 41) White balance ( 48) Image effects ( 49) Digital effects ( 49) Recording mode ( 31) Manual focus ( 47) Image stabilizer ( 79) Pre-recording function ( 45) Memory operation ( 15) Numbe...
Page 14 - Recording Photos
Introduction 14 Recording Photos Viewing Photos Zoom ( 31), Exposure ( 46) Recording program ( 40, 41) White balance ( 48) Image effect ( 49) Digital effect ( 49) Photo quality/size ( 55) Manual focus ( 47) Remaining battery time ( 15) Number of photos available ( 15) On the memory card / In the bui...
Page 16 - Preparations; Charging the Battery Pack; Getting Started
16 Preparations This chapter describes basic operations, such as navigating the menus, and first time settings to help you learn more about your camcorder. Charging the Battery Pack The camcorder can be powered with a battery pack or directly using the compact power adapter. Charge the battery pack ...
Page 17 - IMPORTANT; • Turn off the camcorder before
17 7 Charging will start when the camcorder is turned off. • The ON/OFF(CHG) indicator starts flashing in red. The indicator will go out when the charging is completed. • If the indicator flashes quickly, refer to Troubleshooting ( 85). 1 Disconnect the compact power adapter from the camcorder. 2 Un...
Page 18 - • Turn off the camcorder before charging; Preparing the Accessories; Fasten the grip belt.; button with; Lift the padded handgrip’s flap
Preparations 18 supplied compact power adapter to voltage converters for overseas travels or special power sources such as those on aircraft and ships, DC-AC inverters, etc. NOTES • Turn off the camcorder before charging the battery pack. The battery pack will not charge while the camcorder is on. •...
Page 19 - Rotating the LCD Panel; Open the LCD panel 90 degrees.; • You can rotate the panel 90 degrees; NOTES; The screen is
19 You can also attach the wrist strap to the strap mount on the grip belt to use both for extra convenience and protection. Pass the ends of the shoulder strap through the strap mount on the grip belt and adjust the length of the strap. You can also remove the grip belt and attach the shoulder stra...
Page 20 - LCD Backlight; While the camcorder is on, hold; • This setting does not affect the
Preparations 20 no effect on the recorded image and does not constitute a malfunction. LCD Backlight You can set the brightness of the screen to dim, normal or bright. To set the screen to dim, turn on [LCD DIMMER] ( s 81). To toggle between normal and bright or to turn off [LCD DIMMER], perform the...
Page 21 - Operating Modes; Dual
21 Operating Modes The camcorder’s operating mode is determined by the button and the position of the camera mode dial. In this manual, indicates that a function is available in the operating mode shown and indicates that the function is not available. See the following table for a summary of the op...
Page 22 - Playback; In; Joystick and Joystick Guide; OFF
Preparations 22 settings to your preference. Even in flexible recording mode, the camcorder can help you with the settings. For example, you can use the Special Scene recording programs ( 40) to set at once all the optimal settings to match special recording conditions. Playback Press to switch betw...
Page 23 - Using the Menus; Menu Options Lists; ) the desired setting
23 During playback mode, select ( ) a “row” of functions and press to operate the function in the middle or push the joystick ( ) to operate the function on the left or right side of the row, respectively. In either mode, if you wait a few seconds, the joystick guide will minimize again but the sele...
Page 24 - Selecting an Option from the Setup Menus
Preparations 24 Selecting an Option from the Setup Menus 1 Press . 2 Select ( , ) the icon and press to open the setup menus. You can also hold pressed down for more than 1 second to open directly the setup menus screen. 3 Select ( ) the desired menu from the left side column and press . The title o...
Page 25 - Setting the Date and Time; to; • When you do not use the camcorder for; Changing the Language; Options; Desired language; First Time Settings; ENGLISH
25 Setting the Date and Time You will need to set the date and time of the camcorder before you can start using it. The [DATE/TIME] screen will appear automatically when the camcorder’s clock is not set. When the [DATE/TIME] screen appears, the year will be displayed in orange and indicated with up/...
Page 26 - Changing the Time Zone; Your local time zone*
Preparations 26 NOTES • If you changed the language by mistake, select the menu item with the mark and change the setting. • The displays and that appear in some menu screens refer to the name of buttons on the camcorder and will not change, regardless of the language selected. Changing the Time Zon...
Page 27 - About the SD Speed Class:; The SD Speed; Inserting and Removing a Memory Card; Turn off the camcorder.; Using a Memory Card; Memory cards usable for recording movies
27 Memory Cards Compatible for Use with the Camcorder You can use commercially available SDHC (SD high capacity) memory cards and SD memory cards with this camcorder to record movies and photos. However, depending on the memory card, you may not be able to record movies on it. Refer to the following...
Page 28 - To remove the memory card:; Push the; Selecting the Memory for; only) to permanently delete all the
Preparations 28 4 Close the cover and slide it toward the lens until you hear a click. Do not force the cover closed if the memory card is not correctly inserted. IMPORTANT Memory cards have front and back sides that are not interchangeable. Inserting a memory card facing the wrong direction can cau...
Page 29 - At the time of purchase,; The memory you; Music Transfer Utility; Music Files
29 / At the time of purchase, the built-in memory comes pre-initialized. Options / [ MENU] [ MEMORY OPER.] [INITIALIZE] The memory you want to initialize Initialization method [YES]* [OK] / / [ MENU] [ MEMORY OPER.] [INITIALIZE] Initialization method [YES]* [OK] * Press to cancel the complete initia...
Page 30 - Video; Shooting Video; You can select the; turn off the camcorder.; To save power
30 Video This chapter covers functions related to shooting movies, including recording, playback, and memory operations. Shooting Video 1 Set the camera mode dial to or . 2 Turn on the camcorder. / You can select the memory to be used for recording movies ( 28). 3 Press to begin recording. • Recordi...
Page 31 - • The camcorder uses a variable bit rate; mode, the advanced zoom and; Approximate recording times for movies
31 Selecting the Video Quality (Recording Mode) The camcorder offers 3 recording modes. Changing the recording mode will change the recording time available on the memory. Select XP mode for better movie quality; select LP mode for longer recording times. The following table gives approximate record...
Page 32 - optical zoom are available in; Using the Zoom; Move the zoom lever toward; • Keep at least 1 m away from the; About the Zoom Types; In addition to the optical zoom range, the camcorder processes the
Video 32 optical zoom are available; in mode, only the optical zoom is available. Using the Zoom Move the zoom lever toward W to zoom out (wide-angle). Move it toward T to zoom in (telephoto). Press gently for a slow zoom; press harder for faster zooms. You can also set [ZOOM SPEED] ( 79) to one of ...
Page 33 - Quick Start Function
33 - When you use the T and W buttons on the LCD panel, the zoom speed will be constant at [ SPEED 3]. Quick Start Function When you close the LCD panel with the camcorder on, the camcorder enters the standby mode. In standby mode the camcorder consumes only about half the power used when recording,...
Page 34 - Playing Back the Video; • Observe the following precautions while; Basic Playback; DJUSTING
Video 34 Playing Back the Video 1 Set the camera mode dial to or . 2 Press . • Even if the camcorder is off, pressing will turn on the camcorder in playback mode. • The original movies index screen appears after a few seconds. 3 Move ( , ) the selection frame to the scene you want to play back. Push...
Page 35 - • You may not be able to play back with; Special playback modes; Ending special playback modes; • During some special playback modes,; Selecting What Recordings to Play Back
35 movies on the memory card using this camcorder. • You may not be able to play back with this camcorder movies recorded on a memory card using another device. NOTES Depending on the recording conditions, you may notice brief stops in video or sound playback between scenes. Special playback modes T...
Page 36 - Selecting Scenes by Recording Date; POINTS TO CHECK; Selecting from the List of Recordings; Open the list of recordings.
Video 36 / / / Movies Photos Recordings in the built-in memoryRecordings on the memory card 2 Select ( ) the media ( / only) and the recording type (scenes or photos). 3 Return ( ) to the index screen to select the scene or photo. Selecting Scenes by Recording Date You can search for all the recordi...
Page 37 - Selecting from the Calendar Screen; Open the calendar screen.; • You can change on what day to start the
37 Selecting from the Calendar Screen 1 Open the original movies index screen. • From this index screen, you can also press to open the index screen for Video Snapshot scenes. • / You can select the scenes in the built-in memory or on the memory card ( 35 ). 2 Open the calendar screen. [ SCENE SEARC...
Page 39 - • Repeat this step to add all the; Press; • The selection of scenes/photos will be; Deleting Scenes; Deleting Scenes from; Desired option; • Be careful when deleting original; CANCEL; Deletes all the scenes.; selecting Recordings from the Index Screen
39 • Repeat this step to add all the scenes/photos you want to include in your selection (up to 100). 4 Press twice to close the menu. [ SELECT] [REMOVE ALL SELECTIONS] [YES] [OK] NOTES • The selection of scenes/photos will be canceled if you turn off the camcorder or change the operating mode. • Sc...
Page 40 - Special Scene Recording Programs; Advanced Functions
Video 40 • Observe the following precautions while the ACCESS indicator is on or flashing (while scenes are being deleted).- Do not open the memory card slot cover. - Do not disconnect the power source or turn off the camcorder. - Do not change the operating mode. NOTES • Deleting a scene from the o...
Page 42 - Desired; ) the shutter speed to; - If you use a slow shutter speed in dark; SET; To record in dimly lit places.
Video 42 Options Default value [ PROGRAM AE] Desired recording program* * When you select [ SHUTTER-PRIO.AE], do not press and continue instead with the following procedure. 1 Adjust ( ) the shutter speed to the desired value and then press . 2 Press . Shutter speed guidelines Note that on screen ...
Page 43 - Recording Scenes
43 Mini Video Light You can turn on the mini video light to shoot video or take photos in dark places. 1 Push the joystick ( ) to display the joystick guide. 2 Select ( ) [VID.LIGHT ] and press . • appears on the screen. • Press again to turn the mini video light off. Video Snapshot Record a series ...
Page 44 - Combining Scenes with Music; Set the background music.; Playing Back the Scenes; In the track selection screen,; DELETE
Video 44 Combining Scenes with Music POINTS TO CHECK - Windows users: Use the supplied software Music Transfer Utility to transfer the music files on the supplied Instruction Manual/Music Data Disc CD-ROM to a memory card connected to a computer. For details, refer to the software’s instruction manu...
Page 45 - Instruction Manual/Music Data Disc; Pre-recording Function; • Press; was
45 software’s instruction manual (PDF file). - Mac OS users: Use the Finder to transfer the music files on the supplied Instruction Manual/Music Data Disc CD-ROM to a memory card connected to a computer. Refer to Music Files ( 101) for the folder structure of the memory and CD-ROM. • Before transfer...
Page 46 - Self Timer; In record pause mode, press; Automatic Backlight Correction; appears on the screen.
Video 46 Self Timer [ MENU] [ CAMERA SETUP] [SELF TIMER] [ON ] appears. mode: In record pause mode, press . The camcorder starts recording after a 10-second countdown. The countdown appears on the screen. mode: Press , first halfway to activate the autofocus and then fully. The camcorder will record...
Page 47 - Manual Exposure Adjustment; the image as required.; Manual Focus Adjustment; Infinity Focus; and
47 Manual Exposure Adjustment 1 Push the joystick ( ) to display the joystick guide. 2 Select ( ) [EXPOSURE ] and press . • The exposure adjustment indicator and the neutral value [±0] appear on the screen. • The adjustment range and the length of the exposure adjustment indicator will vary dependin...
Page 48 - White Balance; Point the camcorder at a white; When the adjustment is completed,; Press; For recording outdoors on a bright day.
Video 48 White Balance The white balance function helps you to accurately reproduce colors under different lighting conditions so that white objects will always look truly white in your recordings. POINTS TO CHECK Select a recording program other than the Special Scene recording programs. Options ...
Page 49 - Image Effects; Digital Effects; Setting; Records with no image enhancing effects.
49 Image Effects You can use the image effects to change the color saturation and contrast to record images with special color effects. POINTS TO CHECK Select a recording program other than the Special Scene recording programs. Options Default value [ IMAGE EFFECT OFF] Desired option Digital Effec...
Page 50 - Applying; • When you apply a fader, not only the; On-Screen Displays and Data Code; Repeatedly press
Video 50 Applying 1 Push the joystick ( ) to display the joystick guide. 2 Select ( ) [D.EFFECT ] and press . • The icon of the selected effect turns green. • Press again to deactivate the digital effect (its icon will turn white again). Activate the selected fader in record pause mode ( ), then pre...
Page 51 - Dividing Scenes; Open the scene division screen.; Playlist and Scene Operations
51 mode: • All displays on• Data code only• All displays off mode: • All displays on• Regular displays only (removes the histogram and information icons) • All displays off * The following icons will appear even when all other on-screen displays are turned off: The icons and (in mode), the icon and ...
Page 52 - Adding Scenes to the Playlist; Pre-selecting Recordings from the Index Screen
Video 52 • A progress bar will be displayed on the screen. • You can press to cancel the operation while it is in progress. 6 When the confirmation screen appears, press . The video from the division point to the end of the scene will appear as a new scene in the index screen. NOTES • In this mode, ...
Page 53 - You can copy scenes; Deleting Scenes from the Playlist; Moving Scenes in the Playlist; Open the playlist index screen.; Deletes all the scenes from the playlist.
53 [ ADD TO PLAYLIST] Desired option [YES] • When the operation is completed [ADDED TO PLAYLIST] will be displayed. • / Scenes are added to the playlist on the same media they are recorded on. • To check the playlist, press . NOTES • / You can copy scenes from the built-in memory to the memory card ...
Page 54 - Copying Scenes; Use; Copying Original Movies; Copying the Entire Playlist; ACCESS; indicator is on or flashing.; • If the memory card does not have; Pre-selecting Recordings
Video 54 / Copying Scenes You can copy original movies or the entire playlist only from the built-in memory to the corresponding location on the memory card. / Use this function to copy movies from the built-in memory to the memory card in order to play them back with music tracks. Copying Original ...
Page 55 - Photos; Taking Photos; Set the camera mode dial to; will turn green and one; If the subject is not suitable for autofocus,; Selecting Photo Size and Quality
55 Photos Refer to this chapter for details on shooting photos – from capturing and playing back photos to printing them. Taking Photos 1 Set the camera mode dial to or . 2 Turn on the camcorder. / You can select the memory to be used for recording photos ( 28). 3 Press halfway. Once the focus is au...
Page 56 - Desired photo quality*; • The camcorder retains the last setting; Erasing a Photo Right After Recording It; Photo size; Approximate number of photos on a memory card; Memory card
Photos 56 [ 1024x768] Desired photo size* Desired photo quality* * Press to move back and forth between size and quality selection. The number displayed on the right corner indicates the approximate number of photos that can be recorded with the current quality/size setting. NOTES • The camcorder re...
Page 57 - Viewing Photos; ) the orange selection; Selecting What
57 Viewing Photos When the camera mode dial is set to or : 1 Press . • Even if the camcorder is off, pressing will turn on the camcorder in playback mode. • The original movies index screen appears after a few seconds. 2 Move ( ) the orange selection frame to the tabs on the top of the screen. 3 Sel...
Page 58 - Photo Jump Function; Slideshow
Photos 58 Photo Jump Function When you have recorded a large number of photos, you can jump 10 or 100 photos at a time. 1 Push the joystick ( ) to display the joystick guide. 2 Select ( ) and press . 3 Select ( ) [ JUMP 10 PHOTOS] or [ JUMP 100 PHOTOS]. 4 Jump ( ) the number of photos selected and p...
Page 59 - Adjusting the volume; Magnifying Photos during Playback; Deleting Photos
59 • Refer to Adjusting the volume ( 34) for details on adjusting the speaker’s volume. IMPORTANT • Observe the following precautions while the ACCESS indicator is on or flashing. Failing to do so may result in permanent data loss.- Do not open the memory card slot cover. - Do not disconnect the pow...
Page 60 - Deleting a Single Photo; ) the photo you want to; Deleting Photos from the Index Screen; • Move the zoom lever toward; Protected photos cannot be deleted.
Photos 60 Deleting a Single Photo 1 Select ( ) the photo you want to erase. 2 Push the joystick ( ) to display the joystick guide. 3 Select ( ) and press . 4 S elect ( ) [YES] and press . Deleting Photos from the Index Screen Options 1 Open the photo index screen. • Move the zoom lever toward W . • ...
Page 61 - Histogram Display; Protecting Photos; Protecting Single Photos; Open the photo selection screen.; PROTECT] appears on the; appears on the bottom bar and; twice to close the menu.; Protecting Photos from the Index Screen; Additional Functions; Opens the same screen described in; Protecting; that procedure to protect the photo.; Removes the protection from all photos.
61 Histogram Display When viewing photos you can display the histogram and the icons of all the functions used at the time of recording. Use the histogram as a reference to verify the correct exposure of the photo. The area to the right of the histogram represents highlights and the left side repres...
Page 62 - Initializing the recording media (; Copying Photos; Copying Single Photos; COPY; • If there is not enough space on the
Photos 62 [ PROTECT] Desired option [YES] [OK] IMPORTANT Initializing the recording media ( 28) will permanently erase all recordings, including protected photos. / Copying Photos You can copy photos only from the built-in memory to the memory card. Copying Single Photos 1 Open in single photo view ...
Page 63 - • If the memory card slot cover is open, or; Connecting the Camcorder to the Printer; Connection Diagrams; Manual focus adjustment (; Printing Photos
63 • If the memory card slot cover is open, or the LOCK switch on the memory card is set to prevent writing, you will not be able to copy photos to the memory card. Other Fun ction s You Can Use W hen Takin g Photos Printing Photos The camcorder can be connected to any PictBridge-compatible printer....
Page 64 - • The; Printing with the; ) the photo you wish to; • Printing starts. The; Selecting the Print Settings
Photos 64 • The (print/share) button lights up and the current print settings will be displayed for approx.6 seconds. IMPORTANT • If continues to flash (for more than 1 minute) or if does not appear, the camcorder is not correctly connected to the printer. In such case, disconnect the USB cable and ...
Page 65 - Printing after Changing the Print Settings; The print settings menu appears.; depending on the printer model.
65 Options NOTES Print setting options and [DEFAULT] settings vary depending on the printer model. For details, refer to the printer’s instruction manual. Printing after Changing the Print Settings 1 Push the joystick ( ) to display the joystick guide. 2 Select ( ) and press . The print settings men...
Page 66 - Print Orders; RINT; Canon printer
Photos 66 If an error occurs while printing, an error message, for example [NO PAPER], will appear on the camcorder. Solve the problem referring to the error message list ( 95) and to the printer’s instruction manual.• Canon’s PictBridge-compatible printers: If printing does not resume automatically...
Page 67 - Setting Print Orders from the Index Screen; Marking; Removes all the print orders.
67 Selecting Photos for Printing (Print Order) Set the print orders before connecting the supplied USB cable to the camcorder. Marking Single Photos with Print Orders 1 Open the photo selection screen. [ PRINT ORDER] appears on the screen. 2 Select ( ) the photo you want to mark with a print order. ...
Page 68 - • Depending on the connected printer,
Photos 68 Printing starts. The print settings menu disappears when the printing is completed. NOTES • Depending on the connected printer, you can change some print settings before step 3 ( 64). • To cancel the printing, refer to page 65.• Restarting Printing: Open the print settings menu as explaine...
Page 69 - External Connections; Terminals on the Camcorder; AV OUT Terminal; Connection; Type: Analog Output only
69 External Connections This chapter explains how to connect your camcorder to an external device such as a TV, VCR, or computer. Connection Diagrams Terminals on the Camcorder AV OUT Terminal Access: Open the LCD panel.Sound from the built-in speaker will be muted while the STV-250N Stereo Video Ca...
Page 70 - Refer to; Turn on the connected TV.; • We recommend powering the; In all respects, exactly the same connection as connection; Type: Digital data connection Output only; Playback on a TV Screen
External Connections 70 Connect the camcorder to a TV to enjoy your recordings with family and friends. 1 Turn off the camcorder and the TV. 2 Connect the camcorder to the TV. Refer to Connection Diagrams ( 69) and select the most appropriate connection for your TV. 3 Turn on the connected TV. On th...
Page 71 - Saving Your Recordings on a Computer; PIXELA ImageMixer 3 SE; With the supplied software; you can save; ImageMixer; Installation Guide; Do not access, change or; Authoring DVD Discs and Photo DVDs; Saving Your Recordings
71 Saving Your Recordings on a Computer Movies recorded with this camcorder are saved on the memory card or in the built-in memory ( / only). Because space on the memory is limited, make sure to save your movies onto a computer on a regular basis. PIXELA ImageMixer 3 SE With the supplied software Im...
Page 72 - Preparations on the Camcorder; Set the camcorder to; Creating DVDs; Add all the photos to the slideshow on the disc.
External Connections 72 Options for creating DVD discs ( mode) Options for creating Photo DVDs ( mode) Preparations on the Camcorder 1 Set the camcorder to mode to create DVD discs of your movies or mode to create Photo DVDs of your photos. • Power the camcorder using the compact power adapter. • / ...
Page 73 - Cautions; DVD
73 4 Press the start button on the DVD burner. • A progress bar will be displayed on the screen. • After pressing the start button (while the current disc is being written) the operation cannot be canceled. • When the disc (or the last disc, if the data requires multiple discs) is finalized, [TASK C...
Page 74 - Transfer Orders; checkmark) with a transfer; Pre-selecting Recordings from the; Removes all the transfer orders.
External Connections 74 included on a disc. We recommend keeping the number of scenes to 2,000 or less. (In such case, the connection time will be about 3 minutes 30 seconds). Transfer Orders Using transfer orders, you can mark in advance which photos to add when creating a Photo DVD disc with the o...
Page 75 - Connecting; Recording; Transferring Photos to a Computer; XP
75 Connecting Connect the camcorder to the VCR using Connection or . Refer to Connection Diagrams ( 69). Recording 1 External device: Load a blank cassette or disc and set the device to record pause mode. 2 Camcorder: Locate the scene you wish to copy and pause playback shortly before the scene. 3 C...
Page 76 - ONNECTION; OS
External Connections 76 3 Open [Macintosh HD] and then open the [Applications] folder. 4 Start the Image Capture program. 5 Transfer the desired photos. IMPORTANT • While the camcorder is connected to the computer, do not open the memory card slot cover and do not remove the memory card. • Observe t...
Page 77 - Additional Information; Menu item; Recording programs; STANDARD PLAY 6Mbps]
77 Additional Information This chapter contains troubleshooting advice, screen messages, handling and maintenance tips, and other information. Menu items not available appear grayed out in the FUNC. menu or in black in the setup menus. For details about how to select an item, refer to Using the Menu...
Page 79 - CAMERA SETUP; ON
79 1 Option not available from the original movies index screen. 2 Option available from the original movies index screen and Video Snapshot index screen. 3 Option available from the playlist index screen and Video Snapshot playlist index screen. 4 Option available from the original movies index scr...
Page 80 - Playing back a widescreen recording:
Additional Information 80 • If the degree of camcorder shake is too high, the image stabilizer may not be able to fully compensate. The image stabilizer may not be able to successfully eliminate all blur if the camcorder or the subject is moving too much. • The image stabilizer may not work well on ...
Page 81 - DISPLAY SETUP
81 Memo ry O perat io ns (I nitialization , etc.) / MEMORY OPER. * Option available from the original movies index screen and Video Snapshot index screen. [MEMORY INFO]/[CARD INFO]: Displays a screen where you can verify how much of the built-in memory ( / only) or the memory card is currently in us...
Page 83 - SYSTEM SETUP; Displays a screen where you can verify the battery charge (as a
83 [DEMO MODE]: The demonstration mode displays the camcorder’s main features. It starts automatically when the camcorder is powered with the compact power adapter if you leave it turned on for more than 5 minutes.• To cancel the demo mode once it has started, press any button or turn off the camcor...
Page 84 - List of world time zones.
Additional Information 84 [SPEAKER VOL.]: Adjust ( ) the volume of the playback. You can also adjust the volume using the joystick guide ( 34). [TV TYPE]: In order to display the picture in full and in the correct aspect ratio, select the setting according to the type of television to which you will...
Page 85 - Power supply; Did you turn the camcorder on and set it to recording mode? (; Did you turn the camcorder on and set it to playback mode? (
85 Trou ble? If you have a problem with your camcorder, refer to this section. Sometimes what you think is a malfunction of the camcorder may have the simplest of solutions - please read the “CHECK THIS FIRST” box before going on to the more detailed problems and solutions. Consult your dealer or a ...
Page 87 - Indicators and Onscreen Displays
87 Deleting scenes takes longer than usual. - When the memory contains a large number of scenes, some operations may take longer than usual. Save your recordings ( 71) and initialize the memory ( 28). Cannot erase a photo - The photo is protected. Remove the protection ( 61). Cannot play back a musi...
Page 89 - Connections with External Devices; List of Messages; 5) and for messages that appear only when using the
89 Connections with External Devices Video noise appears on the TV screen. - When using the camcorder in a room where a TV is located, keep a distance between the compact power adapter and the power or antenna cables of the TV. Playback looks fine on the camcorder but there is no image on the TV scr...
Page 90 - ImageMixer 3 SE Transfer Utility
Additional Information 90 / BUILT-IN MEMORY ERROR - The built-in memory could not be read. This may indicate a problem with the camcorder. Consult a Canon Service Center. / BUILT-IN MEMORY FULL - The built-in memory is full ([ END] appears on the screen). Delete some recordings ( 39, 59) to free som...
Page 94 - Messages Related to the Optional DW-100 DVD Burner
Additional Information 94 WHILE THE CAMCORDER IS CONNECTED TO A PC DO NOT DISCONNECT THE USB CABLE OR POWER SOURCE CANNOT TURN OFF POWER OR CHANGE MODES - When the camcorder is in mode and is connected to the computer with a USB cable, the camcorder cannot be operated. Disconnecting the USB cable or...
Page 95 - Direct Print Related Messages
95 OPERATION CANCELED - The USB cable was disconnected and the operation was canceled. Check the USB connection. UNABLE TO RECOVER DATA - Could not recover a corrupted file. Direct Print Related Messages CANNOT PRINT! - You attempted to print a photo that has a different compression. Alternatively, ...
Page 96 - About Canon Inkjet/SELPHY DS Printers; If the printer’s error indicator flashes or an error
Additional Information 96 NO PAPER - Paper is not correctly inserted or there is no paper. NO PRINTHEAD - No print head is installed in the printer or the print head is defective. PAPER ERROR - There is a problem with the paper. The paper is not correctly loaded or the paper size is wrong. Alternati...
Page 97 - Camcorder; Save your recordings periodically.; Handling Precautions
97 Do ’s and Don ’ts Camcorder Be sure to observe the following precautions to ensure maximum performance. • Save your recordings periodically. Make sure to transfer your recordings to an external device such as a computer or digital video recorder ( 71) and back them up on a regular basis. This wil...
Page 98 - Battery Pack; Remaining Battery Time; Memory Card; Treat the battery pack with care.; • Keep it away from fire (or it might
Additional Information 98 Battery Pack • Dirty terminals may cause a poor contact between the battery pack and the camcorder. Wipe the terminals with a soft cloth. Remaining Battery Time If the remaining battery time displayed is not correct, charge the battery pack fully. However, the correct time ...
Page 99 - Built-in Rechargeable Lithium Battery; To recharge the built-in lithium battery:; Disposal; If giving the camcorder
99 • Check the direction before inserting the memory card. Forcing a memory card into the slot if it is not correctly oriented may damage the memory card or the camcorder. • Do not attach any labels or stickers on the memory card. • SD/SDHC memory cards have a physical switch to prevent writing on t...
Page 100 - Cleaning; Power Sources
Additional Information 100 Cleaning Camcorder Body • Use a soft, dry cloth to clean the camcorder body. Never use chemically treated cloths or volatile solvents such as paint thinner. Lens If the lens surface is dirty, the autofocus may not work properly.• Remove any dust or dirt particles using a n...
Page 101 - All of Europe and Russia.; - Windows users: This folder contains two
101 Playback on a TV Screen You can only play back your recordings on TVs compatible with the PAL system. PAL (or the compatible SECAM system) is used in the following regions/countries: Europe: All of Europe and Russia. Americas: Only in Argentina, Brazil, Uruguay and French territories (French Gui...
Page 102 - System Diagram; (Availability differs from area to area)
Additional Information 102 General In formation System Diagram (Availability differs from area to area) CG-800E Battery Charger STV-250N Stereo Video Cable SC-2000 Soft Carrying Case WS-20 Wrist Strap SS-600/SS-650 Shoulder Strap SD/SDHC memory card BP-808Battery Pack Computer TV Card reader/writer ...
Page 103 - Optional Accessories; Use of genuine Canon accessories is recommended.; Charging conditions
103 Battery Packs When you need extra battery packs, make sure you select the BP-808. When you use battery packs bearing the Intelligent System mark, the camcorder will communicate with the battery and display the remaining usage time (accurate to 1 minute). You can only use and charge these battery...
Page 104 - Recording and Playback Times
Additional Information 104 Recording and Playback Times The recording and playback times given in the following table are approximate and vary according to recording mode and charging, recording or playback conditions. The effective usage time of the battery pack may decrease when recording in cold ...
Page 105 - Specifications; System
105 LEGRIA FS37/FS36/FS307/FS306/FS305 Specifications System Recording System Movies: SD-VideoVideo compression: MPEG-2Audio compression: Dolby Digital 2ch (AC-3) Photos: DCF (Design rule for camera file system), compatible with Exif 1 Ver. 2.2 and with DPOF Photo compression: JPEG (Super Fine, Fine...
Page 106 - CA-570 Compact Power Adapter; Terminals
Additional Information 106 CA-570 Compact Power Adapter Minimum Illumination [NIGHT] recording program, Shutter speed at 1/6: 1.1 lx[PROGRAM AE], Auto slow shutter [ON], Shutter speed at 1/25: 4.5 lx Recommended Illumination More than 100 lx Image Stabilization Electronic ([DYNAMIC] setting availabl...
Page 108 - Index
Additional Information 108 A Abroad, using the camcorder . . . . . . . 100 Aspect ratio of a connected TV (TV type) . . . . . . . . . . . . . . . . . . . . . . . 83 Audio level indicator . . . . . . . . . . . . . . . 81 Auto slow shutter . . . . . . . . . . . . . . . . . 80 Autofocus (AF): AF frame ...
Page 110 - Trademark Acknowledgements
Additional Information 110 W White balance . . . . . . . . . . . . . . . . . . . . 48 Wide angle . . . . . . . . . . . . . . . . . . . . . . 31 Wind screen . . . . . . . . . . . . . . . . . . . . . 80 Z Zoom Advanced zoom . . . . . . . . . . . . . . 31 Zoom speed . . . . . . . . . . . . . . 31 , 79 ...
Page 111 - Canon Australia Pty Ltd
PUB. DIE-0349-000B © CANON INC. 2010 CANON Inc. 30-2, S himomaru k o 3-chome, Ohta- k u, To k yo 146-8501, Japan Canon Europa N.V. Bovenkerkerweg 59-61, 1185 XB Amstelveen, The Netherlandswww.canon-europa.com Canon UK Ltd. CCI Service Centre, Unit 130Centennial Park, Borehamwood, Hertfordshire, WD6 ...


 Canon LEGRIA FS21 Manual
 Canon LEGRIA FS22 Manual
 Canon LEGRIA FS36 User Manual
 Canon LEGRIA FS37 User Manual
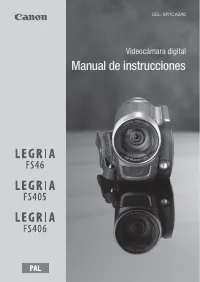 Canon LEGRIA FS46 User Manual
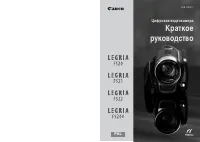 Canon LEGRIA FS200 Manual
 Canon LEGRIA FS306 Manual
 Canon LEGRIA FS307 Manual
 Canon LEGRIA FS405 User Manual
 Canon LEGRIA FS406 User Manual
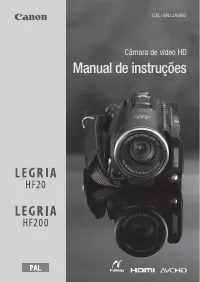 Canon LEGRIA HF20 User Manual
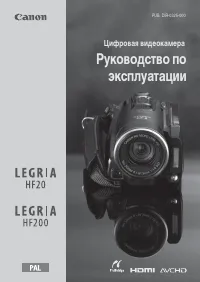 Canon LEGRIA HF200 User Manual