Page 2 - Contents
Contents Introduction ....................................................................................................................................................... 2 How to Use the Manual .........................................................................................................
Page 5 - Introduction
Introduction Introduction .......................................................................................................................................................... 2 How to Use the Manual ..................................................................................................
Page 8 - Symbols Used in This Manual; About Settings
Notations Used in the Manual This explains symbols and settings used in this manual. Symbols Used in This Manual In this manual, explanations of items and operations that must be followed while using the driver are set forth the symbols that indicate the following. IMPORTANT ● Indicates operational ...
Page 10 - Copyright
Copyright Copyright CANON INC. 2022 No part of this publication may be reproduced, transmitted, transcribed, stored in a retrieval system, or translated into any language or computer language in any form or by any means, electronic, mechanical, magnetic, optical, chemical, manual, or otherwise, with...
Page 11 - Trademarks
Trademarks macOS and Safari are trademarks of Apple Inc. All brand names and product names appearing on this document are registered trademarks or trademarks of their respective owners. All other trademarks are the property of their respective owners. Introduction 7
Page 12 - About This Driver
About This Driver About This Driver ............................................................................................................................................... 9 About This Driver 8
Page 13 - Features; Examples of How to Utilize Configuration Profiles; Related Topics
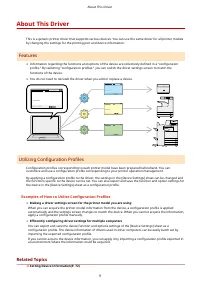
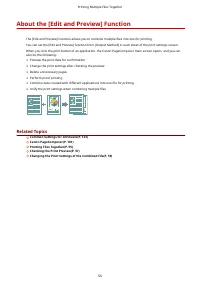
About This Driver This is a generic printer driver that supports various devices. You can use the same driver for all printer models by changing the settings for the printing port and device information. Features ● Information regarding the functions and options of the device are collectively define...
Page 15 - Before Use
Before Use Before Use ............................................................................................................................................................ 12 Before Use 11
Page 19 - Printing
Printing Printing .................................................................................................................................................................. 16 Printing from a Computer ..............................................................................................
Page 21 - Printing from a Computer; Open a document in the application → display the print screen.
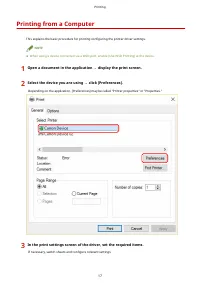
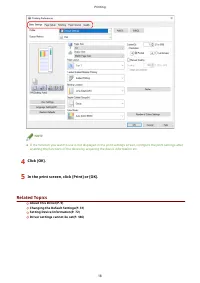
Printing from a Computer This explains the basic procedure for printing configuring the printer driver settings. NOTE ● When using a device connected via a WSD port, enable [Use WSD Printing] at the device. 1 Open a document in the application → display the print screen. 2 Select the device you are ...
Page 23 - Scaling; To Scale to the Output Page Size; Select the paper size set in the application from [Page Size].; To Specify a Desired Scale
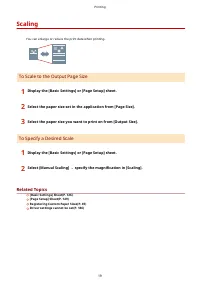
Scaling You can enlarge or reduce the print data when printing. To Scale to the Output Page Size 1 Display the [Basic Settings] or [Page Setup] sheet. 2 Select the paper size set in the application from [Page Size]. 3 Select the paper size you want to print on from [Output Size]. To Specify a Desire...
Page 24 - Watermark Printing; To Attach and Print a Watermark
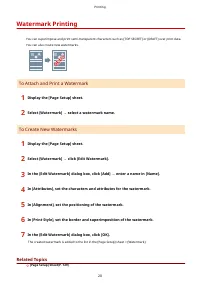
Watermark Printing You can superimpose and print semi-transparent characters such as [TOP SECRET] or [DRAFT] over print data. You can also create new watermarks. To Attach and Print a Watermark 1 Display the [Page Setup] sheet. 2 Select [Watermark] → select a watermark name. To Create New Watermarks...
Page 25 - Poster Printing; To Perform Poster Printing
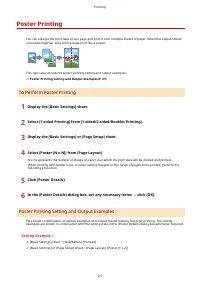
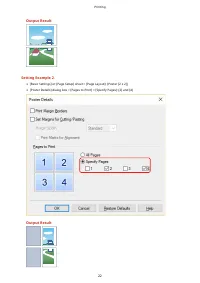
Poster Printing You can enlarge the print data of one page and print it over multiple sheets of paper. When the output sheets are joined together, they form a large print like a poster. This topic also introduces poster printing setting and output examples. Poster Printing Setting and Output Example...
Page 27 - Output Result
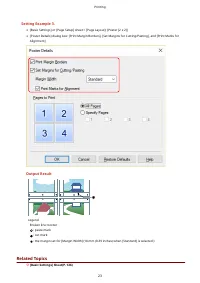
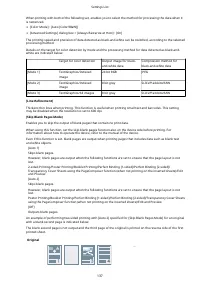
Setting Example 3. ● [Basic Settings] or [Page Setup] sheet > [Page Layout]: [Poster [2 x 2]] ● [Poster Details] dialog box: [Print Margin Borders], [Set Margins for Cutting/Pasting], and [Print Marks forAlignment] Output Result Legend Broken line: border : paste mark: cut mark: the margin set fo...
Page 29 - Printing Over a Fixed Form; To Save a Fixed Form in the Device or the Computer; Select the print menu of the application.
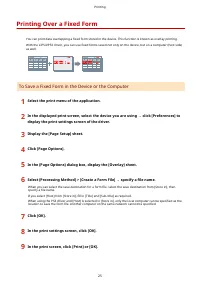
Printing Over a Fixed Form You can print data overlapping a fixed form stored in the device. This function is known as overlay printing. With the LIPS4/PS3 driver, you can use fixed forms saved not only on the device, but on a computer (host side) as well. To Save a Fixed Form in the Device or the C...
Page 30 - To Perform Overlay Printing
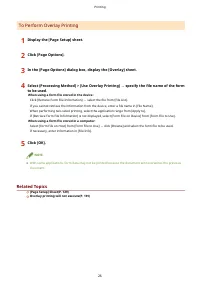
To Perform Overlay Printing 1 Display the [Page Setup] sheet. 2 Click [Page Options]. 3 In the [Page Options] dialog box, display the [Overlay] sheet. 4 Select [Processing Method] > [Use Overlay Printing] → specify the file name of the formto be used. When using a form file stored in the device: ...
Page 31 - Attaching Encryption When Printing
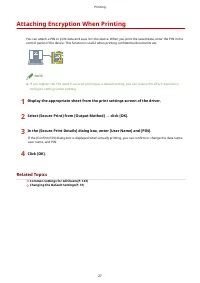
Attaching Encryption When Printing You can attach a PIN to print data and save it in the device. When you print the saved data, enter the PIN in the control panel of the device. This function is useful when printing confidential documents etc. NOTE ● If you register the PIN used in secured printing ...
Page 32 - Putting Print Jobs on Hold
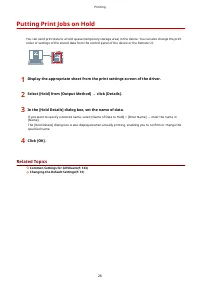
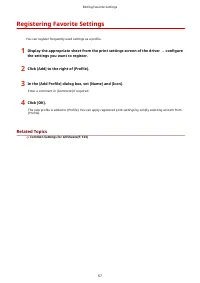
Putting Print Jobs on Hold You can send print data to a hold queue (temporary storage area) in the device. You can also change the print order or settings of the stored data from the control panel of the device or the Remote UI. 1 Display the appropriate sheet from the print settings screen of the d...
Page 33 - Storing Print Data
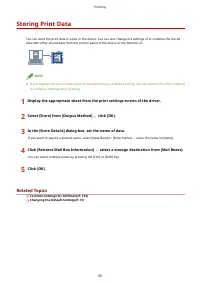
Storing Print Data You can store the print data in a box in the device. You can also change the settings of or combine the stored data with other stored data from the control panel of the device or the Remote UI. NOTE ● If you register the box number used in stored printing as a default setting, you...
Page 34 - Priority Printing
Priority Printing You can print a document with higher priority than other print jobs that are in a standby state in the device. When performing priority printing, if there is a print job being processed at the device, priority printing is started as soon as that job is finished. 1 Display the appro...
Page 35 - Changing the Default Settings; Display the print settings screen of the driver.
Changing the Default Settings You can change the default settings to desired print settings. If you change them to settings that you use frequently, you can reduce the effort required to configure settings when printing. NOTE ● Because Excel carries over settings even when a file is closed, the defa...
Page 36 - Setting 1-sided Printing by Default
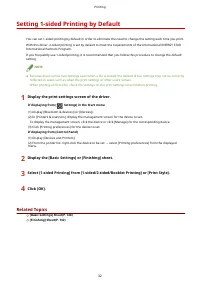
Setting 1-sided Printing by Default You can set 1-sided printing by default in order to eliminate the need to change the setting each time you print. With this driver, 2-sided printing is set by default to meet the requirements of the International ENERGY STAR International Partners Program. If you ...
Page 37 - Setting Black-and-white Printing by Default
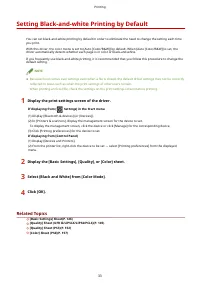
Setting Black-and-white Printing by Default You can set black-and-white printing by default in order to eliminate the need to change the setting each time you print. With this driver, the color mode is set to [Auto [Color/B&W]] by default. When [Auto [Color/B&W]] is set, the driver automatic...
Page 38 - Creating a Booklet When Printing
Creating a Booklet When Printing Creating a Booklet When Printing ......................................................................................................... 35 Booklet Printing ...............................................................................................................
Page 40 - Booklet Printing
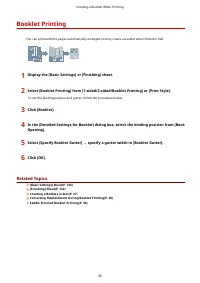
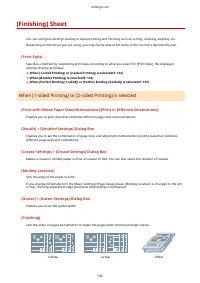
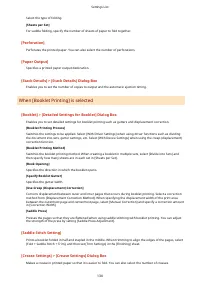
Booklet Printing You can print with the pages automatically arranged so they create a booklet when folded in half. 1 Display the [Basic Settings] or [Finishing] sheet. 2 Select [Booklet Printing] from [1-sided/2-sided/Booklet Printing] or [Print Style]. To set the binding position and gutter, follow...
Page 41 - Creating a Booklet in Sets; Specify the number of pages contained in each set in [Sheets per Set].
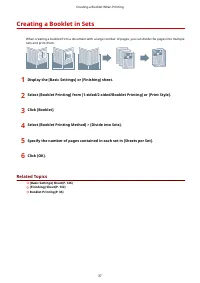
Creating a Booklet in Sets When creating a booklet from a document with a large number of pages, you can divide the pages into multiple sets and print them. 1 Display the [Basic Settings] or [Finishing] sheet. 2 Select [Booklet Printing] from [1-sided/2-sided/Booklet Printing] or [Print Style]. 3 Cl...
Page 42 - Correcting Displacement During Booklet Printing
Correcting Displacement During Booklet Printing You can create and print a booklet while correcting the displacement between outer and inner pages that occurs during booklet printing. If you trim the edges of the pages using a trimmer, you can adjust the amount of margin so that the position of the ...
Page 43 - Saddle Stitched Booklet Printing
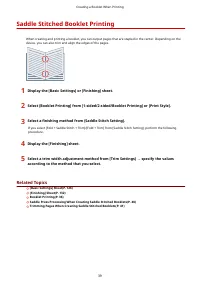
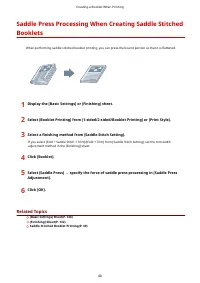
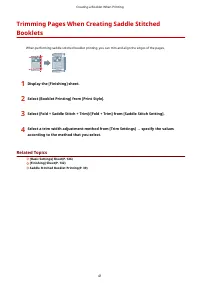
Saddle Stitched Booklet Printing When creating and printing a booklet, you can output pages that are stapled in the center. Depending on the device, you can also trim and align the edges of the pages. 1 Display the [Basic Settings] or [Finishing] sheet. 2 Select [Booklet Printing] from [1-sided/2-si...
Page 46 - Perfect Binding
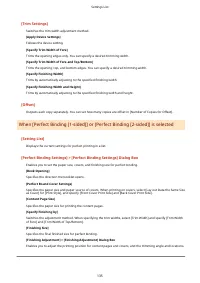
Perfect Binding You can apply glue to the gutter side of the contents and encloses them in a cover to create a booklet. 1 Display the [Finishing] sheet. 2 Select [Perfect Binding [1-sided]] or [Perfect Binding [2-sided]] from [Print Style]. 3 Confirm the content of [Setting List]. 4 If you want to c...
Page 47 - Using Various Types of Paper
Using Various Types of Paper Using Various Types of Paper .................................................................................................................... 44 Registering Custom Paper Sizes ..............................................................................................
Page 49 - Registering Custom Paper Sizes
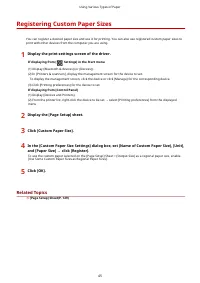
Registering Custom Paper Sizes You can register a desired paper size and use it for printing. You can also use registered custom paper sizes to print with other devices from the computer you are using. 1 Display the print settings screen of the driver. If displaying from [ Settings] in the Start men...
Page 50 - Inserting Sheets Between Transparencies
Inserting Sheets Between Transparencies You can print with sheets of paper inserted between transparencies. You can also print on the inserted sheets. 1 Display the [Paper Source] sheet. 2 Select [Select by] > [Paper Source]/[Paper Type]. 3 Select [Transparency Cover Sheets] from [Paper Selection...
Page 51 - Inserting Sheets
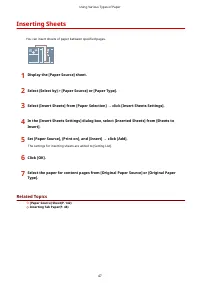
Inserting Sheets You can insert sheets of paper between specified pages. 1 Display the [Paper Source] sheet. 2 Select [Select by] > [Paper Source] or [Paper Type]. 3 Select [Insert Sheets] from [Paper Selection] → click [Insert Sheets Settings]. 4 In the [Insert Sheets Settings] dialog box, selec...
Page 52 - Inserting Tab Paper
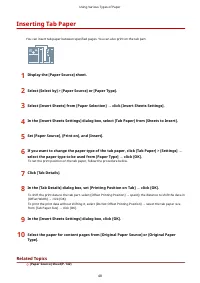
Inserting Tab Paper You can insert tab paper between specified pages. You can also print on the tab part. 1 Display the [Paper Source] sheet. 2 Select [Select by] > [Paper Source] or [Paper Type]. 3 Select [Insert Sheets] from [Paper Selection] → click [Insert Sheets Settings]. 4 In the [Insert S...
Page 54 - Printing on Tab Paper
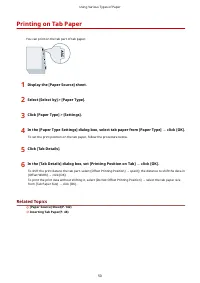
Printing on Tab Paper You can print on the tab part of tab paper. 1 Display the [Paper Source] sheet. 2 Select [Select by] > [Paper Type]. 3 Click [Paper Type] > [Settings]. 4 In the [Paper Type Settings] dialog box, select tab paper from [Paper Type] → click [OK]. To set the print position on...
Page 55 - Adding Cover Sheets
Adding Cover Sheets You can add front and back covers to print data. You can also use paper that differs from that of the content pages, and specify which side(s) of the cover(s) to print on. 1 Display the [Paper Source] sheet. 2 Click [Front/Back Cover Settings]. 3 In the [Front/Back Cover Settings...
Page 56 - Printing Multiple Files Together
Printing Multiple Files Together Printing Multiple Files Together .............................................................................................................. 53 About the [Edit and Preview] Function .....................................................................................
Page 59 - Repeat steps 1 to 3 for each file you want to combine.
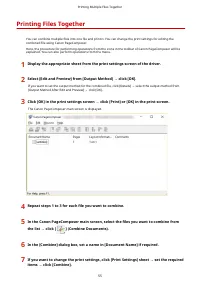
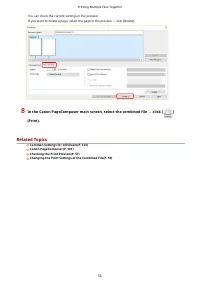
Printing Files Together You can combine multiple files into one file and print it. You can change the print settings for editing the combined file using Canon PageComposer. Here, the procedure for performing operations from the icons in the toolbar of Canon PageComposer will be explained. You can al...
Page 61 - Checking the Print Preview; to check from the list → click [
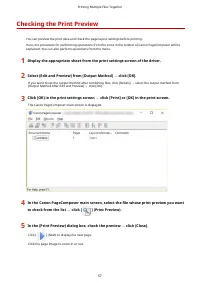
Checking the Print Preview You can preview the print data and check the page layout settings before printing. Here, the procedure for performing operations from the icons in the toolbar of Canon PageComposer will be explained. You can also perform operations from the menu. 1 Display the appropriate ...
Page 63 - Changing the Print Settings of the Combined File; change from the list → click [
Changing the Print Settings of the Combined File You can change the print settings of the combined file using Canon PageComposer. When editing files with different page sizes or layouts, you can unify the settings. Here, the procedure for performing operations from the icons in the toolbar of Canon ...
Page 65 - Setting Color Printing Details
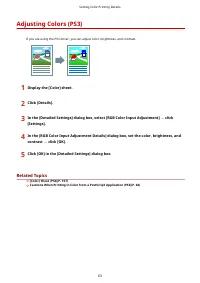
Setting Color Printing Details Setting Color Printing Details ................................................................................................................... 62 Adjusting Colors (PS3) ...................................................................................................
Page 69 - Editing Favorite Settings
Editing Favorite Settings Editing Favorite Settings ............................................................................................................................. 66 Registering Favorite Settings ............................................................................................
Page 72 - Editing the Favorite Settings List; To Export a Profile
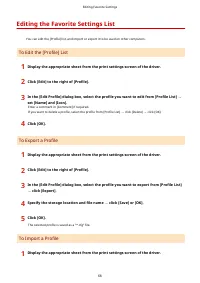
Editing the Favorite Settings List You can edit the [Profile] list, and import or export it to be used on other computers. To Edit the [Profile] List 1 Display the appropriate sheet from the print settings screen of the driver. 2 Click [Edit] to the right of [Profile]. 3 In the [Edit Profile] dialog...
Page 74 - Linking the Driver and the Device
Linking the Driver and the Device Linking the Driver and the Device ......................................................................................................... 71 Setting Device Information ...................................................................................................
Page 76 - Setting Device Information; Prerequisites; Display the printer properties screen.
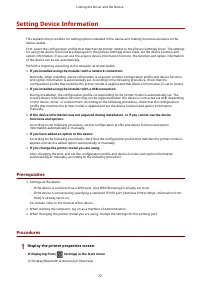
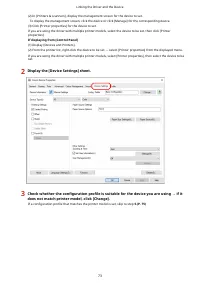
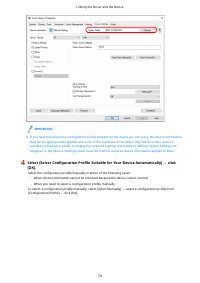
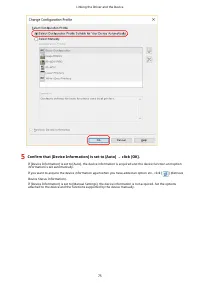
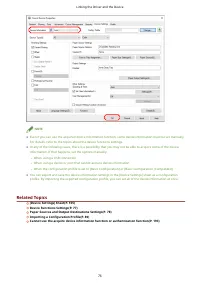
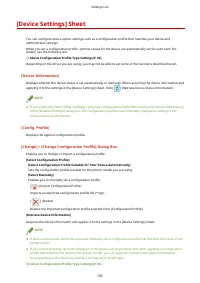
Setting Device Information This explains the procedure for setting options installed in the device and making functions exclusive to the device usable. First, select the configuration profile that matches the printer model on the [Device Settings] sheet. The settings for using the device functions a...
Page 81 - Device Functions Settings; Functions that may require settings to be configured manually
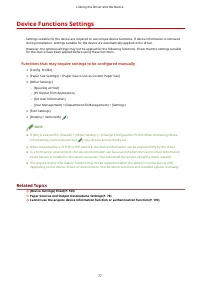
Device Functions Settings Settings suitable for the device are required to use unique device functions. If device information is retrieved during installation, settings suitable for the device are automatically applied to the driver. However, the optimal settings may not be applied for the following...
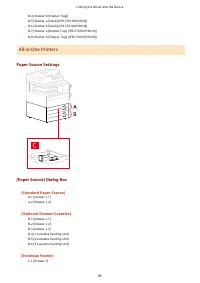
Page 82 - Paper Sources and Output Destinations Settings; Laser Printers; Paper Source Settings
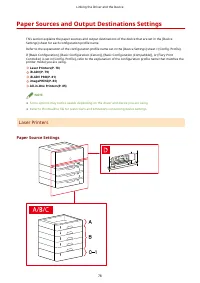
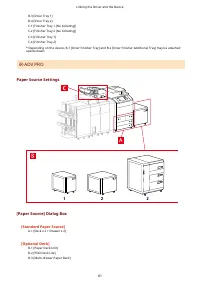
Paper Sources and Output Destinations Settings This section explains the paper sources and output destinations of the device that are set in the [Device Settings] sheet for each configuration profile name. Refer to the explanation of the configuration profile name set in the [Device Settings] sheet ...
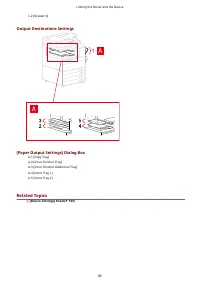
Page 84 - Output Destinations Settings
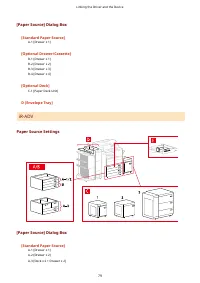
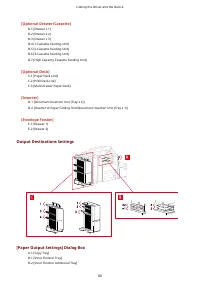
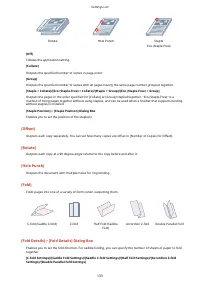
[Optional Drawer/Cassette] B-1 [Drawer x 1]B-2 [Drawer x 2]B-3 [Drawer x 3]B-4 [1-Cassette Feeding Unit]B-5 [2-Cassette Feeding Unit]B-6 [3-Cassette Feeding Unit]B-7 [High Capacity Cassette Feeding Unit] [Optional Deck] C-1 [Paper Deck Unit]C-2 [POD Deck Lite]C-3 [Multi-drawer Paper Deck] [Inserter]...
Page 86 - Finisher Tray
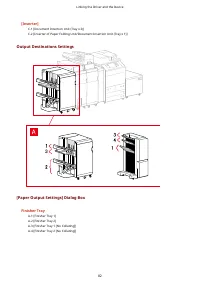
[Inserter] C-1 [Document Insertion Unit (Tray x 2)]C-2 [Inserter of Paper Folding Unit/Document Insertion Unit (Tray x 1)] Output Destinations Settings [Paper Output Settings] Dialog Box Finisher Tray A-1 [Finisher Tray 1]A-2 [Finisher Tray 2]A-3 [Finisher Tray 1 [No Collating]]A-4 [Finisher Tray 2 ...
Page 87 - imagePRESS
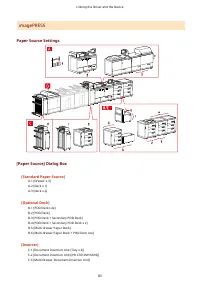
imagePRESS Paper Source Settings [Paper Source] Dialog Box [Standard Paper Source] A-1 [Drawer x 3]A-2 [Deck x 1]A-3 [Deck x 2] [Optional Deck] B-1 [POD Deck Lite]B-2 [POD Deck]B-3 [POD Deck + Secondary POD Deck]B-4 [POD Deck + Secondary POD Deck x 2]B-5 [Multi-drawer Paper Deck]B-6 [Multi-drawer Pa...
Page 91 - Exporting a Configuration Profile; Procedures
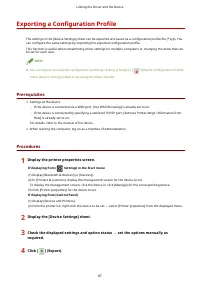
Exporting a Configuration Profile The settings in the [Device Settings] sheet can be exported and saved as a configuration profile file (*.typ). You can configure the same settings by importing the exported configuration profile. This function is useful when streamlining driver settings for multiple...
Page 93 - Importing a Configuration Profile
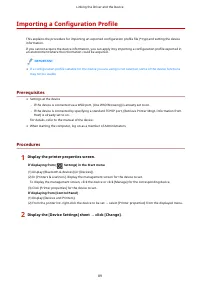
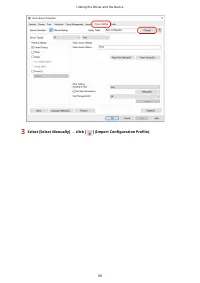
Importing a Configuration Profile This explains the procedure for importing an exported configuration profile file (*.typ) and setting the device information. If you cannot acquire the device information, you can apply it by importing a configuration profile exported in an environment where the info...
Page 95 - Select the configuration profile file to import → click [Open].
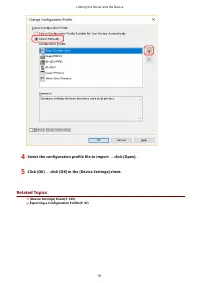
4 Select the configuration profile file to import → click [Open]. 5 Click [OK] → click [OK] in the [Device Settings] sheet. Related Topics [Device Settings] Sheet(P. 165) Exporting a Configuration Profile(P. 87) Linking the Driver and the Device 91
Page 96 - About Configuration Profile Type Settings
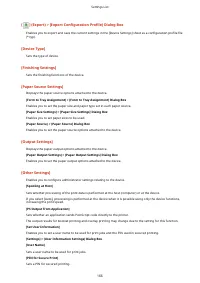
About Configuration Profile Type Settings If you cannot properly set items displayed in the [Device Settings] sheet even after applying a configuration profile that matches the name of the printer model, you can apply the function and option information corresponding to the device by setting a confi...
Page 97 - Setting the Authentication Function
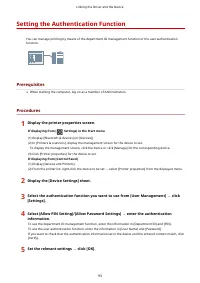
Setting the Authentication Function You can manage printing by means of the department ID management function or the user authentication function. Prerequisites ● When starting the computer, log on as a member of Administrators. Procedures 1 Display the printer properties screen. If displaying from ...
Page 99 - Setting the User Name
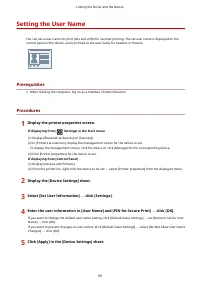
Setting the User Name You can set a user name for print jobs and a PIN for secured printing. The set user name is displayed on the control panel of the device, and is printed as the user name for headers or footers. Prerequisites ● When starting the computer, log on as a member of Administrators. Pr...
Page 103 - Access Management System/Encrypted Secure Print
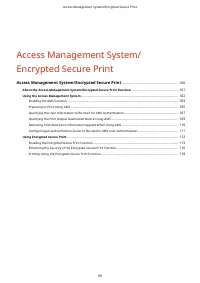
Access Management System/Encrypted Secure Print Access Management System/Encrypted Secure Print .............................................................. 100 About the Access Management System/Encrypted Secure Print Function ................................................... 101 Using the Acce...
Page 107 - Enabling the AMS Function
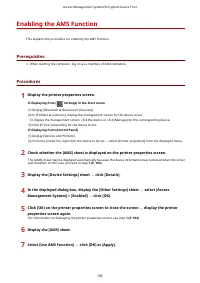
Enabling the AMS Function This explains the procedure for enabling the AMS function. Prerequisites ● When starting the computer, log on as a member of Administrators. Procedures 1 Display the printer properties screen. If displaying from [ Settings] in the Start menu (1) Display [Bluetooth & dev...
Page 109 - Preparing to Print Using AMS; Specify the user information to use for authentication.; Specify IP address/host name of the device to use for printing.; Retrieve the print restriction information.
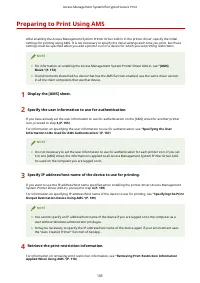
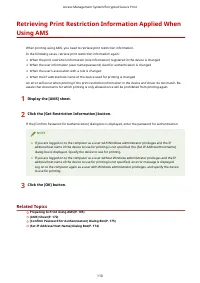
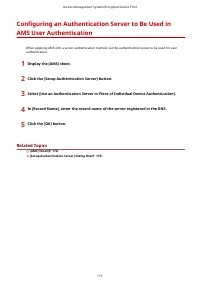
Preparing to Print Using AMS After enabling the Access Management System Printer Driver Add-in in the printer driver, specify the initial settings for printing using AMS. It is not necessary to specify the initial settings each time you print, but these settings must be specified when you add a prin...
Page 116 - Using Encrypted Secure Print
Using Encrypted Secure Print Enabling the Encrypted Secure Print Function(P. 113) Enhancing the Security of the Encrypted Secure Print Function(P. 116) Printing Using the Encrypted Secure Print Function(P. 118) Access Management System/Encrypted Secure Print 112
Page 117 - Enabling the Encrypted Secure Print Function
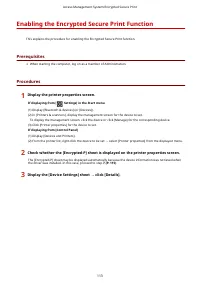
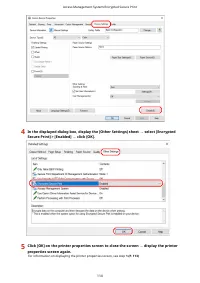
Enabling the Encrypted Secure Print Function This explains the procedure for enabling the Encrypted Secure Print function. Prerequisites ● When starting the computer, log on as a member of Administrators. Procedures 1 Display the printer properties screen. If displaying from [ Settings] in the Start...
Page 120 - Configure settings related to enhanced security as required.
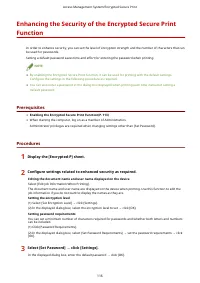
Enhancing the Security of the Encrypted Secure PrintFunction In order to enhance security, you can set the level of encryption strength and the number of characters that can be used for passwords. Setting a default password saves time and effort for entering the password when printing. NOTE ● By ena...
Page 122 - Printing Using the Encrypted Secure Print Function
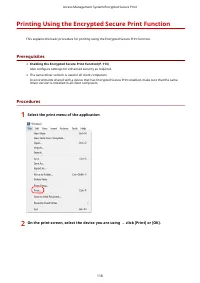
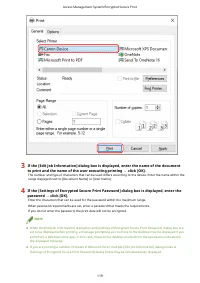
Printing Using the Encrypted Secure Print Function This explains the basic procedure for printing using the Encrypted Secure Print function. Prerequisites ● Enabling the Encrypted Secure Print Function(P. 113)Also configure settings for enhanced security as required. ● The same driver version is use...
Page 125 - Settings List
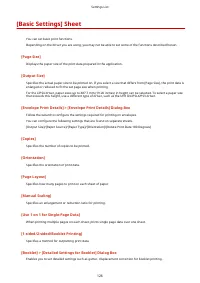
Settings List Settings List ....................................................................................................................................................... 122 Common Settings for All Sheets ........................................................................................
Page 176 - Descriptions of Settings
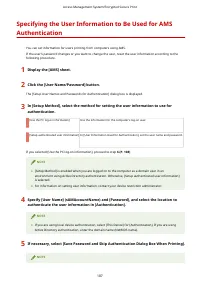
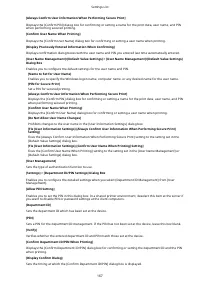
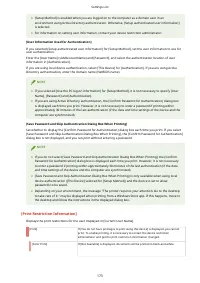
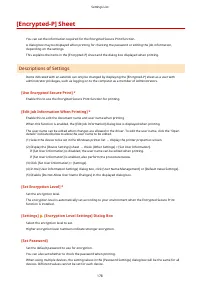
[AMS] Sheet You can set the user information and device information required to use AMS. You can also confirm information for the currently authenticated user and print restrictions. A dialog box may be displayed when printing to check the password or print restriction information. This explains the...
Page 178 - [Check Print Restriction Information When Printing]
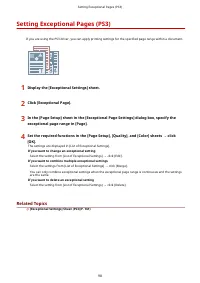
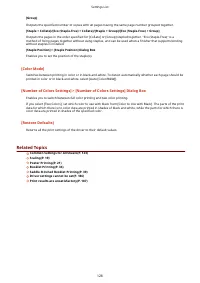
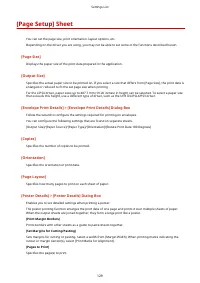
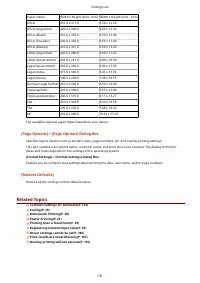
[1-Sided/2-Sided Printing] If [2-sided Printing Only] is displayed, documents will always use 2-sided printing,even if 1-sided printing is specified in the print settings. [Page Layout] Displays how many pages of a file will be printed on each sheet of paper. If [NoRestrictions] is displayed, you ca...
Page 179 - Dialog Box Displayed When Printing; [Confirm Password for Authentication] Dialog Box
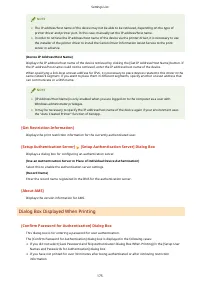
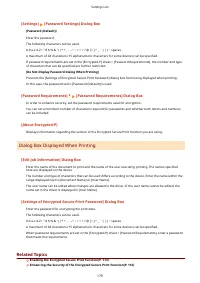
NOTE ● The IP address/host name of the device may not be able to be retrieved, depending on the type ofprinter driver and printer port. In this case, manually set the IP address/host name. ● In order to retrieve the IP address/host name of the device via the printer driver, it is necessary to usethe...
Page 180 - [Confirmation of Print Restrictions] Dialog Box
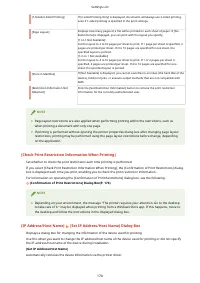
It may take some time for it to be displayed, depending on your environment. Change the settings in the [AMS] sheet > [User Name/Password] > [Setup User Names and Passwords for Authentication] dialog box, as required. [User Name] Displays the user name specified in the [Setup User Names and Pa...
Page 183 - [Settings of Encrypted Secure Print Password] Dialog Box
[Settings] [Password Settings] Dialog Box [Password (Default)] Enter the password. The following characters can be used. 0-9 a-z A-Z ! " # $ % & ' ( ) * + , - . / : ; > = < ? @ [ \ ] ^ _ ` { | } ~ spaces A maximum of 48 characters (15 alphanumeric characters for some devices) can be sp...
Page 185 - Canon PageComposer
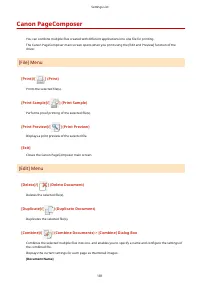
Canon PageComposer You can combine multiple files created with different applications into one file for printing. The Canon PageComposer main screen opens when you print using the [Edit and Preview] function of the driver. [File] Menu [Print]/[ ] (Print) Prints the selected file(s). [Print Sample]/[...
Page 186 - Box
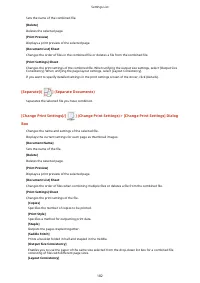
Sets the name of the combined file. [Delete] Deletes the selected page. [Print Preview] Displays a print preview of the selected page. [Document List] Sheet Changes the order of files in the combined file or deletes a file from the combined file. [Print Settings] Sheet Changes the print settings of ...
Page 188 - Troubleshooting
Troubleshooting Troubleshooting ............................................................................................................................................. 185 Driver settings cannot be set ...............................................................................................
Page 190 - Driver settings cannot be set; Page size, orientation, paper selection settings are not valid; Remedy; Cause; Remedy; Cause; Remedy
Driver settings cannot be set Page size, orientation, paper selection settings are not valid Cause Depending on the application you are using, the settings corresponding to these in the application are given priority over the driver settings. Remedy Configure these settings in the application. The [...
Page 191 - Print results are unsatisfactory; Page layout is not correct; Part of the printout does not match what you see on the screen
Print results are unsatisfactory Page layout is not correct If the printing area on the page is not positioned correctly, or if part of the printed area is missing, check the following. Cause 1. Print data is not set in the printable area. Remedy Confirm the printable area of the device, and correct...
Page 192 - Settings are not reflected in the print results
Settings are not reflected in the print results Cause Functions that cannot be enabled at the same time are set in the application and driver. Remedy The settings may be able to be reflected in the results by setting them in the driver only. Related Topics [Basic Settings] Sheet(P. 126) [Page Setup]...
Page 193 - Printing takes a long time
Printing takes a long time Cause The application uses EMF format data which cannot be processed by page printers. Remedy In the [Finishing] sheet, click [Advanced Settings], and then select [Off] from [EMF Spooling]. Related Topics [Finishing] Sheet(P. 132) Troubleshooting 189
Page 194 - Print results are too dark or too bright
Print results are too dark or too bright Cause The colors on the computer monitor and in the print results differ because their color representation methods differ. Remedy 1. For the UFR II/LIPSLX/LIPS4/PCL6 driver, change the color settings according to the following procedure.(1) Display the [Qual...
Page 195 - Overlay printing will not execute; Cannot perform overlay printing; Cannot use previously stored overlay form
Overlay printing will not execute Cannot perform overlay printing Cause 1. The resolution of the print data differs from that of the form file. Remedy 1. For the UFR II/LIPSLX/LIPS4/PCL6 driver, change the resolution according to the following procedure.(1) Display the [Quality] sheet.(2) Click [Adv...
Page 199 - Could not obtain restriction information.
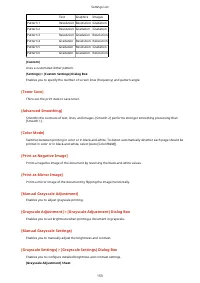
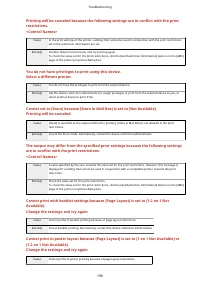
Causes and Remedies for Access Management SystemError Messages This section describes the causes and remedies for error messages which are displayed when using AMS. The output may differ from the specified print settings, or the print job may becanceled because the following settings are in conflict...
Page 201 - Cannot obtain the device IP Address or host name.
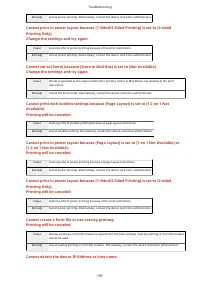
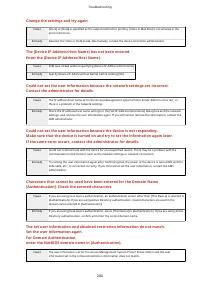
Remedy Cancel poster printing. Alternatively, contact the device restriction administrator. Cannot print in poster layout because [1-Sided/2-Sided Printing] is set to [2-sidedPrinting Only].Change the settings and try again. Cause Cannot perform poster printing because of the print restrictions. Rem...
Page 202 - Contact the administrator for details.
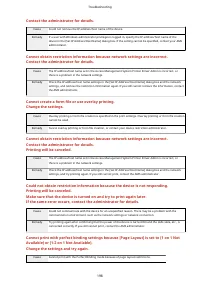
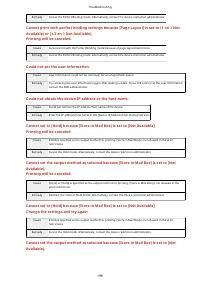
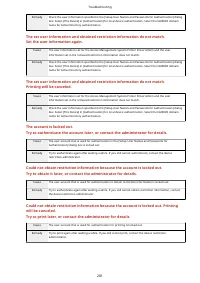
Contact the administrator for details. Cause Could not retrieve the IP address/host name of the device. Remedy If a user with Windows administrator privileges is logged in, specify the IP address/host name of thedevice in the [Set IP Address/Host Name] dialog box. If the setting cannot be specified,...
Page 204 - Change the settings and try again.
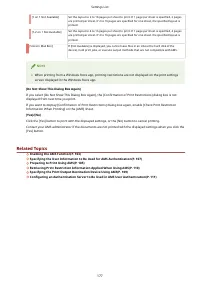
Change the settings and try again. Cause [Store] or [Hold] is specified as the output method for printing. [Store in Mail Box] is not allowed in theprint restrictions. Remedy Deselect the Store or Hold mode. Alternatively, contact the device restriction administrator. The [Device IP Address/Host Nam...
Page 206 - Cannot execute the Encrypted Secure Print function
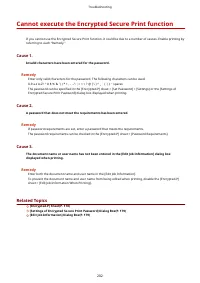
Cannot execute the Encrypted Secure Print function If you cannot use the Encrypted Secure Print function, it could be due to a number of causes. Enable printing by referring to each "Remedy." Cause 1. Invalid characters have been entered for the password. Remedy Enter only valid characters f...