Cafe CWE23SP4MW2 - User Manual
Cafe CWE23SP4MW2 Refrigerator – User Manual, read for free online in PDF format. We hope this helps you resolve any issues you may have. If you have further questions, please contact us through the contact form.


Table of Contents:
- Page 2 – INTRODUCTION; Doors; WARNING: Potable water supply; Final Checks; Installation Checklist; family
- Page 3 – IMPORTANT SAFETY INFORMATION; CALIFORNIA RESIDENTS ONLY
- Page 4 – NEVER
- Page 5 – CAUTION
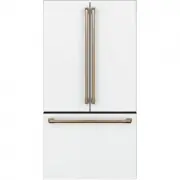
- Page 6 – FEATURES
- Page 7 – External Water Dispenser Model; IMPORTANT
- Page 8 – Before starting; Location; Do Not; Wrench; Allen Wrench; INSTALLATION; WARNING
- Page 9 – Door opening; To raise unit; Door; To lower door
- Page 10 – To adjust the flipper mullion:; Flipper Mullion; WRONG
- Page 11 – To prepare for removing the doors:; DOOR REMOVAL; To remove refrigerator doors:
- Page 12 – Press; NOTE
- Page 14 – Bottom of the Doors
- Page 16 – DOOR HANDLE INSTALLATION
- Page 17 – WATER SUPPLY CONNECTION
- Page 19 – Internal Water Dispenser Control Display Mode Views; CONTROLS AND SETTINGS
- Page 20 – Internal Water Dispenser Control Display
- Page 21 – Door Open; Internal Water Dispenser
- Page 22 – Awake Mode Display; Awake Mode; Sleep Mode Display
- Page 23 – External Water Dispenser Control Display
- Page 25 – Sabbath Mode; FZ−
- Page 26 – AUTOMATIC ICE & WATER DISPENSER
- Page 28 – Remove and empty the ice bin if:; External Dispenser - Refrigerator Ice Maker
- Page 30 – ICE MAKER
- Page 32 – STORAGE FEATURES; To adjust slide-under shelf; Shelves
- Page 33 – Drawers; Crispers; To remove the auto humidity control; Pure; Air Produce KeeperTM
- Page 34 – To remove the Crisper Drawer with; Air Produce KeeperTM for cleaning:; Air Produce KeeperTM after cleaning:
- Page 35 – Using your Adjustable Temp
- Page 36 – To change the position of an adjustable; Remove Upper Freezer Basket
- Page 37 – Lower basket Divider
- Page 38 – STORING FOOD AND SAVING ENERGY
- Page 39 – NORMAL OPERATING SOUNDS; Understanding the sounds you; D. Automatic ice maker; L. Ice dispensing paddle
- Page 40 – FILTER REPLACEMENT
- Page 45 – TROUBLESHOOTING; Concern Potential Cause
- Page 50 – LIMITED WARRANTY; USA; Canada
- Page 52 – welcome; home; owner support; Our home is your home. Visit us if you; registration; (See your registration card
*Select Models Only
SAFETY INFORMATION
. . . . . 3
OPERATING INSTRUCTIONS
Features . . . . . . . . . . . . . . . . . . . . . . . . . . 6
Controls . . . . . . . . . . . . . . . . . . . . . . . . . . 8
Dispenser . . . . . . . . . . . . . . . . . . . . . . . . . 11
Water Filter . . . . . . . . . . . . . . . . . . . . . . 12
Hot Water . . . . . . . . . . . . . . . . . . . . . . . 13
Single Serve Keurig K-Cup Brewer . . 14
Appliance Communication . . . . . . . . . 15
Fresh Food Storage Options . . . . . . . 16
Climate Zone & Temperature
Controlled Drawer . . . . . . . . . . . . . . . . 18
Freezer . . . . . . . . . . . . . . . . . . . . . . . . . . 20
Automatic Ice maker . . . . . . . . . . . . . . 21
CARE AND CLEANING
. . . . . 22
Replacing the Lights . . . . . . . . . . . . . . 23
INSTALLATION INSTRUCTIONS
Preparing to Install the
Refrigerator . . . . . . . . . . . . . . . . . . . . . . 24
Installing the Refrigerator . . . . . . . . . . 26
Installing the Anti-Tip Bracket . . . . . . 32
Installing the Water Line . . . . . . . . . . . 37
TROUBLESHOOTING TIPS
. . 41
Normal Operating Conditions . . . . . . 40
Truth or Myth . . . . . . . . . . . . . . . . . . . . 43
WARRANTY
. . . . . . . . . . . . . . . . . . 45
CONSUMER SUPPORT
RPWFE Water Filter Cartridge
Limited Warranty . . . . . . . . . . . . . . . . 46
Performance Data Sheet . . . . . . . . . . . 47
Consumer Support . . . . . . . . . . . . . . . . 48
ENGLISH/FRANÇAIS/
ESPAÑOL
Write the model and serial
numbers here:
Model # _________________
Serial # _________________
Find these numbers on a label
on the left side, near the middle
of the refrigerator compartment.
Pub No. 49-60791-2 02-18 GEA
GE Café™ models
Models that start with CFE are
Standard Depth Models (SD)
Models that start with CYE and
CWE are Counter Depth Models
(CD)
OWNER’S MANUAL &
INSTALLATION
INSTRUCTIONS
REFRIGERATORS
Bottom Freezer
GE is a trademark of the General Electric Company. Manufactured under trademark license.
"Loading the manual" means you need to wait until the file loads and becomes available for online reading. Some manuals are very large, and the time they take to appear depends on your internet speed.
Summary
2 49-60791-2 THANK YOU FOR MAKING GE APPLIANCES A PART OF YOUR HOME. Whether you grew up with GE Appliances, or this is your first, we’re happy to have you in the family. We take pride in the craftsmanship, innovation and design that goes into every GE Appliances product, and we think you will too. ...
49-60791-2 3 STATE OF CALIFORNIA PROPOSITION 65 WARNINGS: WARNING This product contains one or more chemicals known to the State of California to cause cancer and birth defects or other reproductive harm. CAUTION To reduce the risk of injury when using your refrigerator, follow these basic safety pr...
4 49-60791-2 SAFETY INFORMA T ION IMPORTANT SAFETY INFORMATION READ ALL INSTRUCTIONS BEFORE USING THE APPLIANCE READ AND SAVE THESE INSTRUCTIONS PROPER DISPOSAL OF YOUR OLD REFRIGERATOR Do not, under any circumstances, cut or remove the third (ground) prong from the power cord. For personal safety, ...