Page 2 - WARNING; Contents
2 BREVILLE RECOMMENDS SAFETY FIRST At Breville we are very safety conscious. We design and manufacture consumer products with the safety of you, our valued customer, foremost in mind. In addition we ask that you exercise a degree of care when using any electrical appliance. IMPORTANT SAFETY INSTRUCT...
Page 5 - SAVE THESE INSTRUCTIONS
5 • Always turn the microwave off by pressing the STOP/CLEAR button and unplug the power plug from the wall outlet before: − The appliance is to be left unattended. − If not in use. − Before moving or assembly. − When storing the appliance. − Cleaning per page 39. • Keep the appliance clean. Follow ...
Page 12 - • This appliance must be
12 NOTE This equipment generates, uses and can radiate radio frequency energy and, if not installed and used in accordance with the instructions, may cause harmful interference to radio communications. However, there is no guarantee that interference will not occur in a particular installation. If t...
Page 13 - • If it is necessary to use an; NOTE
13 • If it is necessary to use an extension cord, use only a 3-wire extension cord that has a 3-blade grounded plug, and 3-slot receptacle that will accept the plug on the appliance. The marked rating of the extension cord shall be equal to or greater than the electrical rating of the appliance. NOT...
Page 14 - SPECIFICATIONS
14 CALIFORNIA PROPOSITION 65: (Applicable to California residents only). This product contains chemicals known to the State of California to cause cancer, birth defects or other reproductive harm. SHORT CORD INSTRUCTIONS Your Breville appliance is fitted with a short power supply cord to reduce perso...
Page 15 - Components
15 A B C D K M L F H J I E G A. Viewing window B. Door handle C. Crisper pan Use with COOK & GRILL functions to crisp and brown foods. D. LCD screen E. POWER/AMOUNT dial Turn dial to adjust the power level and select the weight or quantity for a selected food type. F. +30 SEC & START button,...
Page 16 - Assembly; BEFORE FIRST USE
16 Assembly BEFORE FIRST USE Before first use, remove all promotional stickers and packing material. Carefully unpack the microwave oven and keep all the packing material until all the parts of the microwave oven have been found and the appliance has been assembled. It is recommended to keep all the...
Page 18 - Functions; SETTING THE CLOCK; Press SET CLOCK; Setting The Clock - 12 Hour Clock Display
18 Functions SETTING THE CLOCK Press SET CLOCK on the shortcuts panel. The default clock mode is 12hr. The selected mode will flash, indicating it can be changed. Turn the TIME dial to change between 12hr and 24hr clock mode. Press START to confirm selection. Setting The Clock - 12 Hour Clock Display ...
Page 19 - Press BEEP VOL on shortcuts panel.; SETTING THE UNIT OF WEIGHT; Press UNITS on the shortcuts panel.; Unit Conversion During Operation
19 The screen will return to the default display. When in standby mode, the screen will now display the 24hr time. NOTE To show the clock before standby mode is activated, press STOP/CLEAR. SETTING THE BEEP VOLUME Press BEEP VOL on shortcuts panel. The default beep volume is LOW. Amount POWER Turn t...
Page 20 - SETTING THE CHILD LOCK; button for 3 seconds.; button for 3 seconds.; SETTING THE TIMER; Setting the count down timer; Press TIMER on the control panel.; Press TIMER on the control panel.; Press START to start counting up.
20 SETTING THE CHILD LOCK Activate the child lock to prevent accidental usage of the microwave. To enable the child lock, press and hold the A BIT MORE ‰ A Bit More button for 3 seconds. The CHILD LOCK symbol will display on the LCD screen, as well as the clock if it has been set. A Bit More PRESS &...
Page 21 - For example
21 Press STOP/CLEAR once to pause the timer. Press START to resume counting up or press STOP/CLEAR a second time to clear the timer and return to the default screen. If the maximum of 95 minutes is reached in count up mode, the microwave will beep 3 times and ‘End’ will flash on the screen. NOTE 'End...
Page 22 - Press START to begin reheating.; Press the A BIT MORE
22 Press START to begin reheating. Food Type TIME Reheat process ends. Open the microwave door, check food, and if A Bit More‰ reheating time is required, close the door. Press the A BIT MORE ‰ button to add A BIT MORE ‰ reheating time. The timer will start to count down. A Bit More STOP/CLEAR Press...
Page 23 - Heating; TIME & POWER LEVEL ADJUSTMENT; Turning the TIME Dial; Turning the POWER Dial
23 WHEN COOKING IS FINISHED At the end of any cooking cycle, the microwave will beep 3 times and ‘End’ will flash on the screen for 1 minute or until the door is opened. COOLING FAN At the end of the cooking cycle, the fan may rotate to cool the electrical components. When this occurs the words 'Cool...
Page 24 - When using the SMART settings,; Setting a COOK setting
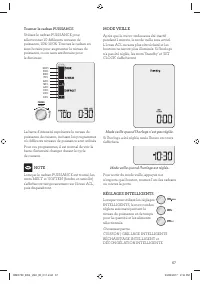
24 STANDBY MODE When the microwave has been idle for 1 minute, Standby mode will be activated. The LCD backlight will turn off and the buttons will no longer be illuminated. If the clock has not been set, 'Standby' and 'SET CLOCK' will be displayed. Stand-by mode when the clock is not set. If the cl...
Page 25 - Selecting a COOK & GRILL setting; Press START to confirm your selection.
25 Press START to begin the cook cycle. The TIME appears and begins to count down. NOTE While the microwave is cooking, both the power and time can be increased or decreased. Adjusting the cooking time does not change the selected weight or quantity. Selecting a COOK & GRILL setting If the selec...
Page 27 - Icon descriptions
27 Press START to begin the cook cycle. The TIME appears and begins to count down. Food Type TIME Microwave, grill or combination icons will display as the cooking cycle progresses. Food Type TIME Food Type TIME Icon descriptions = Microwave only = Grill only = Microwave + grill SMART COOK FOOD TYPE...
Page 29 - Place vegetables in a microwave safe bowl.; Bacon; Cook up to 8 slices of bacon in two layers.
29 Veg - Fresh The SMART COOK – FRESH VEG setting is suitable for all types of vegetables such as carrots, beans, broccoli and cauliflower. Cook times are based on vegetables directly from the refrigerator (approx. 40°F/5°C). Cut vegetables into even sized pieces and place in a microwave safe bowl. A...
Page 30 - CAUTION
30 Dried - Herbs The SMART COOK – DRIED HERBS setting heats fresh herbs so they become dry and crisp in texture. Herbs dried this way retain more color, fragrance and flavor than store-bought dried herbs. For best results use hard herbs such as thyme, rosemary, sage and oregano. Pick leaves off fresh...
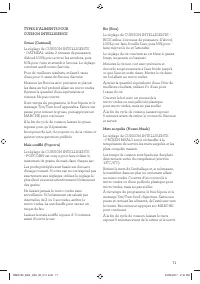
Page 31 - Caramel Table; SMART COOK & GRILL FOOD TYPES; Meat
31 Caramel Table AMOUNT SUGAR WATER CHECK EVERY 1 MIN AFTER 1 cup 1 cup (200g) ½ cup (120ml) 10 mins 2 cups 2 cups (400g) 1 cup (240ml) 20 mins SMART COOK & GRILL FOOD TYPES Meat The SMART COOK & GRILL – MEAT setting is suitable for smaller cuts, e.g. steaks and chops of beef, lamb and pork....
Page 32 - This setting is suitable for all types of bread.; Frozen Snacks; SMART REHEAT
32 Frozen Pizza The SMART COOK & GRILL – FROZEN PIZZA setting is ideal for cooking frozen pizzas so the crust gets crispy and the cheese is melted and golden brown. Cook times are based on pizza directly from the freezer (approx. 0°F/-18°C). At the end of the cooking cycle, allow pizza to stand ...
Page 33 - Leftovers
33 After selecting a food type, turn the AMOUNT dial to adjust the quantity or weight. Amount POWER Press START to begin the reheat cycle. The TIME appears and begins to count down. Reheat times are based on food directly from the refrigerator (approx. 40°F/5°C). NOTE While the microwave is reheatin...
Page 35 - SMART DEFROST
35 SMART DEFROST The SMART DEFROST setting is designed to gently defrost foods without overheating it or drying out the edges. Press the SMART DEFROST button to display the food menu Turn the TIME/Food Type dial to scroll through the available food types. The arrow on the right indicates which food ...
Page 36 - Chicken; For a whole chicken; Soup
36 Chicken The SMART DEFROST – CHICKEN setting is suitable for defrosting chicken pieces or a whole chicken. For chicken pieces, position the pieces in a single layer on a microwave safe plate and do not cover. Arrange thicker ends around the outside of the turntable. Halfway through the defrost pro...
Page 37 - SHORTCUTS; FAVORITE; Soften butter
37 SHORTCUTS Use the Shortcuts panel inside the door to perform common cooking tasks at the push of a button. FAVORITE The FAVORITE shortcut can be used to save your most used cook, reheat, defrost or shortcut setting. You can then easily duplicate your favorite program at the push of a button. To p...
Page 41 - Troubleshooting
41 Troubleshooting POSSIBLE PROBLEM EASY SOLUTION Microwave oven interfering with radio, TV or similar equipment. • Clean door and sealing surface of the oven. • Reorient the receiving antenna of radio or television. • Relocate the microwave oven with respect to the receiver. • Plug the microwave ov...
Page 43 - the; Quick Touch; Crisp
43 the Quick Touch MC Crisp Manuel d'instructions - BMO700 BMO700_BSS_USC_IB_C17.indd 43 23/03/2017 2:16 PM
Page 44 - AVERTISSEMENT
44 BREVILLE VOUS RECOMMANDE LA SÉCURITÉ AVANT TOUT Chez Breville, la sécurité occupe une place de choix. Nous concevons et fabriquons des produits de consommation sans jamais perdre de vue la sécurité de notre précieuse clientèle. De plus, nous vous demandons d’être très vigilant lorsque vous utilis...
Page 54 - LIQUIDES SURCHAUFFÉS
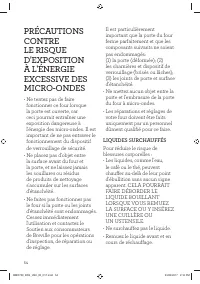
54 PRÉCAUTIONS CONTRE LE RISQUE D'EXPOSITION À L'ÉNERGIE EXCESSIVE DES MICRO-ONDES • Ne tentez pas de faire fonctionner ce four lorsque la porte est ouverte, car ceci pourrait entraîner une exposition dangereuse à l'énergie des micro-ondes. Il est important de ne pas entraver le fonctionnement du di...
Page 55 - ATTENTION
55 • N'utilisez pas de récipient à parois droites et col étroit. • Après le réchauffage, laissez reposer le récipient quelques instants dans le micro-ondes avant de le retirer du four. • Soyez extrêmement prudent lorsque vous insérez une cuillère ou autre ustensile dans le récipient. INTERFÉRENCE AV...
Page 56 - • Cet appareil doit être relié
56 NOTE Cet appareil utilise, génère et peut irradier (diffuser) de l'énergie de fréquences radio, et lorsqu'il n'est pas installé ou utilisé en accord avec le manuel d'instructions, ce dernier peut causer des interférences nocives aux communications radio. Toutefois, il n'est pas garanti que des in...
Page 57 - SPÉCIFICATIONS
57 NOTE N'utilisez pas de fiche d'adaptation avec cet appareil. (Les fiches d'adaptation ne sont pas permises au Canada.) PROPOSITION 65 DE LA CALIFORNIE : (Applicable aux résidents de la Californie seulement). Cet appareil contient des produits chimiques connus de l'État de la Californie comme pouvan...
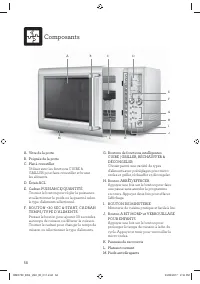
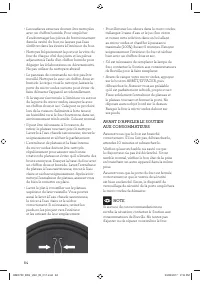
Page 58 - Minuterie de cuisine pratique et facile à lire.; Composants
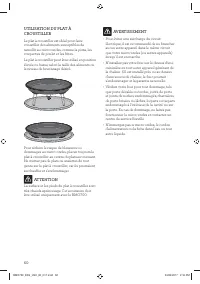
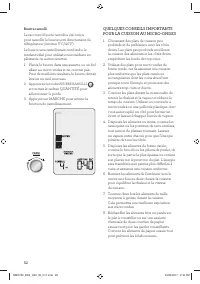
58 A B C D K M L F H J I E G A. Vitre de la porte B. Poignée de la porte C. Plat à croustiller Utiliser avec les fonctions CUIRE & GRILLER pour faire croustiller et brunir les aliments. D. Écran ACL E. Cadran PUISSANCE/QUANTITÉ Tourner le bouton pour régler la puissance et sélectionner le poids ...
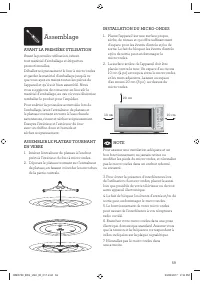
Page 59 - Assemblage; AVANT LA PREMIÈRE UTILISATION; Déposez le plateau tournant sur l'entraîneur; INSTALLATION DU MICRO-ONDES; La surface arrière de l'appareil doit être
59 Assemblage AVANT LA PREMIÈRE UTILISATION Avant la première utilisation, retirez tout matériel d'emballage et étiquettes promotionnelles. Déballez soigneusement le four à micro-ondes et gardez le matériel d'emballage jusqu'à ce que vous ayez en mains toutes les pièces de l'appareil et qu'il soit b...
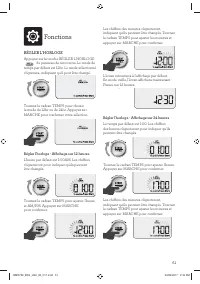
Page 61 - Fonctions; Appuyez sur la touche RÉGLER L'HORLOGE; Régler l'horloge - Affichage sur 12 heures
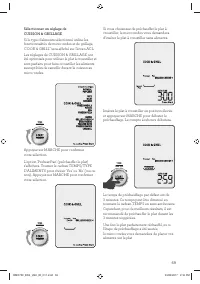
61 Fonctions RÉGLER L'HORLOGE Appuyez sur la touche RÉGLER L'HORLOGE du panneau de raccourcis. Le mode de temps par défaut est 12hr. Le mode sélectionné clignotera, indiquant qu'il peut être changé. Tournez le cadran TEMPS pour choisir le mode de 12hr ou de 24hr. Appuyez sur MARCHE pour confirmer vot...
Page 62 - Appuyez sur la touche BIP VOL; RÉGLER LES UNITÉS DE POIDS; Conversion des unités durant l'opération
62 L'écran retournera à l'affichage par défaut. En mode veille, l'écran affichera maintenant l'heure sur 24 heures. NOTE Pour afficher l'horloge avant que le mode veille soit activé, appuyez sur ARRÊT/EFFACER. RÉGLER LE VOLUME SONORE Appuyez sur la touche BIP VOL du panneau de raccourcis. Le volume par...
Page 63 - durant; RÉGLER LA MINUTERIE; Régler le compte à rebours; Appuyez sur le cadran TEMPS du; panneau de commande.; Régler le compte progressif; Appuyez sur le bouton MINUTERIE du
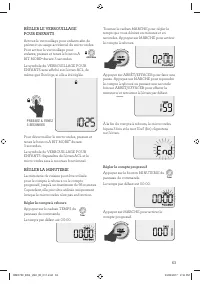
63 RÉGLER LE VERROUILLAGE POUR ENFANTS Activez le verrouillage pour enfants afin de prévenir un usage accidentel du micro-ondes. Pour activer le verrouillage pour enfants, pressez et tenez le bouton A BIT MORE ‰ durant 3 secondes. Le symbole du VERROUILLAGE POUR ENFANTS sera affiché sur l'écran ACL, d...
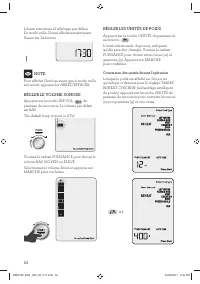
Page 64 - Par exemple
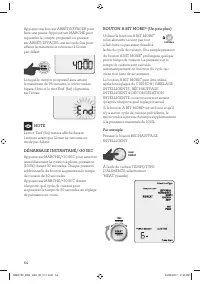
64 Appuyez une fois sur ARRÊT/EFFACER pour faire une pause. Appuyez sur MARCHE pour reprendre le compte progressif ou pressez sur ARRÊT/EFFACER une seconde fois pour effacer la minuterie et retourner à l'écran par défaut. Lorsque le compte progressif aura atteint le maximum de 95 minutes, le micro-o...
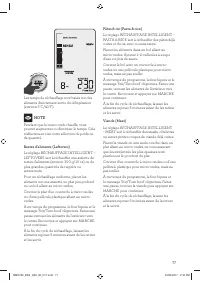
Page 65 - Le cycle de réchauffage est terminé.
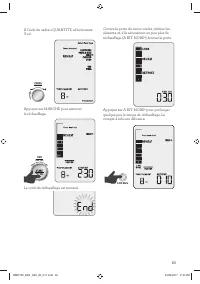
65 À l'aide du cadran QUANTITÉ, sélectionnez '8 oz'. Amount POWER Appuyez sur MARCHE pour amorcer le réchauffage. Food Type TIME Le cycle de réchauffage est terminé. Ouvrez la porte du micro-ondes, vérifiez les aliments et, s'ils nécessitent un peu plus de réchauffage (A BIT MORE ‰ ), fermez la porte...
Page 66 - Réchauffage; Tourner le cadran TEMPS
66 ARRÊT/EFFACER Appuyez une fois sur ARRÊT/EFFACER pour arrêter temporairement la fonction en cours. Appuyez deux fois pour l'effacer et retourner à l'écran par défaut. x2 Si l'écran par défaut est affiché, appuyez une fois sur ARRÊT/EFFACER pour afficher l'horloge. Si elle n'a pas été réglée, le mes...
Page 67 - Tourner le cadran PUISSANCE; Lorsque vous utilisez les réglages; Choisissez parmi
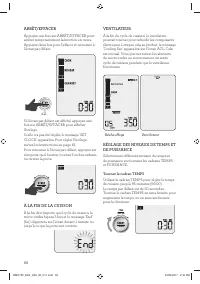
67 Tourner le cadran PUISSANCE Utilisez le cadran PUISSANCE pour sélectionner 10 différents niveaux de puissance, 10%–100%. Tournez le cadran en sens horaire pour augmenter le niveau de puissance, ou en sens antihoraire pour le diminuer. 100% 90%80% 70% 60% 50%40%30%20% 10% Amount POWER La barre d'i...
Page 68 - CUISSON | GRILLAGE INTELLIGENTS; Sélectionner un réglage de CUISSON
68 CUISSON | GRILLAGE INTELLIGENTS Le réglage CUISSON | GRILLAGE INTELLIGENTS utilise des temps de cuisson au micro-ondes et de grillage prédéterminés pour vous permettre de cuire vos aliments favoris sans y aller à l'aveuglette. Appuyez sur le bouton CUISSON | GRILLAGE INTELLIGENTS pour afficher le ...
Page 70 - Description des icones
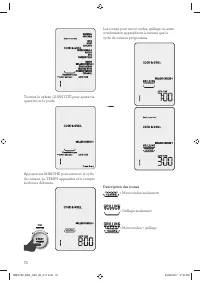
70 Food Type TIME Tournez le cadran QUANTITÉ pour ajuster la quantité ou le poids. Food Type TIME Appuyez sur MARCHE pour amorcer le cycle de cuisson. Le TEMPS apparaîtra et le compte à rebours débutera. Food Type TIME Les icones pour micro-ondes, grillage ou autre combinaison apparaîtront à mesure ...
Page 74 - Caramel; Tableau de cuisson du caramel
74 Caramel Le réglage de CUISSON INTELLIGENTE – CARAMEL sert à caraméliser le sucre et l'eau pour obtenir une sauce caramel, du caramel au beurre ou autres régals à base de caramel. Le réglage CARAMEL utilise 2 niveaux de puissance. D'abord, 100% pour évaporer l'eau et faire fondre le sucre, puis 80...
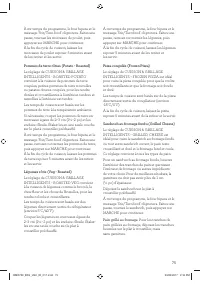
Page 75 - Sandwich au fromage fondu (Grilled Cheese); Ce réglage convient à tous les types de pain.
75 À mi-temps du programme, le four bipera et le message 'Stir/Turn food' clignotera. Faites une pause, tournez les morceaux de poulet, puis appuyez sur MARCHE pour continuer. À la fin du cycle de cuisson, laissez les morceaux de poulet reposer 5 minutes avant de les retirer et les servir. Pommes de ...
Page 76 - RÉCHAUFFAGE INTELLIGENT; Appuyez sur le bouton
76 À mi-temps du programme, le four bipera et le message 'Stir/Turn food' clignotera. Faites une pause, tournez les tranches de pain, ajoutez le fromage ou toute autre garniture, puis appuyez sur MARCHE pour continuer. À la fin du cycle de cuisson, retirez et servez immédiatement. Collations congelée...
Page 78 - Pizza
78 Poulet (Chicken) Le réglage RÉCHAUFFAGE INTELLIGENT – CHICKEN sert à réchauffer lentement les morceaux de poulet sans trop les cuire ou les dessécher. Il ne peut servir à réchauffer un poulet entier. Placez les morceaux de poulet sur une seule couche dans une assiette allant au micro-ondes, en vo...
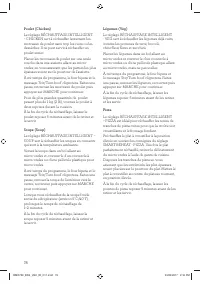
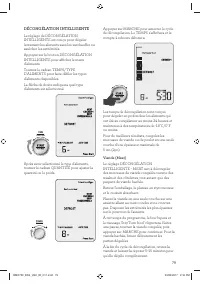
Page 79 - DÉCONGÉLATION INTELLIGENTE
79 DÉCONGÉLATION INTELLIGENTE Le réglage de DÉCONGÉLATION INTELLIGENTE est conçu pour dégeler lentement les aliments sans les surchauffer ou assécher les extrémités. Appuyez sur le bouton DÉCONGÉLATION INTELLIGENTE pour afficher le menu d'aliments. Tournez le cadran TEMPS/TYPE D'ALIMENTS pour faire d...
Page 80 - Pour un poulet entier,; RACCOURCIS; FAVORI
80 Poulet (Chicken) Le réglage de DÉCONGÉLATION INTELLIGENTE – CHICKEN sert à décongeler les morceaux de poulet ou poulet entier. Pour les morceaux de poulet, placez-les en une seule couche sur une assiette allant au micro-ondes, mais ne couvrez pas. Placez les extrémités plus épaisses sur le pourto...
Page 82 - Beurre ramolli
82 Beurre ramolli Le raccourci Beurre ramolli a été conçu pour ramollir le beurre sorti directement du réfrigérateur (environ 5°C/40°F). Le beurre sera ramolli mais non fondu, le rendant idéal pour utilisation immédiate en pâtisserie ou autres recettes. 1. Placez le beurre dans une assiette ou un bo...
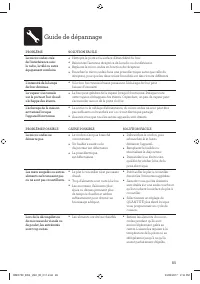
Page 85 - Guide de dépannage
85 Guide de dépannage PROBLÈME SOLUTION FACILE Le micro-ondes crée de l'interférence avec la radio, la télé ou autre équipement similaire. • Nettoyez la porte et la surface d'étanchéité du four. • Réorientez l'antenne réceptrice de la radio ou du téléviseur. • Replacez le micro-ondes en fonction du ...
Page 88 - USA; Breville Consumer Support
Web: www.breville.ca/support Web: www.brevilleusasupport.com Breville is a registered trademark of Breville Pty. Ltd. A.B.N. 98 000 092 928. Copyright Breville Pty. Ltd. 2017. Due to continued product improvement, the products illustrated/photographed in this booklet may vary slightly from the actua...