Page 2 - CONTENTS; Introduction; Selecting the input source and favorite settings with one touch
En 2 CONTENTS Introduction 5 Accessories................................................................................... 5 About this book ............................................................................ 5 About remote control .............................................................
Page 3 - Configuring playback settings for different playback sources; CONFIGURATIONS
En 3 Selecting the sound mode ............................................................. 60 Playing back with surround effects optimized for the scene (SURROUND:AI).......................................... 61 Enjoying stereoscopic sound fields (CINEMA DSP HD 3 ) ....................................
Page 4 - APPENDIX
En 4 Restoring the default settings (INITIALIZE)............................................................................................... 141 Updating the firmware (FIRM. UPDATE).................................................................................................... 141 Checking th...
Page 5 - Accessories; Icons used in this manual
En 5 Introduction Accessories Check that the following accessories are supplied with the product. # AM antenna(except Australia, U.K., Europe, Middle East and Russia models) # FM antenna (except Australia, U.K., Europe, Middle East and Russia models) # DAB/FM antenna (Australia, U.K., Europe, Middle...
Page 6 - About remote control; This section explains how to use the supplied remote control.; Batteries; Insert the batteries the right way round.; Operating range of the remote control; operating range shown below.
En 6 About remote control This section explains how to use the supplied remote control. Batteries Insert the batteries the right way round. Operating range of the remote control Point the remote control at the remote control sensor on the unit and remain within the operating range shown below. 30° 3...
Page 7 - FEATURES; What you can do with the unit
En 7 FEATURES What you can do with the unit The unit is equipped with the various useful features. Connecting various devices (p.32) A number of HDMI jacks and various input/output jacks on the unit allow you to connect video devices (such as BD/DVD players), audio devices (such as CD players), game...
Page 8 - What is a sound field?; us the auditory sensation of being in that specific place.; Conceptual diagram of a concert hall’s sound field; CINEMA DSP; “CINEMA DSP HD; Capability for reproducing reflections
En 8 CINEMA DSP The excitement of a concert hall and the powerful sense of being inside a movie - we all want to enjoy these experiences in our own living room. Yamaha has pursued the fulfillment of these desires for more than 30 years, and this fulfillment has now taken shape as the Yamaha AV recei...
Page 9 - Useful applications; AV CONTROLLER; AV SETUP GUIDE; Functions; MusicCast CONTROLLER; Functions
En 9 Useful applications The following applications provide you the flexibility to control the unit or assist you with the cable connections. AV CONTROLLER “AV CONTROLLER” will turn your smartphone/tablet into a Wi-Fi enabled remote control for your Yamaha network products. This application provides...
Page 10 - Part names and functions; This section explains the functions of the parts of the unit.; Front panel; To use controls or jacks behind the front panel door, gently; b c
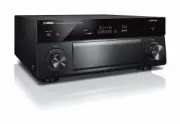
En 10 Part names and functions This section explains the functions of the parts of the unit. Front panel a MAIN ZONE z key Turns on/off (standby) the unit. b Standby indicator Lights up when the unit is in standby mode under any of the following conditions. • HDMI Control is enabled (p.124) • HDMI S...
Page 11 - Inside of the front panel door
En 11 ■ Inside of the front panel door a SETUP key Displays the Setup menu on the TV. b Menu operations keys Cursor keys: Select a menu or a parameter. ENTER: Confirms a selected item. RETURN: Returns to the previous screen. c OPTION key Displays the option menu (p.101). d HELP key In the on-screen ...
Page 12 - VIRTUAL; MUTE
En 12 Front display (indicators) a HDMI Lights up when HDMI signals are being input or output. IN Lights up when HDMI signals are being input. OUT1/OUT2/OUT3 Indicates the HDMI OUT jacks currently outputting an HDMI signal. b ECO Lights up when the unit is in the eco mode (p.136). c Firmware update ...
Page 13 - Rear panel
En 13 Rear panel (U.S.A. model) * The area around the video/audio output jacks is marked in white on the actual product to prevent improper connections. HDMI OUT ARC 1 3 2 HDMI (1 MOVIE) (5 STB) (6 GAME) (ZONE OUT) AV 1 AV 2 AV 3 AV 4 (HDCP2.2) AV 5 AV 6 AV 7 IN OUT REMOTE R L AV 1 AV 2 AV 3 AV 4 AU...
Page 15 - Remote control; hq
En 15 Remote control a Remote control signal transmitter Transmits infrared signals. b z (receiver power) key Turns on/off (standby) the unit. c MAIN/ZONE2 switch Changes the zone that is controlled by the remote control (p.96). d SLEEP key Pressing this key repeatedly will specify the time (120 min...
Page 16 - PREPARATIONS; General setup procedure
En 16 PREPARATIONS General setup procedure 1 Connecting speakers . . . . . . . . . . . . . . . . . . . . . . . . . . . . . . . . . . . . . . . . . . . . . . . . . . . . . . . . . . . . . . . . . . . . . . . . . . . (p.17) 2 Connecting a TV and playback devices . . . . . . . . . . . . . . . . . . . ....
Page 17 - Connecting speakers; Ideal speaker layout; Caution
En 17 1 Connecting speakers The unit has 7 built-in amplifiers. You can connect 2 to 9 speakers and up to 2 subwoofers to create the favorite acoustic space in your room. You can also apply bi-amp connections, channel expansion (using an external power amplifier) or multi-zone configurations to enha...
Page 18 - Basic speaker configuration; Placing speakers in your room; section describes the representative speaker layout examples.; (using both surround back and front presence speakers)
En 18 Basic speaker configuration If you do not apply bi-amp connections, channel expansion (using an external amplifier) or multi-zone configurations, follow the procedure below to place the speakers in your room and connect them to the unit. ■ Placing speakers in your room Depending on the number ...
Page 19 - extended surround sounds using the surround back speakers.
En 19 5.1.2 system [ S ] (using front presence speakers) This speaker system uses the front presence speakers to produce a natural 3-dimensional sound field, and also creates Virtual Surround Back Speaker (VSBS) using the surround speakers to add a sense of depth to the rear sound field. This system...
Page 22 - Presence speaker layout; Front Height; Install the presence speakers on the front side wall.; Overhead; rear sound spaces effectively.; Dolby Enabled SP; Use the Dolby Enabled speakers as the presence speakers.; Notes on installation of ceiling speakers
En 22 Presence speaker layout The unit provides three layout patterns for presence speakers (Front Height, Overhead and Dolby Enabled SP). Choose a layout pattern that suits your listening environment (p.115). X You can enjoy Dolby Atmos, DTS:X or Cinema DSP HD 3 with any layout pattern. Front Heigh...
Page 23 - Precaution for connecting of the speaker cables; ¡¡¡¡¡¡¡¡¡8¬MIN
En 23 ■ Setting the speaker impedance Under its default settings, the unit is configured for 8-ohm speakers. When using a 6-ohm speaker for any channel, set the speaker impedance to “6 Ω MIN”. In this case, you can also use 4-ohm speakers as the front speakers. 1 Before connecting speakers, connect ...
Page 24 - Speakers to be connected; depending on the input signal and CINEMA DSP.; Cables necessary for connection (commercially available); Speaker cables (x the number of speakers); Connection diagram
En 24 Speakers to be connected If you have nine speakers, you can connect the both surround back speakers and front presence speakers. In this case, the unit automatically changes the speakers to be used, depending on the input signal and CINEMA DSP. If you have seven speakers, use two of them as su...
Page 25 - Connecting speaker cables; Loosen the speaker terminal.; Use an audio pin cable to connect the subwoofer.
En 25 Connecting speaker cables Speaker cables have two wires. One is for connecting the negative (-) terminal of the unit and the speaker, and the other is for the positive (+) terminal. If the wires are colored to prevent confusion, connect the black wire to the negative and the other wire to the ...
Page 26 - Advanced speaker configuration
En 26 Advanced speaker configuration In addition to the basic speaker configuration (p.18), the unit also allows you to apply the following speaker configurations to enhance your system. Using the four internal amplifiers for front speakers to have more high-quality sounds (Example) (Example) (Examp...
Page 27 - Available speaker configurations
En 27 ■ Available speaker configurations Y When applying one of these configurations, you need to configure the “Power Amp Assign” setting in the “Setup” menu (p.42). 7.1 +1Zone X When Zone2 output is enabled (p.96), the surround back speakers in the main zone do not output sound. Main zone Multi-zo...
Page 29 - terminals and EXTRA SP1 terminals.
En 29 7.1 Bi-Amp [ext.SB] ■ Connecting front speakers that support bi-amp connections When using front speakers that support bi-amp connections, connect them to the FRONT terminals and EXTRA SP1 terminals. To enable the bi-amp function, configure the “Power Amp Assign” setting in the “Setup” menu af...
Page 30 - Connecting Zone2 speakers; (when using surround back speakers in the main zone)
En 30 ■ Connecting Zone2 speakers When using Zone2 speakers, connect them to the EXTRA SP1 or EXTRA SP2 terminals. To utilize the EXTRA SP terminals for Zone2 speakers, configure the “Power Amp Assign” setting in the “Setup” menu after connecting the power cable to an AC wall outlet (p.42). X You ca...
Page 31 - Connecting an external power amplifier; FRONT jacks; SURROUND jacks; CENTER jack; Connecting front speakers via an external power amplifier; About external power amplifiers; • With unbalanced inputs; a b c
En 31 ■ Connecting an external power amplifier When connecting an external power amplifier to enhance speaker output, connect the input jacks of the power amplifier to the PRE OUT jacks of the unit. The same channel signals are output from the PRE OUT jacks as from their corresponding SPEAKERS termi...
Page 32 - Connecting a TV and playback devices; Input/output jacks and cables; Video jacks
En 32 2 Connecting a TV and playback devices Connect a TV and playback devices (video and audio devices) to the unit. For information on how to connect a USB storage device, see “Connecting a USB storage device” (p.80). Input/output jacks and cables The unit is equipped with the following input/outp...
Page 33 - Connecting a TV; You can also enjoy playback of TV audio on the unit.; HDMI connection; Connecting another TV or a projector
En 33 Connecting a TV Connect a TV to the unit so that video input to the unit can be output to the TV. You can also enjoy playback of TV audio on the unit. ■ HDMI connection Connect the TV to the unit with an HDMI cable and an audio cable (digital optical or stereo pin cable). Y You can connect ano...
Page 34 - Connect a video device to the unit with an HDMI cable.; Component video connection; output jacks available on your video device.
En 34 Connecting video devices (such as BD/DVD players) Connect video devices such as BD/DVD players, set-top boxes (STBs) and game consoles to the unit. Depending on the video/audio output jacks available on your video device, choose one of the following connections. We recommend using an HDMI conn...
Page 35 - Composite video connection; audio output jacks available on your video device.
En 35 ■ Composite video connection Connect a video device to the unit with a video pin cable and an audio cable (digital coaxial, digital optical, or stereo pin cable). Choose a set of input jacks (on the unit) depending on the audio output jacks available on your video device. Output jacks on video...
Page 36 - Connecting audio devices (such as CD players); When connecting a turntable
En 36 Connecting audio devices (such as CD players) Connect audio devices such as CD players and a turntable to the unit. Depending on the audio output jacks available on your audio device, choose one of the following connections. Y The following explanation is based on the assumption that you have ...
Page 37 - Connecting to the jacks on the front panel; will be output from the unit.
En 37 Connecting to the jacks on the front panel The AUX jacks are convenient for temporarily connecting an audio playback device. Use stereo pin cables to connect an audio device (such as a CD player) to the unit. For details on connecting a USB device to the USB jack, see “Connecting a USB storage...
Page 38 - Connecting the radio antennas; Connect the supplied radio antenna to the unit.; Assembling the AM antenna
En 38 3 Connecting the radio antennas Connect the supplied radio antenna to the unit. FM/AM antennas (except Australia, U.K., Europe, Middle East and Russia models) Connect the supplied FM/AM antennas to the unit. Fix the end of the FM antenna to a wall, and place the AM antenna on a flat surface. A...
Page 39 - Connecting a network cable or preparing the wireless antenna; antenna for establishing a wireless network connection.; Connecting the network cable; Preparing the wireless antenna; wireless antenna up straight.
En 39 4 Connecting a network cable or preparing the wireless antenna Connect the unit to a router (access point) with a network cable, or prepare the wireless antenna for establishing a wireless network connection. You can enjoy Internet radio or music files stored on media servers, such as PCs and ...
Page 40 - Connecting other devices; Connect a device compatible with the trigger function.; Connecting the power cable; to an AC wall outlet.
En 40 5 Connecting other devices Connect a device compatible with the trigger function. Connecting a device compatible with the trigger function The trigger function can control an external device in conjunction with operating the unit (such as powering on/off and input selection). If you have a Yam...
Page 41 - Selecting an on-screen menu language; Press
En 41 7 Selecting an on-screen menu language Select the desired on-screen menu language from English (default), Japanese, French, German, Spanish, Russian, Italian and Chinese. 1 Press z (receiver power) to turn on the unit. 2 Turn on the TV and switch the TV input to display video from the unit (HD...
Page 42 - Configuring the necessary speaker settings
En 42 8 Configuring the necessary speaker settings If you use any of the following speaker configurations, follow the procedure below to configure the corresponding speaker settings manually before performing YPAO. • Advanced speaker configuration (p.26) • Using the surround speakers for front 5.1-c...
Page 43 - Optimizing the speaker settings automatically (YPAO); The Yamaha Parametric room Acoustic Optimizer (YPAO) function
En 43 9 Optimizing the speaker settings automatically (YPAO) The Yamaha Parametric room Acoustic Optimizer (YPAO) function detects speaker connections, measures the distances from them to your listening position(s), and then automatically optimizes the speaker settings, such as volume balance and ac...
Page 44 - When “Measuring option” is set to “Multi Measure”:
En 44 5 If desired, change the measuring method (multi/single). When “Measuring option” is set to “Multi Measure”, measurements are taken at multiple listening positions. (multi measure) Measuring method X • If you perform the multi measure, the speaker settings will be optimized for you to enjoy su...
Page 47 - Disconnect the YPAO microphone from the unit.; This completes optimization of the speaker settings.; Checking the measurement results; You can check the YPAO measurement results.; After the measurement, use the cursor keys to select; The following screen appears.; Measurement result items; Use the cursor keys to select an item.
En 47 6 Disconnect the YPAO microphone from the unit. This completes optimization of the speaker settings. Checking the measurement results You can check the YPAO measurement results. 1 After the measurement, use the cursor keys to select “Measurement result” and press ENTER. X You can also select “...
Page 48 - Reloading the previous YPAO adjustments; When the speaker settings you have configured manually are not
En 48 Reloading the previous YPAO adjustments When the speaker settings you have configured manually are not suitable, follow the procedure below to discard the manual settings and reload the previous YPAO adjustments. 1 In the “Setup” menu, select “Speaker” and then “YPAO Result” (p.116). 2 Use the...
Page 49 - Error messages
En 49 Error messages If any error message is displayed during the measurement, resolve the problem and perform YPAO again. Error message Remedy ERROR 1 Front speakers are not detected. Follow the on-screen instructions to exit YPAO, turn off the unit, and then check the speaker connections. ERROR 2 ...
Page 50 - Warning messages; results by following on-screen instructions.
En 50 Warning messages If a warning message is displayed after the measurement, you can still save the measurement results by following on-screen instructions. However, we recommend you perform YPAO again in order to use the unit with the optimal speaker settings. Warning message Remedy WARNING 1 A ...
Page 51 - Connecting to a network device wirelessly; Connecting with a wireless router (access point)
En 51 10 Connecting to a network device wirelessly Connect the unit to a wireless router (access point) or a mobile device by establishing a wireless connection. Connecting with a wireless router (access point) Connect the unit to a wireless router (access point). You can enjoy Internet radio, AirPl...
Page 52 - Connecting the unit to a wireless network; Select a connection method according to your environment.; Sharing the iOS device setting; Before proceeding, confirm that your iOS device is connected to a
En 52 Connecting the unit to a wireless network There are several methods to connect the unit to a wireless network. Select a connection method according to your environment. • Using MusicCast CONTROLLER (p.57) • Sharing the iOS device setting (p.52) • Using the WPS push button configuration (p.53) ...
Page 53 - Using the WPS push button configuration; You can easily set up a wireless connection with one push of the WPS; About WPS
En 53 8 After checking the on-screen message, use the cursor keys and ENTER to select “NEXT”. 9 On the iOS device, select the unit as the AirPlay speaker in the Wi-Fi screen. 10 Check the network currently selected and tap “Next”. When the sharing process finishes, the unit is automatically connecte...
Page 54 - Using other connection methods; wireless network settings.; The following connection methods are available.
En 54 ■ Using other connection methods If your wireless router (access point) does not support WPS push button configuration method, follow the procedure below to configure the wireless network settings. 1 Press z (receiver power) to turn on the unit. 2 Turn on the TV and switch the TV input to disp...
Page 56 - Using the PIN code
En 56 3 Use the cursor keys and ENTER to enter the security key and select “NEXT”. If you select “None” in Step 2, this setting is not available. Proceed to Step 4. If you select “WEP”, enter either 5 or 13 character string, or 10 or 26 hexadecimal digits. If you select other method, enter either 8 ...
Page 57 - Connecting to the MusicCast network
En 57 11 Connecting to the MusicCast network MusicCast is a brand new wireless musical solution from Yamaha, allowing you to share music among all of your rooms with a variety of devices. You can enjoy music from your smartphone, PC, NAS drive and music streaming service anywhere in your house with ...
Page 58 - PLAYBACK; Basic playback procedure; Turn on the external devices (such as a TV or BD/DVD; Refer to the instruction manual for the external device.; Press VOLUME to adjust the volume.; Selecting an HDMI output jack; Press HDMI OUT to select an HDMI OUT jack.; Each time you press the key, the HDMI OUT jack to be used for
En 58 PLAYBACK Basic playback procedure 1 Turn on the external devices (such as a TV or BD/DVD player) connected to the unit. 2 Use the input selection keys to select an input source. 3 Start playback on the external device or select a radio station. Refer to the instruction manual for the external ...
Page 59 - Registering a scene; Main Zone and Zone2; SET Complete
En 59 Selecting the input source and favorite settings with one touch (SCENE) The SCENE function allows you to select the assigned input source, sound program, HDMI output and various settings with just one touch. You can use up to 8 scenes to register your favorite settings and switch them dependin...
Page 60 - Selecting the sound mode; Selecting a sound program suitable for movies and music; Precaution for enjoying Dolby Atmos®; Precaution for enjoying DTS:XTM
En 60 Selecting the sound mode The unit is equipped with a variety of sound programs and surround decoders that allow you to enjoy playback sources with your favorite sound mode (such as sound field effect or stereo playback). Enabling SURROUND:AI. • Press AI. This mode lets you enjoy the optimum su...
Page 61 - Enjoying stereoscopic sound fields; MUSIC; Hall in Vienna
En 61 Playing back with surround effects optimized for the scene (SURROUND:AI) With SURROUND:AI, the AI incorporated in the DSP creates the optimal surround effect for the scene of the content. Scenes are instantaneously analyzed with a focus on sound elements such as “dialogue”, “background music”,...
Page 62 - Sound programs suitable for movies (MOVIE); MOVIE THEATER
En 62 ■ Sound programs suitable for movies (MOVIE) The following sound programs are optimized for viewing video sources, such as movies, TV programs, and games. MOVIE THEATER ENTERTAINMENT Standard This program creates a sound field that emphasizes the surround feeling without disturbing the origina...
Page 63 - You can also select stereo playback.; CLASSICAL
En 63 ■ Sound programs suitable for music/stereo playback (MUSIC) The following sound programs are optimized for listening to music sources. You can also select stereo playback. CLASSICAL LIVE/CLUB STEREO Y CINEMA DSP HD 3 (p.61) and Virtual CINEMA DSP (p.64) do not work when “2ch Stereo” or “7ch St...
Page 65 - Enjoying unprocessed playback; You can play back input sources without any sound field effect; Press SUR. DECODE to select a surround decoder.; Each time you press the key, the surround decoder changes.; †‡ Dsur
En 65 Enjoying unprocessed playback You can play back input sources without any sound field effect processing. ■ Playing back in original channels (straight decode) When the straight decode mode is enabled, the unit produces stereo sound from the front speakers for 2-channel sources such as CDs, and...
Page 66 - PURE DIRECT
En 66 Enjoying pure high fidelity sound (Pure Direct) When Pure Direct is enabled, the unit plays back the selected source with the least circuitry in order to reduce the electrical noise from other circuitry (such as the front display). It allows you to enjoy Hi-Fi sound quality. 1 Press PURE DIREC...
Page 67 - from registered radio stations.; Setting the frequency steps; Hold down the key for about a second to search stations; TUNER FRQ STEP
En 67 Listening to FM/AM radio (except Australia, U.K., Europe, Middle East and Russia models) You can tune into a radio station by specifying its frequency or selecting from registered radio stations. Y • The radio frequencies differ depending on the country or region where the unit is being used. ...
Page 68 - Registering a radio station manually; tune into the desired radio station.; To start the Auto Preset process, press ENTER.; Preset OK; Preset
En 68 Registering favorite radio stations (presets) You can register up to 40 radio stations as presets. Once you have registered stations, you can easily tune into them by selecting their preset numbers. X You can automatically register FM radio stations that have strong signals by using “FM Auto P...
Page 69 - Selecting a preset station; Clearing preset stations
En 69 ■ Selecting a preset station Tune into a registered radio station by selecting its preset number. 1 Press TUNER to select “TUNER” as the input source. 2 Press PRESET repeatedly to select the desired radio station. Y “No Presets” appears when no radio stations are registered. ■ Clearing preset ...
Page 70 - Preparing the DAB tuning; perform an initial scan.; Press TUNER to select “TUNER” as the input source.; The following message appears on the front panel if you have not; Press ENTER to start an initial scan.; first DAB radio station as stored in station order.; DAB
En 70 Listening to DAB radio (Australia, U.K., Europe, Middle East and Russia models only) DAB (Digital Audio Broadcasting) uses digital signals for clearer sound and more stable reception compared to analog signals. The unit can also receive DAB+ (an upgraded version of DAB) that allows for more st...
Page 71 - Selecting a DAB radio station for reception; Registering a DAB radio station as presets; Select a DAB radio station and register it to a preset number.; Follow “Selecting a DAB radio station for reception”; The first time that you do register a station, the selected radio; Daily Service; BBC Radio 4
En 71 Selecting a DAB radio station for reception You can select a DAB radio station from the stations stored by the initial scan. 1 Press TUNER to select “TUNER” as the input source. 2 Press BAND to select the DAB band. 3 Press TUNING repeatedly to select a DAB radio station. Y • “Off Air” appears ...
Page 72 - Selecting a preset DAB radio station; Clearing preset DAB radio stations
En 72 ■ Selecting a preset DAB radio station Tune into a registered DAB radio station by selecting its preset number. 1 Press TUNER to select “TUNER” as the input source. 2 Press BAND to select the DAB band. 3 Press PRESET repeatedly to select the desired DAB radio station. Y “No Presets” appears wh...
Page 73 - Displaying the DAB information; into a DAB radio station.; Info; Classic FM; Tune AID
En 73 Displaying the DAB information The unit can receive various types of DAB information when it is tuned into a DAB radio station. 1 Tune into the desired DAB radio station. 2 Press INFO on the front panel. Each time you press the key, the displayed item changes. About 3 seconds later, the corres...
Page 74 - DAB frequency information
En 74 ■ DAB frequency information The unit supports Band III (174 to 240 MHz) only. Frequency Channel label 174.928 MHz 5A 176.640 MHz 5B 178.352 MHz 5C 180.064 MHz 5D 181.936 MHz 6A 183.648 MHz 6B 185.360 MHz 6C 187.072 MHz 6D 188.928 MHz 7A 190.640 MHz 7B 192.352 MHz 7C 194.064 MHz 7D 195.936 MHz ...
Page 75 - Selecting a frequency for reception; You can register up to 40 FM radio stations as presets. Once you have
En 75 Listening to FM radio (Australia, U.K., Europe, Middle East and Russia models only) You can tune into a radio station by specifying its frequency or selecting from registered radio stations. Y If you cannot obtain good reception on the radio, adjust the direction of the DAB/FM antennas. Select...
Page 78 - Radio Data System tuning; Displaying the Radio Data System information; Tune into the desired Radio Data System broadcasting station.; Each time you press the key, the displayed item changes.; CLASSICS
En 78 Radio Data System tuning (U.K., Europe, Middle East and Russia models only) Radio Data System is a data transmission system used by FM stations in many countries. The unit can receive various types of Radio Data System data, such as “Program Service”, “Program Type”, “Radio Text” and “Clock Ti...
Page 79 - Playing back music via Bluetooth; Press BLUETOOTH to select “Bluetooth” as the input
En 79 Playing back music via Bluetooth You can play back music files stored on a Bluetooth device (such as smartphones) on the unit. Y • To use the Bluetooth function, set “Bluetooth” (p.129) in the “Setup” menu to “On”. • Stand the wireless antenna upright for connecting to a Bluetooth device wirel...
Page 80 - Playing back music stored on a USB storage device; The unit supports USB mass storage class devices (FAT16 or FAT32; Connecting a USB storage device; Connect the USB storage device to the USB jack.; Playback of USB storage device contents; Press USB to select “USB” as the input source.; The browse screen is displayed on the TV.; Connected
En 80 Playing back music stored on a USB storage device You can play back music files stored on a USB storage device on the unit. The unit supports USB mass storage class devices (FAT16 or FAT32 format). X For details on playable file formats, see “Supported devices and file formats” (p.157). Connec...
Page 81 - Use the cursor keys to select an item and press ENTER.; If a song is selected, playback starts and the playback screen is; Browse screen; Status indicators; Operation menu
En 81 2 Use the cursor keys to select an item and press ENTER. If a song is selected, playback starts and the playback screen is displayed. X • To return to the previous screen, press RETURN. • To return to the top screen during menu operations on the browse screen, hold down RETURN. • Files not sup...
Page 82 - Playback screen; Shuffle/repeat settings; When “USB” is selected as the input source, press; Use the cursor keys to select “Shuffle” (Shuffle) or
En 82 ■ Playback screen a Status indicators Display the current shuffle/repeat settings (p.84), playback status (such as play/pause) and elapsed time. b Playback information Displays the artist name, album name and song title. X You can use the playback operation keys ( a , s , d , f , g ) on the re...
Page 83 - Media sharing setup; media sharing setting on each music server.; For a PC with Windows Media Player installed; Start Windows Media Player 12 on your PC.
En 83 Playing back music stored on media servers (PCs/NAS) You can play back music files stored on your media servers on the unit. Y • To use this function, the unit and your PC must be connected to the same router (p.39). You can check whether the network parameters (such as the IP address) are pro...
Page 84 - Playback of PC music contents; You can control the PC/NAS with the menu displayed on the TV screen.; Press NET repeatedly to select “SERVER” as the input; Use the cursor keys to select a music server and press
En 84 Playback of PC music contents Follow the procedure below to operate the PC music contents and start playback. You can control the PC/NAS with the menu displayed on the TV screen. 1 Press NET repeatedly to select “SERVER” as the input source. The browse screen is displayed on the TV. X If playb...
Page 86 - When “SERVER” is selected as the input source, press
En 86 ■ Shuffle/repeat settings You can configure the shuffle/repeat settings for the playback of PC music content. 1 When “SERVER” is selected as the input source, press OPTION. 2 Use the cursor keys to select “Shuffle/Repeat” and press ENTER. X • To return to the previous screen during menu operat...
Page 87 - Listening to Internet radio; You can listen to Internet radio stations from all over the world.; Playback of Internet radio; Press NET repeatedly to select “NET RADIO” as the input; If an Internet radio station is selected, playback starts and the
En 87 Listening to Internet radio You can listen to Internet radio stations from all over the world. Y • To use this function, the unit must be connected to the Internet (p.39). You can check whether the network parameters (such as the IP address) are properly assigned to the unit in “Information” (...
Page 88 - Contents list; Playback indicator; Playback information
En 88 ■ Browse screen a Contents list Displays the list of Internet radio content. Use the cursor keys to select an item and press ENTER to confirm the selection. b Item number/total c Operation menu Use the cursor keys to select an item. Press ENTER to confirm the selection. X When “Video Out” in t...
Page 89 - Registering favorite Internet radio stations (Favorites); can quickly access to them from the “Favorites” folder in the browse; Select the desired Internet radio station in the browse; The selected station is added to the “Favorites” folder.
En 89 Registering favorite Internet radio stations (Favorites) By registering your favorite Internet radio stations to “Favorites”, you can quickly access to them from the “Favorites” folder in the browse screen. X You can also register up to 40 favorite USB and network contents or Bluetooth input s...
Page 90 - Playing back iTunes/iPod music with AirPlay; Playback of iTunes/iPod music contents; If the iTunes/iPod recognizes the unit, the AirPlay icon appears.; name of the unit) as the audio output device.; The playback screen is displayed on the TV.
En 90 Playing back iTunes/iPod music with AirPlay The AirPlay function allows you to play back iTunes/iPod music on the unit via network. Y • To use this function, the unit and your PC or iPod must be connected to the same router. You can check whether the network parameters (such as the IP address)...
Page 92 - Multi-zone configuration examples; Enjoying music in another room; You can enjoy music using speakers placed in another room.; Enjoying videos/music in another room; You can enjoy videos/music using a TV placed in another room.; Enjoying videos/music using a TV and speakers; Enjoying videos/music using only a TV
En 92 Playing back videos/audio in multiple rooms (multi-zone) The multi-zone function allows you to play back different input sources in the room where the unit is installed (main zone) and in another room (Zone2). For example, while you are watching TV in the living room (main zone), another perso...
Page 93 - Preparing Zone2; Connect the device that will be used in Zone2 to the unit.; Connecting speakers to play back audio; the amplifier being used (the unit or an external amplifier).; Using the unit’s internal amplifier; speakers to the external amplifier.
En 93 Preparing Zone2 Connect the device that will be used in Zone2 to the unit. ■ Connecting speakers to play back audio Connect speakers to play back audio in Zone2. The connection method varies depending on the amplifier being used (the unit or an external amplifier). Using the unit’s internal am...
Page 94 - Operating the unit from Zone2 (remote connection)
En 94 ■ Connecting an HDMI-compatible device to play back videos/audio Connect an HDMI-compatible device (such as a TV) to play back videos/audio at Zone2. Y • To watch videos played back on a video device at Zone2, you need to connect the video device to the unit with an HDMI cable (p.34). • We rec...
Page 95 - Remote connections between Yamaha products
En 95 Remote connections between Yamaha products An infrared signal transmitter is not required if you are using Yamaha products that support remote connections, as the unit does. You can transmit remote control signals by connecting the REMOTE IN/OUT jacks with monaural mini-jack cables and an infr...
Page 96 - Controlling Zone2; Each time you press the key, Zone2 is enabled or disabled.; Use the input selection keys to select an input source.
En 96 Controlling Zone2 1 Set MAIN/ZONE2 to “ZONE2”. 2 Press z (receiver power). Each time you press the key, Zone2 is enabled or disabled. When Zone2 is enabled, “ZONE2” lights up in the front display. 3 Use the input selection keys to select an input source. Y • Audio signals that can be output to...
Page 97 - Other operations for Zone2; Adjusting the volume
En 97 ■ Other operations for Zone2 The following functions are also available when Zone2 is enabled. Adjusting the volume Press VOLUME or MUTE. Selecting the input source and settings at once (SCENE) Press SCENE 1-8. X To register the current settings (input source, volume and tone control) to a sce...
Page 98 - Registering an item; Select a desired item and register it to a shortcut number.; Play back a song or a radio station to be registered.; To confirm the registration, press MEMORY.; Recalling a registered item; Recall a registered item by selecting the shortcut number.; Press PRESET to select a desired content.; Memory Preset; Recall Preset
En 98 Registering favorite items (shortcut) You can register up to 40 favorite USB and network contents or Bluetooth input source as shortcuts and access them directly by selecting the shortcut numbers. X • You can also use the “Favorites” feature to register Internet radio stations (p.89). • Only t...
Page 99 - Viewing the current status; Switching information on the front display; Audio Decoder
En 99 Viewing the current status You can view the current status (input or DSP program currently selected) on the front panel display or TV. Switching information on the front display 1 Press INFO on the front panel to select between the various display items. About 3 seconds after a display item is...
Page 100 - Viewing the status information on the TV; Use the cursor keys to select “On-screen Information”
En 100 Viewing the status information on the TV 1 Press OPTION. 2 Use the cursor keys to select “On-screen Information” and press ENTER. The following information is displayed on the TV. X When SURROUND:AI is enabled, the status information for SURROUND:AI is also displayed. 3 To close the informati...
Page 101 - allowing you to easily configure settings during playback.; Front display; Tone Control
En 101 Configuring playback settings for different playback sources (Option menu) You can configure separate playback settings for different playback sources. This menu is available on the front panel (or on the TV screen), allowing you to easily configure settings during playback. 1 Press OPTION. F...
Page 102 - Option menu items
En 102 Option menu items X • Available items vary depending on the selected input source. • When the input icon is displayed on the upper right of the “Option” menu, the setting is applied to the currently selected input source. Otherwise, the setting is applied to all of the input sources. • Text i...
Page 103 - Enables/disables YPAO Volume or Adaptive DRC.
En 103 ■ Tone Control (Tone Control) Adjusts the level of high-frequency range (Treble) and low-frequency range (Bass) individually. Choices Treble (Treble), Bass (Bass) Setting range -6.0 dB to 0.0 dB to +6.0 dB, *0.5 dB increments Y • When both “Treble” and “Bass” are 0.0 dB, “Bypass” appears. • I...
Page 104 - Adjusts the delay between video and audio output.; PCM and FLAC) using Compressed Music Enhancer.
En 104 Dialogue Lift (Dialog Lift) Adjusts the perceived height of dialogue sounds. If the dialogue sounds as if it is coming from below the TV screen, you can raise its perceived height by increasing this setting. X This setting is available only when one of the following conditions is met. – One o...
Page 108 - Configuring various functions (Setup menu); unit’s various functions with the “Setup” menu.; Use the cursor keys to select a menu and press ENTER.; This completes the settings.
En 108 CONFIGURATIONS Configuring various functions (Setup menu) Perform the following basic procedure to operate the “Setup” menu. You can configure the unit’s various functions with the “Setup” menu. X • If new firmware is available, the message screen appears. • If new firmware is available, the ...
Page 109 - Setup menu items
En 109 Setup menu items Use the following table to configure various functions of the unit. Menu Item Function Page Speaker Setting Pattern Registers two speaker setting patterns and switches between them. 113 Setting Data Copy Copies the “Setting Pattern” parameters in the specified direction. 113 ...
Page 113 - Setting Pattern; Setting Data Copy; Power Amp Assign
En 113 Speaker Configures the speaker settings manually. X • Some speaker settings are not available depending on the selected “Power Amp Assign” setting. • Default settings are underlined. ■ Setting Pattern Registers two speaker setting patterns and switches between them. When you configure the fol...
Page 114 - Configuration; Configures the output characteristics of the speakers.; Front; Selects the size of the front speakers.; Selects whether or not a center speaker is connected and its size.; Surround; Surround Back
En 114 ■ Configuration Configures the output characteristics of the speakers. X • When you configure the speaker size, select “Large” if the woofer diameter of your speaker is 16 cm (6-1/4”) or larger or “Small” if it is smaller than 16 cm (6-1/4”) as a guide. • When the speaker size is set to “Smal...
Page 115 - Selects whether or not a subwoofer is connected and its phase.; Distance; Adjusts the volume of each speaker.; Parametric EQ; Adjusts the tone with an equalizer.
En 115 Front Presence Selects whether or not front presence speakers are connected and their size and layout. Settings Layout Settings X • This setting is not available when “Configuration (Front Presence)” is set to “None”. • To play Dolby Atmos contents using the front presence speakers, see “Pres...
Page 116 - Use the cursor keys to adjust the gain of the selected band.; Test Tone; balance or equalizer while confirming its effect.; YPAO Result; manual settings and reload the previous YPAO adjustments.
En 116 ■ Manual equalizer adjustment 1 Set “Parametric EQ” to “Manual” and press ENTER. 2 Press ENTER again to enter the edit screen. 3 Use the cursor keys to select a speaker and press ENTER. X • To restore the default settings for all speakers, select “PEQ Data Clear” and then “OK”. • To copy the ...
Page 117 - Sound; Configures the audio output settings.; Displays information about the current audio signal.; Lipsync; Delay Enable; Enables/disables the Lipsync adjustment for each input source.
En 117 Sound Configures the audio output settings. ■ Information Displays information about the current audio signal. Choices X Even when the unit is set to output bitstream signals directly, the signal may be converted depending on the specifications and settings of the playback device. ■ Lipsync A...
Page 118 - DSP Parameter; Higher to enhance the delay effect, and lower to reduce it.; Adjusts the broadening effect of the presence sound field.; Adjusts the loss of the presence sound field.; and lower to have clear sound.
En 118 Adjustment Adjusts the delay between video and audio output manually when “Auto/Manual Select” is set to “Manual”. You can fine-adjust the audio output timing when “Auto/Manual Select” is set to “Auto”. Setting range 0 ms to 500 ms (1 ms increments) X • “Offset” shows the difference between a...
Page 120 - Surround Decoder; Configures the surround decoders settings.; Decode Type; is played. This setting is effective when “; Center Image; ch Stereo; Adjusting the volume settings.; Level
En 120 ■ Surround Decoder Configures the surround decoders settings. Decode Type Selects a surround decoder to be used in combination with the selected sound program. Choices Auto, b Dsur, Neural:X, Neo:6 Cinema, Neo:6 Music Center Spread Selects whether to spread the center channel signals to left ...
Page 121 - Restores all default settings.; Dynamic Range; Max Volume; Sets the limit value of the volume.; Initial Volume; Sets the initial volume when the receiver is turned on.; Pure Direct Mode
En 121 Monaural Mix Enables/disables monaural sound output. This setting is effective when “7ch Stereo” is selected. Settings Reset Restores all default settings. ■ Dynamic Range Selects the dynamic range adjustment method for bitstream audio (Dolby Digital and DTS signals) playback. Settings ■ Volu...
Page 122 - Virtual Speaker; Setting Virtual Speaker.; VPS; VSBS; Scene; Configures the scene settings.; Scene Setting; assigned to the selected scene.; Procedure
En 122 ■ Virtual Speaker Setting Virtual Speaker. VPS Selects whether to create Virtual Presence Speaker (VPS) using the front, center, and surround speakers. When VPS is enabled, the unit creates front VPS when no front presence speakers are connected, and creates rear VPS when front presence speak...
Page 123 - Scene Rename; Changes the SCENE name displayed on the front display or on the TV.
En 123 X To restore the default settings for the selected scene, select “Reset”. ■ Scene Rename Changes the SCENE name displayed on the front display or on the TV. ■ Procedure 1 Use the cursor keys to select the SCENE name and press ENTER to enter the name edit screen. 2 Use the cursor keys and ENTE...
Page 124 - Configures the video signal processing settings.; Video Mode; Resolution; Aspect; Configures the HDMI control settings.; TV Audio Input
En 124 ■ Video Mode Configures the video signal processing settings. Video Mode Enables/disables the video signal processing (resolution and aspect ratio). Settings X • When “Video Mode” is set to “Direct”, the unit transmits video signals with the least circuitry in order to reduce video output del...
Page 125 - “HDMI Control” is set to “On”.; HDMI Audio Output; Selects a device to output audio.; HDCP Version
En 125 ARC Enables/disables ARC (p.161) when “HDMI Control” is set to “On”. Settings Y You do not need to change this setting normally. In case noises are produced from the speakers connected to the unit because TV audio signals input to the unit via ARC are not supported by the unit, set “ARC” to “...
Page 126 - Network; Configures the network settings.; Displays the network information on the unit.; Network Connection; Selects the network connection method.; DHCP; Select whether to use a DHCP server.; IP Address; Manual network settings
En 126 Network Configures the network settings. ■ Information Displays the network information on the unit. Choices ■ Network Connection Selects the network connection method. Settings ■ IP Address Configures the network parameters (such as IP address). DHCP Select whether to use a DHCP server. Sett...
Page 127 - Network Standby; more than two watts when in Network Standby mode.; MAC Address Filter; Filter; the unit when “Filter” is set to “On”.; Setup procedure
En 127 4 Use the cursor keys to move the edit position and to select a value. 5 To confirm the setting, press ENTER. 6 To configure another network parameter, repeat steps 2 to 4. 7 To exit from the menu, press SETUP. ■ Network Standby Selects whether the unit can be turned on from other network dev...
Page 128 - DMC Control; AirPlay Volume Interlock; Interlock; Network Name; MusicCast Link Power Interlock; also turns on the power of other devices of the network.
En 128 ■ DMC Control Selects whether to allow a Digital Media Controller (DMC) to control playback. A Digital Media Controller (DMC) is a device that can control other network devices through the network. When this function is enabled, you can control playback of the unit from DMCs (such as Windows ...
Page 129 - Configures the Bluetooth settings.; Bluetooth; Audio Receive; Disconnect; Bluetooth Standby; connect operation is performed on the Bluetooth device.
En 129 Bluetooth Configures the Bluetooth settings. ■ Bluetooth Enables/disables the Bluetooth function (p.79). Settings ■ Audio Receive Configures the Bluetooth settings when the unit is used as the Bluetooth audio receiver. Disconnect Terminates the Bluetooth connection between a Bluetooth device ...
Page 130 - Multi Zone; Volume; Audio Delay
En 130 Multi Zone Configures the multi zone settings. ■ Information Displays information about Zone2. Choices ■ Zone2 Configures the Zone2 settings. Volume Enables/disables volume adjustments for Zone2 output. If you have connected an external amplifier with volume control to the unit, disable volum...
Page 131 - enhanced bass sounds, regardless of the size of speakers.; Zone Rename; Changes the zone name displayed on the front display or TV screen.; Party Mode Set
En 131 Enhancer Enables/disables Compressed Music Enhancer (p.66) for Zone2 output. Settings Tone Control Adjusts the level of high-frequency range (Treble) and low-frequency range (Bass) for Zone2 output. Settings Extra Bass Enables/disables Extra Bass for Zone2 output. When Extra Bass is enabled, ...
Page 132 - System; Configures the system settings.; Displays the system information on the unit.; Language; Input Assignment; ) jack to the input source “AV 2”; Use the cursor keys to select “
En 132 System Configures the system settings. ■ Information Displays the system information on the unit. Choices ■ Language Select an on-screen menu language. Settings English, Japanese, French, German, Spanish, Russian, Italian, Chinese X The information on the front display is provided in English ...
Page 133 - Input Skip; name created by the Auto Rename function.; The cursor moves to the name edit screen.; To change another input source name, repeat steps 1 to 3.; Auto Play
En 133 ■ Input Skip Set which input sources are skipped when operating the INPUT key or AV CONTROLLER. You can select the desired input source quickly by using this function. X When using AV CONTROLLER, you cannot select the input sources set to “On” in this function. Input sources AV 1-7, AUX, AUDI...
Page 134 - DSP Skip; desired sound program quickly by using this function.; Remote Key; Configures the Remote Key settings.; PROGRAM Key; PROGRAM key for other than DSP program selection.; Color Key; Display Set; Adjusts the brightness of the front display.; Switches the scale of the volume display.
En 134 ■ DSP Skip Set which sound programs are skipped when operating the PROGRAM key.You can select the desired sound program quickly by using this function. Settings ■ Remote Key Configures the Remote Key settings. PROGRAM Key Sets the function that is assigned to the PROGRAM key on the remote con...
Page 135 - Selects the image to be used as wallpaper on the TV.; Trigger Output1, Trigger Output2; Trigger Mode; Specifies the condition for the TRIGGER OUT jack to function.; Source; “Trigger Mode” is set to “Source”.; Manual; connected via the TRIGGER OUT jack.; Target Zone
En 135 Short Message Selects whether to display short messages on the TV screen when the unit is operated (such as input selection and volume adjustment). Settings Wallpaper Selects the image to be used as wallpaper on the TV. Settings ■ Trigger Output1, Trigger Output2 Sets the TRIGGER OUT 1-2 jack...
Page 136 - ECO; Configures the power supply settings.; Auto Power Standby; ECO Mode; sure to press ENTER to restart the unit.; Prevents accidental changes to the settings.; Memory Guard
En 136 ■ ECO Configures the power supply settings. Auto Power Standby Sets the amount of time for the auto-standby function. If you do not operate the unit or if no input signals are detected for the specified time, the unit will automatically go into standby mode. Settings Default U.K., Europe and ...
Page 137 - Displays information about the firmware update.; Firmware Update; USB Update; The new settings take effect.
En 137 ■ Firmware Update Displays information about the firmware update. Firmware Update Updates the firmware via the network. You can also check the firmware version and system ID. Choices X • Firmware update takes about 20 minutes or more (depending on your Internet connection speed). • If the Int...
Page 138 - ADVANCED SETUP menu items; turned off, you cannot control the unit from the remote control.; ¬MIN
En 138 ADVANCED SETUP menu items X Default settings are underlined. Changing the speaker impedance setting (SPEAKER IMP.) Change the unit’s speaker impedance settings depending on the impedance of the speakers connected. Settings Turning on/off the remote control sensor (REMOTE SENSOR) Turn on/off t...
Page 139 - Selecting the remote control ID (REMOTE ID); remote control ID for its corresponding receiver.; Changing the remote control ID of the remote control; Switching the video signal type (TV FORMAT); resolution than the detected resolution.
En 139 Selecting the remote control ID (REMOTE ID) Change the unit’s remote control ID so that it matches the remote control’s ID (default: ID1). When using multiple Yamaha AV receivers, you can set each remote control with a unique remote control ID for its corresponding receiver. Settings ID1, ID2...
Page 140 - Selecting the HDMI 4K signal format (4K MODE); playback device are connected to the unit.; Switching the DTS format notification setting (DTS MODE); Switches the DTS format notification setting.; device using FAT16 or FAT32 format in advance.; Backup/rstore procedure; MODE 1
En 140 Selecting the HDMI 4K signal format (4K MODE) Selects the format of signals input/output at the unit when HDMI 4K compatible TV and playback device are connected to the unit. Settings Format Y When “MODE 1” is selected, use a Premium High Speed HDMI Cable or Premium High Speed Cable with Ethe...
Page 141 - • Check that the file is stored in the route of the USB memory device.; Restoring the default settings (INITIALIZE); Restores the default settings for the unit.; supplied with updates.; Firmware update procedure; Check the version of firmware currently installed on the unit.; CANCEL
En 141 4 When “Please Power Off!” appears on the front display, press z (power) to set the unit to standby mode and turn it on again. If “Failed” appears on the front display, check the following and start the process again. In case of “BACKUP”: • You cannot overwrite save. When you save the setting...
Page 142 - Updating the unit’s firmware via the network; New firmware that provides additional features or product; Updating the unit’s firmware; Use the cursor keys to select “START” and press ENTER.; The on-screen display turns off and the firmware update begins.; If “UPDATE SUCCESS PLEASE POWER OFF!” appears on; The firmware update is complete.; Note
En 142 Updating the unit’s firmware via the network New firmware that provides additional features or product improvements will be released as needed. If the unit is connected to the Internet, you can download the firmware via the network and update it. X • The firmware update indicator (p.12) on th...
Page 143 - Frequently asked questions; manuals for each device.
En 143 APPENDIX Frequently asked questions The new speaker system does not provide an ideal sound balance... If you have changed speakers or have a new speaker system, use “YPAO” to optimize the speaker settings again (p.43). If you want to adjust the speaker settings manually, use “Speaker” in the ...
Page 144 - Troubleshooting; Refer to the table below when the unit does not function properly.; Power, system and remote control
En 144 Troubleshooting Refer to the table below when the unit does not function properly. If the problem you are experiencing is not listed below or if the instructions below do not help, turn off the unit, disconnect the power cable, and contact the nearest authorized Yamaha dealer or service cente...
Page 145 - Audio
En 145 Audio The unit cannot be controlled using the remote control. The unit is out of the operating range. Use the remote control within the operating range (p.6). The batteries are weak. Replace with new batteries. The unit’s remote control sensor is exposed to direct sunlight or strong lighting....
Page 147 - Video
En 147 Video Problem Cause Remedy No video. Another input source is selected on the unit. Select an appropriate input source with the input selection keys. Another input source is selected on the TV. Switch the TV input to display the video from the unit. The video signal output from the unit is not...
Page 150 - USB and network
En 150 USB and network Problem Cause Remedy The unit does not detect the USB device. The USB device is not connected to the USB jack securely. Turn off the unit, reconnect your USB device, and turn the unit on again. The file system of the USB device is not FAT16 or FAT32. Use a USB device with FAT1...
Page 152 - Error indications on the front display
En 152 Error indications on the front display Message Cause Remedy Access denied Access to the PC is denied. Configure the sharing settings and select the unit as a device to which music contents are shared (p.83). Access error The unit cannot access the USB device. Turn off the unit and reconnect y...
Page 153 - Glossary; This section explains the technical terms used in this manual.; Audio information (audio decoding format)
En 153 Glossary This section explains the technical terms used in this manual. Audio information (audio decoding format) Dolby Atmos Introduced first in the cinema, Dolby Atmos brings a revolutionary sense of dimension and immersion to the Home Theater experience. Dolby Atmos is an adaptable and sca...
Page 155 - HDMI and video information
En 155 Audio Information (Others) Bi-amplification connection (Bi-amp) A bi-amplification connection uses two amplifiers for a speaker. When you use the bi-amplification connection, the unit drives the tweeter and woofer in a speaker with the discrete amplifiers. As a consequence, the tweeter and wo...
Page 156 - Network information; Yamaha technologies
En 156 Network information SSID SSID (Service Set Identifier) is a name that identifies a particular wireless LAN access point. Wi-Fi Wi-Fi (Wireless Fidelity) is a technology that allows an electronic device to exchange data or connect to the Internet wirelessly using radio waves. Wi-Fi offers the ...
Page 157 - Supported devices and file formats; Supported devices; Bluetooth device; • The unit supports Bluetooth devices that support A2DP or AVRCP.; USB devices; Do not connect any other type of USB devices.; AirPlay; File formats; recording device or consult file’s help.
En 157 Supported devices and file formats This section explains the devices and file formats supported by the unit. Supported devices For information about specifications of each device, refer to the instruction manual of it. ■ Bluetooth device • The unit supports Bluetooth devices that support A2DP...
Page 158 - Video signal flow; Video signals input from a video device to the unit are output; Video conversion table
En 158 Video signal flow Video signals input from a video device to the unit are output to a TV as shown below. HDMI HDMI HDMI HDMI VIDEO VIDEO P R P B Y COMPONENT VIDEO P R P B Y COMPONENT VIDEO Video device The unit TV HDMI out HDMI in COMPONENT VIDEO in VIDEO in Video conversion table X • You can...
Page 159 - Information on HDMI; Operations available from the TV’s remote control
En 159 Multi-zone output Audio signals that can be output to Zone2 vary depending on how you connect the device in Zone 2 to the unit's output jacks. m : Available *1 Available when 2-channel PCM signals are input (stereo output [down mixed to 2-channels] when the input source selected in the main z...
Page 160 - connecting the TV and playback devices.; Switch the TV input to display video from the unit.; the input source manually.
En 160 (Example) Y HDMI Control might not work properly. To use HDMI Control, you need to perform the following HDMI Control link setup after connecting the TV and playback devices. For details on settings and operating your TV, refer to the instruction manual for the TV. Y This setup is required ev...
Page 161 - Check the following after the HDMI Control settings.; Select a TV program with the TV remote control.; If you cannot hear the TV audio, check the following:; HDMI signal compatibility; output, depending on the type of the DVD player.
En 161 Audio Return Channel (ARC) ARC allows you to input TV audio to the unit with the HDMI cable which transmits video signal to the TV. Check the following after the HDMI Control settings. 1 Select a TV program with the TV remote control. 2 Check that the input source of the unit will be automati...
Page 162 - Trademarks; Explanations regarding GPL
En 162 Trademarks Manufactured under license from Dolby Laboratories. Dolby, Dolby Atmos, Dolby Surround, Dolby Vision, and the double-D symbol are trademarks of Dolby Laboratories. For DTS patents, see http://patents.dts.com. Manufactured under license from DTS, Inc. DTS, the Symbol, DTS in combina...
Page 163 - Specifications
En 163 Specifications Input jacks • Analog Audio Audio x 9 (AV 1-4, AUDIO 1-3, PHONO, AUX) • Digital Audio Optical x 3 (AV 3, AUDIO 1–2) (Supported sampling frequencies: 32 kHz to 96 kHz) Coaxial x 3 (AV 1-2, AUDIO 3) (Supported sampling frequencies: 32 kHz to 192 kHz) • Video Composite x 4 (AV 1-4)...


 Yamaha NS AW150
User Manual
Yamaha NS AW150
User Manual
 Yamaha NS AW350
User Manual
Yamaha NS AW350
User Manual
 Yamaha CLP 825
User Manual
Yamaha CLP 825
User Manual
 Yamaha CLP 835
User Manual
Yamaha CLP 835
User Manual
 Yamaha NS IW470WH
Installation Manual
Yamaha NS IW470WH
Installation Manual
 Yamaha CS500
User Manual
Yamaha CS500
User Manual
 Yamaha CS 800
Manual
Yamaha CS 800
Manual
 Yamaha NS F210BL
User Manual
Yamaha NS F210BL
User Manual
 Yamaha ATS C300
User Manual
Yamaha ATS C300
User Manual
 Yamaha PASC9
User Manual
Yamaha PASC9
User Manual