Whirlpool WRT348FMES - Manuals
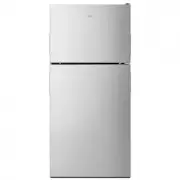
User Manual Whirlpool WRT348FMES


Summary
2 REFRIGERATOR SAFETY You can be killed or seriously injured if you don't immediately You can be killed or seriously injured if you don't follow All safety messages will tell you what the potential hazard is, tell you how to reduce the chance of injury, and tell you what canhappen if the instruction...
3 INSTALLATION INSTRUCTIONS Unpack the Refrigerator Remove the Packaging IMPORTANT: Do not remove the white foam air return insert from behind the control panel on the ceiling of the refrigerator. If the insert is removed, ice may migrate down from the freezer and cause icicles to form. Remove tape ...
4 Location Requirements IMPORTANT: This refrigerator is designed for indoor household use only.To ensure proper ventilation for your refrigerator, allow for ½" (1.25 cm) of space on each side and at the top. Allow for 1" (2.54 cm) of space behind the refrigerator. If your refrigerator has an...
Whirlpool Refrigerators Manuals
-
 Whirlpool WB3560EUBL
User Manual
Whirlpool WB3560EUBL
User Manual
-
 Whirlpool WB3560EUXX
User Manual
Whirlpool WB3560EUXX
User Manual
-
 Whirlpool WB3560UEXX
User Manual
Whirlpool WB3560UEXX
User Manual
-
 Whirlpool WMT 503
User Manual
Whirlpool WMT 503
User Manual
-
 Whirlpool WQ70900SBX
User Manual
Whirlpool WQ70900SBX
User Manual
-
 Whirlpool WQ70900SXX
User Manual
Whirlpool WQ70900SXX
User Manual
-
 Whirlpool WRB119WFBB
User Manual
Whirlpool WRB119WFBB
User Manual
-
Whirlpool WRB119WFBB
Manual
-
 Whirlpool WRB119WFBM
User Manual
Whirlpool WRB119WFBM
User Manual
-
Whirlpool WRB119WFBM
Manual
-
 Whirlpool WRB119WFBW
User Manual
Whirlpool WRB119WFBW
User Manual
-
 Whirlpool WRB322DMBB
User Manual
Whirlpool WRB322DMBB
User Manual
-
 Whirlpool WRB322DMBM
User Manual
Whirlpool WRB322DMBM
User Manual
-
 Whirlpool WRB322DMBW
User Manual
Whirlpool WRB322DMBW
User Manual
-
 Whirlpool WRB322DMHV
User Manual
Whirlpool WRB322DMHV
User Manual
-
Whirlpool WRB322DMHV
Manual
-
 Whirlpool WRB329DMBB
User Manual
Whirlpool WRB329DMBB
User Manual
-
 Whirlpool WRB329DMBM
User Manual
Whirlpool WRB329DMBM
User Manual
-
 Whirlpool WRB329DMBW
User Manual
Whirlpool WRB329DMBW
User Manual
-
 Whirlpool WRB533CZJB
User Manual
Whirlpool WRB533CZJB
User Manual