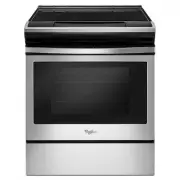
Whirlpool WFG320M0MB - Manuals
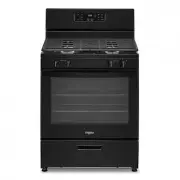
User Manual Whirlpool WFG320M0MB


Summary
2 TABLE OF CONTENTS RANGE SAFETY .............................................................................3 The Anti-Tip Bracket ....................................................................4 COOKTOP USE ..............................................................................5 Cookt...
3 You can be killed or seriously injured if you don't immediately You can be killed or seriously injured if you don't follow All safety messages will tell you what the potential hazard is, tell you how to reduce the chance of injury, and tell you what canhappen if the instructions are not followed. ...
4 The Anti-Tip Bracket The range will not tip during normal use. However, the range can tip if you apply too much force or weight to the open door without the anti-tip bracket fastened down properly. Tip Over Hazard A child or adult can tip the range and be killed.Verify the anti-tip bracket has bee...
Manual Whirlpool WFG320M0MB


Whirlpool Ranges Manuals
-
 Whirlpool ACM 501
User Manual
Whirlpool ACM 501
User Manual
-
 Whirlpool ACM 503
User Manual
Whirlpool ACM 503
User Manual
-
 Whirlpool ACM 562
User Manual
Whirlpool ACM 562
User Manual
-
 Whirlpool AER6303MFB
User Manual
Whirlpool AER6303MFB
User Manual
-
 Whirlpool AER6303MFW
User Manual
Whirlpool AER6303MFW
User Manual
-
 Whirlpool AKM 513
User Manual
Whirlpool AKM 513
User Manual
-
 Whirlpool LWFR7200S
User Manual
Whirlpool LWFR7200S
User Manual
-
 Whirlpool LWFR7300S
User Manual
Whirlpool LWFR7300S
User Manual
-
 Whirlpool WEC310S0LB
User Manual
Whirlpool WEC310S0LB
User Manual
-
Whirlpool WEC310S0LB
Manual
-
 Whirlpool WEC310S0LS
User Manual
Whirlpool WEC310S0LS
User Manual
-
Whirlpool WEC310S0LS
Manual
-
 Whirlpool WEC310S0LW
User Manual
Whirlpool WEC310S0LW
User Manual
-
Whirlpool WEC310S0LW
Manual
-
 Whirlpool WEC310SAGS
User Manual
Whirlpool WEC310SAGS
User Manual
-
 Whirlpool WEE510S0FS
User Manual
Whirlpool WEE510S0FS
User Manual
-
Whirlpool WEE510S0FS
Manual
-
Whirlpool WEE510S0FS
Installation Manual
-
 Whirlpool WEE515S0LB
User Manual
Whirlpool WEE515S0LB
User Manual
-
Whirlpool WEE515S0LB
Manual