Page 2 - PRODUCTO FABRICADO POR:; ÍNDICE
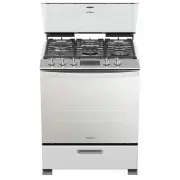
1 PARTES Y CARACTERISTICAS SEGUN MODELO PRODUCTO FABRICADO POR: Industrias Acros Whirlpool S. de R.L. de C.V. Unidad Celaya Carretera Panamericana Km. 280 C.P. 38020, Celaya, Gto. Tel. 01 (461) 6 18 55 00 Parrillas superiores Quemadores superiores Parrillas superiores Quemadores superiores Partes y ...
Page 3 - INSTRUCCIONES IMPORTANTES DE SEGURIDAD; PELIGRO
2 Mantenga los alrededores del aparato libres de materiales combustibles, gasolina y otros vapores o líquidos inflamables. No obstruya la salida de los gases de combustión del horno o asador. No utilice el aparato como calefactor de ambiente. Asegúrese que los muebles cercanos a su estufa, así como ...
Page 6 - MODELO; Requisitos del Suministro de Gas
5 GAS LP PRESIÓN DE OPERACIÓN 2,75 kPa; 2750 Pa; 27,5 mbar; 28cm COL. AGUA GAS LP PRESIÓN DE OPERACIÓN 1,76 kPa; 1760Pa; 17,6 mbar; 18cm COL. AGUA MODELO Kit de gas LP a gas natural LWFR7300S W11344945 LWFR7400S W11344946 LWFR9000S W11344947 LWFR7600S W11353307 LWFR7100S, LWER5000S W11209938 LWFR720...
Page 7 - CONEXIÓN PARA MODELOS LWFR7100S,; ALIMENTACIÓN DE GAS
6 CONEXIÓN PARA MODELOS LWFR7100S, LWFR7200S, LWFR7600S, LWER5000S ALIMENTACIÓN DE GAS INSTALACIÓN CON CILINDRO DE GAS L.P. IMPORTANTE: · Este producto está preparado para funcionar con gas LP (Licuado de Petroleo). · Antes de la instalación asegurese que las condiciones locales de distribución de g...
Page 8 - INSTALACIÓN CON GAS NATURAL O LP ENTUBADO IMPORTANTE:
7 2. Con el destornillador, apriete la abrazadera metálica alrededor de la manguera (fig. 2). 3. Ponga la otra abrazadera metálica en el otro extremo de la manguera de gas y conecte este otro extremo de la manguera a la válvula reguladora de su cilindro de gas. Apriete la abrazadera metálica con el ...
Page 10 - QUEMADOR DE HORNO
9 Instalación del espaciador cubierta (modelos de capelo) Para el correcto funcionamiento de su estufa, DEBE instalar en la parte posterior de la cubierta, los espaciadores con los tornillos, según se indica en las figuras. El espaciador se coloca en ambos lados de su estufa, según como se ilustra e...
Page 12 - AJUSTANDO LA HORA
11 1. Tecla Light: prende y apaga la luz del horno. 2. Tecla Clock: para ajustar la hora del producto eléctrico. 3. Tecla CANCELAR: cancela funciones programadas para el horno. 4. Tecla TIMER/KEY LOCK: para ajustar el tiempo de desconexión del producto eléctrico. Cuando se aprieta durante 3 segundos...
Page 13 - UTILIZANDO LOS COMANDOS DEL PANEL ELECTRÓNICO FULLTOUCH
12 2.2 TEMPORIZADOR Notas: • Si se desconecta la estufa del enchufe o falta energía eléctrica, el horario deberá ajustarse nuevamente, repitiendo el procedimiento. • En caso que no quiera que la pantalla muestre la hora, después que parpadee “12:00”, o a cualquier momento después de ajustar la hora,...
Page 14 - CONOCIENDO LAS FUNCIONES DE SU HORNO
13 1. Apriete la tecla Oven. 2. En la pantalla aparecerá la sugerencia de temperatura de 180°C. Para cambiar, seleccione la temperatura deseada utilizando las teclas + y –, para seleccionar apriete START. 3. Ajuste el tiempo de preparación, apretando las teclas + y -. Al final del tiempo seleccionad...
Page 17 - MODIFICANDO TEMPERATURA Y/O TIEMPO DURANTE EL PROCESO
16 2.6 MODIFICANDO TEMPERATURA Y/O TIEMPO DURANTE EL PROCESO Temperatura recomendada para la programación del Termómetro MeatControl Para modificar la temperatura y el tiempo durante un proceso 1. Apriete la tecla Temperatura y ajuste la nueva temperatura apretando las teclas + y -. 2. Apriete la te...
Page 18 - AJUSTE DE FLAMAS; FLAMA DEL QUEMADORES SUPERIORES
17 AJUSTE DE FLAMAS FLAMA DEL QUEMADORES SUPERIORES Al realizar conversión de su producto de gas LP a gas natural, algunos componentes requieren de ajustes para poder utilizar su estufa correctamente. Las válvulas con vástago sólido, como se muestra en la imagen a la derecha, durante la conversión d...
Page 19 - USO DE LA ESTUFA; Para fijar la temperatura del quemador:
18 La flama del quemador de horno debe ser azulada y estable, siga esta secuencia para mejorar esta condición: 1. Verifique que la estufa esté completamente fría y todas las perillas apagadas. 2. Desconecte el cable tomacorriente. Retire la charola del piso de horno, tome la charola por la parte pos...
Page 22 - USO DEL HORNO; Utensilios para hornear; Parrillas del horno
21 USO DEL HORNO Utensilios para hornear Para la cocción uniforme, el aire caliente debe poder circular. Deje 5 cm de espacio alrededor del utensilio para hornear y las paredes del horno. Use el siguiente cuadro como guía: Modelos con termostato electrónico 1. Abra la puerta del horno. 2. Gire la pe...
Page 23 - Recomendaciones de Cuidados:
22 removerlos y colocarlos nuevamente: 1. Abra la puerta y verifique que la parrilla se encuentre en el segundo nivel de la cavidad de horno. 2. Retire los sinchos que sostienen las varillas de movimiento. 3. Coloque las varillas de movimiento en los orificios de los soportes ubicados en la puerta d...
Page 27 - SOLUCIÓN DE PROBLEMAS
26 SOLUCIÓN DE PROBLEMAS Antes de llamar a Servicio, pruebe las soluciones aquí sugeridas. Problema Revisar Solución Nada funciona -Si se ha cableado y polarizado debidamente el contacto al suministro de energía. Conecte a un tomacorriente aterrizado. -Se ha quemado un fusible en la casa o se dispar...
Page 28 - DIAGRAMAS ELÉCTRICOS
27 Problema Revisar Solución Las llamas del quemador del horno están desiguales, amarillas y/o ruidosas -Tipo de gas está usando en su casa (Gas LP). Si no usa gas LP, hay que realizar la conversión, ponga en contacto con un técnico de servicio autorizado. La temperatura del horno está muy alta o mu...
Page 30 - Covers the; Congratulations on the purchase of your new; CAREFULLY READ THIS INSTRUCTIONS BEFORE; RANGES; Installation, use and handling
You have just acquired a product developed with the most advanced design and manufacturing techniques, with Whirlpool quality. We suggest to carefully read the instructions in this manual before using your range. Keep this document as the information contained in it will be important for the proper ...
Page 31 - PRODUCT MANUFACTURED BY:; INDEX
30 PARTS AND FEATURES ACCORDING TO MODEL PRODUCT MANUFACTURED BY: Industrias Acros Whirlpool S. de R.L. de C.V. Unidad Celaya Carretera Panamericana Km. 280 C.P. 38020, Celaya, Gto. Tel. 01 (461) 6 18 55 00 Parts and features 30 Important safety instructions 31 Installation 32 Connections 35 Electri...
Page 32 - Your safety and the safety of others are very important.; DANGER
31 . . . You can be killed or seriously injured if you don’t immediately follow instructions.You can be killed or seriously injured if you don’t follow instructions. We have provided many important safety messages in this manual and on your appliance. Always read and obey all safety messages. This i...
Page 33 - WARNING
32 RANGE INSTALLATION GENERAL RECOMMENDATIONS INSTALLATION • Keep these instructions for future reference. • Read the instructions for use before turning this appliance on. • Before installation, make sure that the local gas supply conditions (nature and LP gas pressure) and the adjustment of the ap...
Page 35 - Gas Supply Requirements
34 MODELO Kit de gas LP a gas natural LWFR7300S W11344945 LWFR7400S W11344946 LWFR9000S W11344947 LWFR7600S W11353307 LWFR7100S, LWER5000S W11209938 LWFR7200S W11209939 CONNECTION OF THE RANGE TO THE GAS LINE FOR MODELS: LWFR7300, LWFR7400, LWFR9000 A combination of splice pipes must be used to conn...
Page 36 - CONNECTION FOR MODELS LWFR7100S,; GAS POWER SUPPLY
35 CONNECTION FOR MODELS LWFR7100S, LWFR7200S, LWFR7600S, LWER5000S GAS POWER SUPPLY GAS L.P. CYLINDER INSTALLATION IMPORTANT:· This product is prepared to work with LP gas (Liquefied Petroleum Gas). · Before installation make sure that the local gas distribution conditions (nature and gas pressure)...
Page 37 - INSTALLATION WITH NATURAL GAS OR LP IMPORTANT PLUGGED:
36 2. Using the screwdriver, tighten the metal clamp around the hose (fig. 2). 3. Put the other metal clamp on the other end of the gas hose and connect this other end of the hose to the regulating valve of your gas cylinder. Tighten the metal clamp with the screwdriver (fig. 3). 4. Confirm that the...
Page 38 - ELECTRICAL SUPPLY REQUIREMENTS; Explosion Hazard
37 ELECTRICAL SUPPLY REQUIREMENTS • If your range has electrical accessories, place it near a wall outlet. • The range must be connected to an electrically grounded outlet in accordance with local regulations. • DO NOT USE ELECTRICAL EXTENSIONS OR MULTIPLE CONTACTS. • This gas range is equipped with...
Page 39 - OVEN BURNER
38 Installation of the cover spacer (models with cover) For the correct operation of your range, you MUST install the spacers with the screws on the back of the range, as indicated in the figures. The spacer is placed on both sides of your range, as illustrated in the following figure Operation Veri...
Page 41 - ADJUSTING THE TIME
40 1. Light button: turns the oven light on and off. 2. Clock button: adjust the hour of the electrical appliance. 3. CANCEL button: cancels programmed functions for the oven. 4. TIMER / KEY LOCK button: adjust the disconnection time of the electrical appliance. When pressed for 3 seconds, activate ...
Page 46 - MODIFYING TEMPERATURE AND / OR TIME DURING THE PROCESS
45 2.6 MODIFYING TEMPERATURE AND / OR TIME DURING THE PROCESS Recommended temperature for programming the MeatControl Thermometer To modify the temperature and time during a process 1. Press the temperature button and adjust the new temperature by pressing the + and - keys. 2. Press the START key to...
Page 47 - FLAME ADJUST; FLAME OF THE COOKTOP BURNERS
46 FLAME ADJUST FLAME OF THE COOKTOP BURNERS When converting your LP gas range to natural gas, some components require adjustments to be able to use your stove correctly. The valves with solid stem, as shown in the image on the right during the conversion of LP gas to natural gas, require adjustment...
Page 48 - USE OF THE STOVE; Control knobs
47 The oven burner flame should be bluish and stable, follow these steps to improve this condition: 1. Check that the range is completely cold, and all the knobs are off. 2. Disconnect the power cord. Remove the tray from the oven floor, take the tray from the back on both sides and pull up and remo...
Page 51 - OVEN USE; Baking utensils; Oven grills
50 OVEN USE Baking utensils For even cooking, hot air must be able to circulate. Leave 2 inches of space around the bakeware and oven walls. Use the following chart as a guide: Models with electronic thermostat 1. Open the oven door. 2. Lift the grate from the front. 3. Pull again to release it. 4. ...
Page 52 - Care Recommendations:
51 1. Open the door and check that the grate is on the second level of the oven cavity. 2. Remove the ties that hold the moving rods. 3. Place the moving rods in the holes in the brackets located on the oven door. 4. Your self-sliding grate is ready to use, check by opening and closing the door. Ove...
Page 56 - TROUBLESHOOTING
55 TROUBLESHOOTING Before making a service call, try the following suggested solutions. Problem Check Solution Nothing works - If the contact has been properly wired and polarized to the power supply. Connect to a grounded outlet. - A fuse has been burned in the house or the circuit breaker tripped....
Page 57 - ELECTRIC DIAGRAMS
56 Problem Check Solution The cooktop burner flames are uneven, yellow and / or noisy -Type of gas used in your home (LP Gas). If you do not use LP gas, you must perform the conversion, contact an authorized service technician. The oven temperature is too high or too low -The calibration adjustment ...