Page 2 - TABLE OF CONTENTS
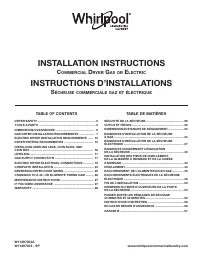
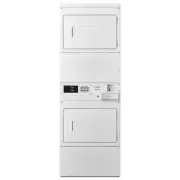
INSTALLATION INSTRUCTIONS INVERTED WALL MOUNTING STACKING INSTALLATION INSTALL THE FLEXIBLE HOSE TABLE OF CONTENTS INSTALLATION INSTRUCTIONSIDENTIFICATION OF PARTS 3 IMPORTANT SAFETY INSTRUCTIONS 1 4 5 7 10 OPERATING INSTRUCTIONSCONTROL PANEL 11 OPERATING INSTRUCTIONS 11 CLEANING AND MAINTENANCE 14 ...
Page 3 - IMPORTANT SAFETY INSTRUCTIONS
1 Read all instructions before using this dryer. 2 The interior of the dryer should be cleaned periodically by qualified service personnel. An excessive amount of lint build up in the interior of the dryer could result in inefficient drying and pose a possible fire hazard. 3 The appliance must not b...
Page 5 - Read all instructions before using this dryer.; SAVE THESE INSTRUCTIONS.; IDENTIFICATION OF PARTS; Warning
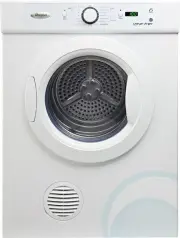
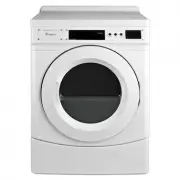
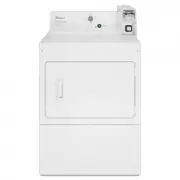
Service label 3 Power supply cord Model number and Serial number Back plate Air intake grill Control panel Door switch Outlet cover Lint filter Top panel Door latch Door Read all instructions before using this dryer. This dryer has been designed for domestic use only. SAVE THESE INSTRUCTIONS. This d...
Page 6 - INSTALLATION INSTRUCTIONS
Remove the transport packaging (f ig.1) Remove the tape on the door (fig.2), the wall mounting kit and the inverted panel film attached to the inside of the drum (fig.3) before starting the dryer. Packing accessoriesCheck list of the accessories and materials provided with the machine: To ensure the...
Page 7 - Free standing; Inverted wall mounting
5 Tools required For plaster/ Drill & 3mm Bit 1 Wooden wall Philips head screwdriver 1 Wall mounting kit includes Plastic spacers 2 Wall hanging brackets 2Hanging hook 2 Wood screws, 12gx50mm 4 Screws for hanging hooks 6 and plastic spacers. Description Free standing The dryer stands on the floo...
Page 9 - Stacking installation
5.With assistance, mount dryer on wall brackets. See Fig.4. 6. A second control panel film with inverted symbols is supplied. To fit this film, pull off the knob and then remove the old film.Peel the release paper from the back of inverted film, then place new control panel film on the surface so th...
Page 13 - B - Program control knob; CONTROL PANEL; A E; OPERATING INSTRUCTIONS
A - Start/Pause button After selecting your desired drying program, press this button to start the dryer. To pause the dryer while in operation, press this button again. 11 B - Program control knob Turn this knob to choose the drying program you desire. This dryer has 15 program options available fo...
Page 14 - Selecting programme
3. Selecting programme Turn the program knob to set your desired drying program. 5. Program operation After a program is set, press the “START/PAUSE” button to start the program. If you want to change the programme after the program has started, first you must pressthe “START/PAUSE” button, and then...
Page 15 - Turning off the dryer; Program completion
Attention: 1.Before operation, clean off any dust and dirt inside the drum of the dryer with a damp towel. 2.Clean off any debris on the lint filter and in the duct to increase the drying efficiency. Turning on power Before turning on the power of the dryer, check:- Whether the supply voltage is in ...
Page 16 - CLEANING AND MAINTENANCE; WARNING! Unplug the power cord prior to any cleaning
CLEANING AND MAINTENANCE WARNING! Unplug the power cord prior to any cleaning Cleaning the surface Wipe off any dust or dirt. Note: Do not use excessive water, a damp cloth is fine. Do not use solvent. Do not use spray cleaners when cleaning the interior. Do not use harsh or abrasive cleaners. Clean...
Page 18 - WIRING CIRCUIT; ITEM; PCB; SPECIFICATIONS
WIRING CIRCUIT 16 Power supply Maximum operating current (A) Rated load (kg) Drying program Maximum power (W) Dimensions (HxDxW) mm Weight (kg) ( 220-240)V~ · 50Hz 10 6 15 2100 830x560x600 30 IPX4 Waterproof degree ITEM TYPE SDRY60 Capacitor Motor Heater Door switch Sensor L N PCB Thermostat Thermal...
Page 19 - TROUBLESHOOTING GUIDE
17 If a fault occurs, before contacting Whirlpool customer service, make the following checks to try and remedy the problem: Machine does not switch on, or the programme does not start Problem Explanation / Suggestion Cause The product may not have been plugged in, or turned on Door is not closed pr...
Page 20 - Whirlpool Customer Service; Before contacting Whirlpool customer service:
Whirlpool Customer Service Before contacting Whirlpool customer service: 1. Try to remedy the problem yourself (see “Troubleshooting Guide”).2. Restart the programme to check whether the problem solved itself.3. If the dryer machine continues to function incorrectly, call Whirlpool customer service....