Whirlpool AWG 238_AWG 239_AWG 249_AWG 259 - Manuals
Whirlpool AWG 238_AWG 239_AWG 249_AWG 259 Washing Machine – User Manual in PDF format online.
Manuals:
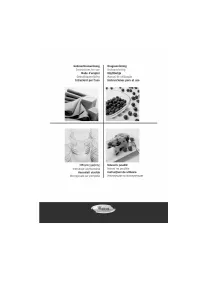
User Manual Whirlpool AWG 238_AWG 239_AWG 249_AWG 259


Summary
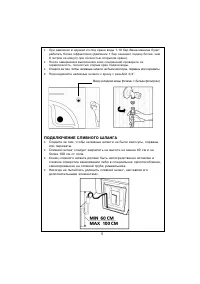
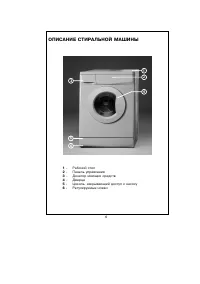
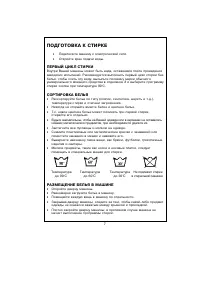
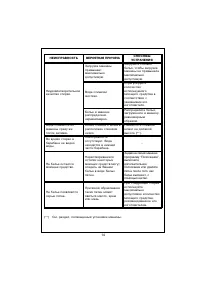
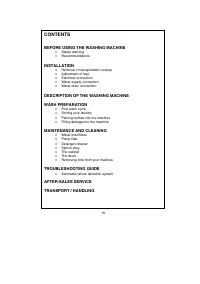
СОДЕРЖАНИЕ ПРЕЖДЕ ЧЕМ ПОЛЬЗОВАТЬСЯ СТИРАЛЬНОЙ МАШИНОЙ • Правила техники безопасности • Рекомендации УСТАНОВКА • Снятие транспортировочных винтов • Регулировка ножек • Подключение к электросети • Подключение к водопроводу • Подключение сливного шланга ОПИСАНИЕ СТИРАЛЬНОЙ МАШИНЫ ПОДГОТОВКА К СТИРКЕ • ...
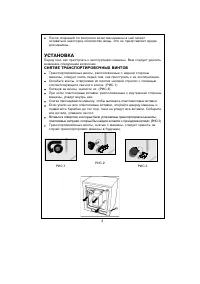
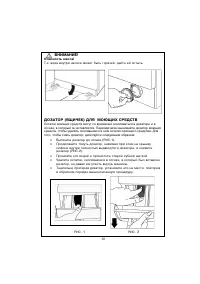
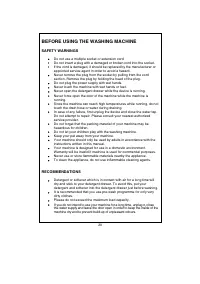
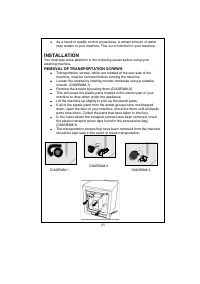
• После операций по контролю качества машины в ней можетоставаться некоторое количество воды. Это не представляет вредадля машины. УСТАНОВКА Перед тем, как приступать к эксплуатации машины, Вам следует уделитьвнимание следующим вопросам. СНЯТИЕ ТРАНСПОРТИРОВОЧНЫХ ВИНТОВ • Транспортировочные винты, р...
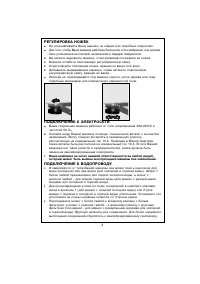
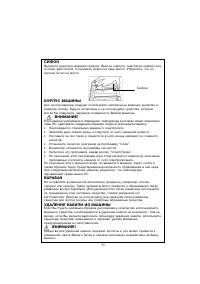
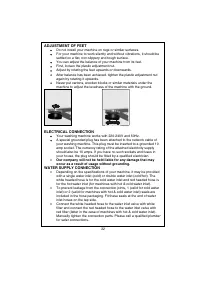
РЕГУЛИРОВКА НОЖЕК • Не устанавливайте Вашу машину на коврах или подобных покрытиях. • Для того, чтобы Ваша машина работала бесшумно и без вибраций, она должнабыть установлена на плоской, нескользкой и твердой поверхности. • Вы можете выровнять машину, отрегулировав положение ее ножек. • Вначале осла...
Whirlpool Washing Machines Manuals
-
 Whirlpool AWG 215_AWG 217_AWG 222_AWG 223_AWG 231
User Manual
Whirlpool AWG 215_AWG 217_AWG 222_AWG 223_AWG 231
User Manual
-
 Whirlpool AWG 218_AWG 233_AWG 236_AWG 237_AWG 246_AWG 248
User Manual
Whirlpool AWG 218_AWG 233_AWG 236_AWG 237_AWG 246_AWG 248
User Manual
-
 Whirlpool AWG 2311
User Manual
Whirlpool AWG 2311
User Manual
-
 Whirlpool AWG 232_AWG 234_AWG 235_AWG 240_AWG 241
User Manual
Whirlpool AWG 232_AWG 234_AWG 235_AWG 240_AWG 241
User Manual
-
 Whirlpool AWG 263
User Manual
Whirlpool AWG 263
User Manual
-
 Whirlpool AWG 294
User Manual
Whirlpool AWG 294
User Manual
-
 Whirlpool CAE2743BQ
User Manual
Whirlpool CAE2743BQ
User Manual
-
 Whirlpool CAE2745FQ
User Manual
Whirlpool CAE2745FQ
User Manual
-
 Whirlpool CAE2795FQ
User Manual
Whirlpool CAE2795FQ
User Manual
-
 Whirlpool CHW9150GW
User Manual
Whirlpool CHW9150GW
User Manual
-
Whirlpool CHW9150GW
Manual
-
 Whirlpool CHW9160GW
User Manual
Whirlpool CHW9160GW
User Manual
-
 Whirlpool FDLR70210
User Manual
Whirlpool FDLR70210
User Manual
-
 Whirlpool FDLR80210
User Manual
Whirlpool FDLR80210
User Manual
-
 Whirlpool FDLR80250
User Manual
Whirlpool FDLR80250
User Manual
-
 Whirlpool FSCR10420
User Manual
Whirlpool FSCR10420
User Manual
-
 Whirlpool FSCR12420
User Manual
Whirlpool FSCR12420
User Manual
-
 Whirlpool WB10037
User Manual
Whirlpool WB10037
User Manual
-
 Whirlpool WB70803
User Manual
Whirlpool WB70803
User Manual
-
 Whirlpool WB90805
User Manual
Whirlpool WB90805
User Manual