Page 2 - CONTENTS; WELCOME 3; To purchase accessories for your tool, visit
2 CONTENTS WELCOME 3 Introduction ......................................................................................................3Specifications ................................................................................................... 3 SAFETY 4 General Safety Rules ...................
Page 3 - INTRODUCTION; safety for both yourself and others.; SPECIFICATIONS
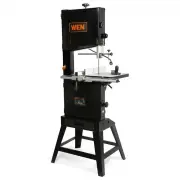
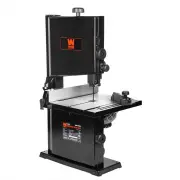
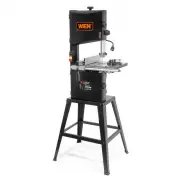
INTRODUCTION Thanks for purchasing the WEN Band Saw. We know you are excited to put your tool to work, but first, please take a moment to read through the manual. Safe operation of this tool requires that you read and understand this operator’s manual and all the labels affixed to the tool. This man...
Page 4 - GENERAL SAFETY RULES; WORK AREA SAFETY
GENERAL SAFETY RULES 4 WORK AREA SAFETY 1. Keep work area clean and well lit. Cluttered or dark areas invite accidents. 2. Do not operate power tools in explosive atmo- spheres, such as in the presence of flammable liq- uids, gases or dust. Power tools create sparks which may ignite the dust or fume...
Page 5 - POWER TOOL USE AND CARE
GENERAL SAFETY RULES 5 7. If devices are provided for the connection of dust extraction and collection facilities, ensure these are connected and properly used. Use of dust collection can reduce dust-related hazards. POWER TOOL USE AND CARE 1. Do not force the power tool. Use the correct power tool ...
Page 6 - SAW BLADE SAFETY; PERSONAL SAFETY; SPECIFIC RULES FOR YOUR BAND SAW
SAW BLADE SAFETY 1. Always wear protective gloves when handling saw blades. 2. Only use blades with correct size and type for both your band saw and your workpiece. • See the blade specifications on page 3. • Make sure the blade is installed in the proper direc- tion. 3. Never use damaged or deforme...
Page 7 - DURING CUTTING OPERATIONS
5. Never hand-hold a workpiece that is too small to be clamped, as it can be launched away and cause inju- ry. Use proper support and guides to secure the small workpiece. 6. Support round work properly (use a V block or press it against the miter gauge) to prevent it from rolling and the blade from...
Page 8 - ELECTRICAL INFORMATION; AMPERAGE; GUIDELINES AND RECOMMENDATIONS FOR EXTENSION CORDS; In the event of a malfunction or breakdown; Improper connection
ELECTRICAL INFORMATION 8 AMPERAGE REQUIRED GAUGE FOR EXTENSION CORDS 25 ft. 50 ft. 100 ft. 150 ft. 9.5A 18 gauge 16 gauge 14 gauge 12 gauge 3. Check with a licensed electrician or service personnel if you do not completely under- stand the grounding instructions or whether the tool is properly groun...
Page 9 - UNPACKING; UNPACKING & PACKING LIST; PACKING LIST; Circle Cutting Accessories:
UNPACKING With the help of a friend or trustworthy foe, carefully remove the band saw from the packaging. Make sure to take out all contents and accessories. Do not discard the packaging until everything is removed. Check the packing list below to make sure you have all of the parts and accessories....
Page 10 - KNOW YOUR BAND SAW; TOOL PURPOSE
10 KNOW YOUR BAND SAW TOOL PURPOSE Band saws are used to cut wood. Refer to the following diagrams to become familiarized with all the parts and controls of your band saw. The components will be referred to later in the manual for assembly and operation instructions. 10 Tension Knob Light SwitchPowe...
Page 11 - ASSEMBLY & ADJUSTMENTS; TO ASSEMBLE THE STAND
ASSEMBLY & ADJUSTMENTS 11 WARNING! Do not plug in or turn on the tool until it is fully assembled according to the instructions. Read through and become familiarized with the following procedures of handling and adjusting your tool. Failure to follow the safety instructions may result in serious...
Page 12 - INSTALLING THE ACCESSORY TOOLS; Lock Knob A
12 ASSEMBLY & ADJUSTMENTS WARNING! Do not plug in or turn on the tool until it is fully assembled according to the instructions. Read through and become familiarized with the following procedures of handling and adjusting your tool. Failure to follow the safety instructions may result in serious...
Page 13 - TILTING THE TABLE
13 ASSEMBLY & ADJUSTMENTS WARNING! Always be sure that the tool is switched off and unplugged before making any adjustments. TILTING THE TABLE 1. Find and loosen the table bevel lock located in back under the saw table (Fig. 12 - 1). 2. Adjust the table to the desired angle using the table tilti...
Page 14 - ADJUSTING BLADE TENSION
14 ASSEMBLY & ADJUSTMENTS WARNING! If the tension in the blade is too high, it runs the risk of breaking. If the tension is too low, there is a risk of the blade slipping and stopping during a cut. ADJUSTING BLADE TENSION 1. Raise the upper blade guide fully using the saw blade tension knob loca...
Page 15 - LOWER BLADE GUIDE ADJUSTMENT; ADJUSTING THE CUTTING SPEED
15 ASSEMBLY & ADJUSTMENTS Fig. 17 Fig. 18 Fig. 19 WARNING! The lower blade guide must be adjusted after every blade change and tracking adjustment. LOWER BLADE GUIDE ADJUSTMENT 1. Loosen the set screw (Fig. 20 - 3) and move the entire lower blade guide. Adjust the guide bearing to a position of ...
Page 16 - CHANGING THE BAND SAW BLADE
16 ASSEMBLY & ADJUSTMENTS WARNING! The saw blade is dangerous. Be sure to wear gloves when handling the saw blade in any situation. CHANGING THE BAND SAW BLADE 1. Loosen the four lock knobs for the guide rail. Remove the guard rail by loosening the four lock knobs located underneath (Fig. 24 - 1...
Page 17 - OPERATION; WARNINGS & SUGGESTIONS; LED WORK LIGHT
17 OPERATION WARNINGS & SUGGESTIONS • Do not touch the saw blade when cutting. • During saw operation, wear safety glasses but do not wear gloves. • Cut only one workpiece at a time. • Always hold the workpiece down on the table. • Do not jam any workpieces. • Do not try to slow the blade down b...
Page 18 - USING THE MITER GAUGE
OPERATION USING THE MITER GAUGE 1. Place the miter gauge into the slot on the table. (Fig. 29)2. Loosen the knob on the gauge to set a new miter angle (be- tween 0 and 60 degrees).3. Tighten the knob firmly before cutting begins. USING THE PUSH STICK The push stick serves as an extension of the hand...
Page 19 - CONNECT A DUST COLLECTOR; Blade Width; CUTTING CURVES WITH THE CIRCLE CUTTING GUIDE
OPERATION CONNECT A DUST COLLECTOR The band saw provides a dust port for collecting various size hoses. It should be connected with a dust collector during any sawing operations. Ex- cess debris gets collected into the dust drawer un- derneath which should be routinely cleaned out. Dust port sizes i...
Page 20 - ROUTINE INSPECTION; MAINTENANCE; LUBRICATION; Please recycle the packaging and electronic
21 20 ROUTINE INSPECTION Before each use, inspect the general condition of the tool. If any of these following conditions exist, do not use until parts are replaced or the saw is properly re- paired. Check for: • Loose hardware,• Misalignment or binding of moving parts, • Damaged cord/electrical wir...
Page 21 - EXPLODED VIEW & PARTS LIST
21 20 EXPLODED VIEW & PARTS LIST NOTE: Not all parts may be available for purchase. Parts and accessories that wear down over the course of normal use are not covered under the warranty.
Page 22 - Description
EXPLODED VIEW & PARTS LIST 22 No. Part No. Description Qty. 1 3966-001 Socket head screw 1 2 3966-002 Flat washer 1 3 3966-003 Blade tension knob 1 4 3966-004 Screw 1 5 3966-005 Bushing 1 6 3966-006 Retaining ring 1 7 3966-007 Frame cap 1 8 3966-008 Hex nut 2 9 3966-009 Tension bracket 1 10 3966...
Page 26 - WARRANTY
WARRANTY 26 WEN Products is committed to building tools that are dependable for years. Our warranties are consistent with this commitment and our dedication to quality. LIMITED WARRANTY OF WEN PRODUCTS FOR HOME USE GREAT LAKES TECHNOLOGIES, LLC (“Seller”) warrants to the original purchaser only, tha...
Page 27 - NOTES