VITEK VT-1214 - Manuals
VITEK VT-1214 Iron – User Manual in PDF format online.
Manuals:
User Manual VITEK VT-1214


Summary
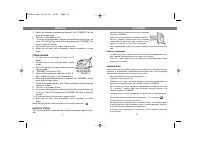
DO'S DO'S 1. Check the mains voltage stated on the iron. 2. Unwind and straighten the power cord before use. 3. Depress the control button for select the temperature, pilot lightglows. 4. To turn off the appliance, depress and hold the control button for2sec when it is not in use, even for a short p...
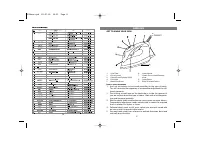
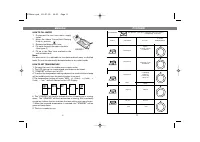
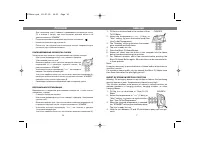
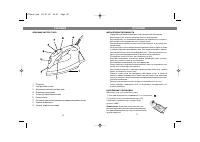
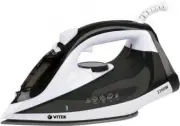
GET TO KNOW YOUR IRON HINTS FOR IRONING 1. Sort out the articles to be ironed according to the type of fabric. This will minimize the frequency of temperature adjustment for dif-ferent garments. 2. Test ironing a small area on the backside or inside the garment if you are unsure about the type of fa...
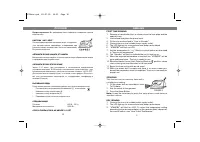
17 HOW TO FILL WATER 1. Disconnect the iron from mains supply outlet. 2. Move the Steam Control/Self-Cleaning Knob to position: 3. Release the Water Inlet Cover.4. Fill water through the water inlet hole. (See figure 2) 4. Fill up to the 'Max' level marked on the side of water tank. Note: For best r...
VITEK Irons Manuals
-
 VITEK 1267-VT-01
User Manual
VITEK 1267-VT-01
User Manual
-
 VITEK 8305 VT
User Manual
VITEK 8305 VT
User Manual
-
 VITEK VT-1201
User Manual
VITEK VT-1201
User Manual
-
 VITEK VT-1201 BN
User Manual
VITEK VT-1201 BN
User Manual
-
 VITEK VT-1203
User Manual
VITEK VT-1203
User Manual
-
 VITEK VT-1204
User Manual
VITEK VT-1204
User Manual
-
 VITEK VT-1205
User Manual
VITEK VT-1205
User Manual
-
 VITEK VT-1206
User Manual
VITEK VT-1206
User Manual
-
 VITEK VT-1207
User Manual
VITEK VT-1207
User Manual
-
 VITEK VT-1208
User Manual
VITEK VT-1208
User Manual
-
 VITEK VT-1209 BN
User Manual
VITEK VT-1209 BN
User Manual
-
 VITEK VT-1210 VT
User Manual
VITEK VT-1210 VT
User Manual
-
 VITEK VT-1211
User Manual
VITEK VT-1211
User Manual
-
 VITEK VT-1212
User Manual
VITEK VT-1212
User Manual
-
 VITEK VT-1213
User Manual
VITEK VT-1213
User Manual
-
 VITEK VT-1215
User Manual
VITEK VT-1215
User Manual
-
 VITEK VT-1215 PK
User Manual
VITEK VT-1215 PK
User Manual
-
 VITEK VT-1216
User Manual
VITEK VT-1216
User Manual
-
 VITEK VT-1217
User Manual
VITEK VT-1217
User Manual
-
 VITEK VT-1218 OG
User Manual
VITEK VT-1218 OG
User Manual