Page 2 - CAMERA OVERVIEW
2 EN CAMERA OVERVIEW Reset O P E N Night detection sensor Microphone Speaker Passive infrared motion sensor Threaded Mounting Hole (for optional outdoor stand accessory) LED indicator Pair button Magnetic stand holder Reset button Micro USB charging port Infrared LEDs (for night vision) Remember to ...
Page 3 - CHARGE THE CAMERA
3 EN CHARGE THE CAMERA Before using the camera for the first time, charge it for at least two hours with the included USB charging cable. 1 Open the rubber cover of the micro USB port at the back of the camera. 2 Insert the smaller end of the USB charging cable into the micro USB port on the camera,...
Page 4 - GET THE SWANN SECURITY APP
4 EN GET THE SWANN SECURITY APP 1 Download the latest version of the Swann Security app from the Apple App Store® or Google Play™ Store on your iOS or Android device. Simply search for " Swann Security ". 2 Open the app and create your Swann Security account. You will need to activate your a...
Page 5 - SET UP THE CAMERA
5 EN Launch the Swann Security app and sign in. Tap the Pair Device button on the screen (or open Menu and select Pair Device ) and follow the in-app instructions to set up your new camera. Before you begin, be close to your router or access point and have your Wi-Fi network information (including p...
Page 6 - CAMERA PLACEMENT
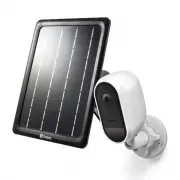
6 EN The camera can be conveniently placed on a table or shelf, or mounted on the wall using the magnetic stand or the outdoor stand (optional accessory which can be purchased separately). Because the camera is completely wire-free, you’ll have a lot of flexibility on where you can put it. Choose a ...
Page 7 - TIPS
7 EN Have questions? We’re here to help! Visit our Support Center at support.swann.com . You can register your product for dedicated technical support, find answers to commonly asked questions, and more. You can also email us at any time via: [email protected] TIPS Motion detection The camera’s PIR ...
Page 8 - DESCRIPCIÓN DE LA CÁMARA
8 ES ES DESCRIPCIÓN DE LA CÁMARA Reset O P E N Sensor de detección nocturna Micrófono Altavoz Sensor infrarrojo pasivo de movimiento Orificio roscado de montaje (para el accesorio de soporte opcional para exteriores) Indicador LED Botón Vincular Soporte magnético Botón de reinicio Puerto de carga mi...
Page 9 - CARGUE LA CÁMARA
9 ES ES CARGUE LA CÁMARA Antes de usar la cámara por primera vez, cárguela por al menos dos horas con el cable de carga USB incluido. 1 Abra la cubierta de goma del puerto micro USB en la parte posterior de la cámara. 2 Inserte el extremo más pequeño del cable de carga USB en el puerto micro USB de ...
Page 11 - CONFIGURE LA CÁMARA
11 ES Abra la aplicación Swann Security e inicie sesión. Toque el botón Vincular dispositivo en la pantalla (o abra el Menú y seleccione Vincular dispositivo ) y siga las instrucciones en la aplicación para configurar su nueva cámara. Antes de comenzar, manténgase cerca de su enrutador o punto de ac...
Page 12 - COLOCACIÓN DE LA CÁMARA
12 ES La cámara se puede colocar convenientemente en una mesa o estante, o montarse en la pared mediante el soporte magnético o el soporte para exterior (accesorio opcional que se puede comprar por separado). Como la cámara se utiliza completamente sin cables, tendrá una enorme flexibilidad para el ...
Page 13 - SUGERENCIAS
13 ES ¿Alguna pregunta? ¡Estamos aquí para ayudarlo! Visite nuestro Centro de Asistencia en support.swann.com . Puede registrar su producto para obtener asistencia técnica dedicada, encontrar respuestas a preguntas frecuentes y más. También puede enviarnos un correo electrónico en cualquier momento ...
Page 14 - PRÉSENTATION GÉNÉRALE DE LA CAMÉRA
14 FR PRÉSENTATION GÉNÉRALE DE LA CAMÉRA Reset O P E N Capteur de détection de nuit Microphone Haut-parleur Capteur de mouvement infrarouge passif Trou de montage fileté (pour accessoire de support extérieur en option) Indicateur LED Bouton Lier Porte-support magnétique Bouton de réinitialisation Po...
Page 15 - CHARGEMENT DE LA CAMÉRA
15 FR CHARGEMENT DE LA CAMÉRA Avant d'utiliser la caméra pour la première fois, chargez-la pendant au moins deux heures à l'aide du câble de chargement USB fourni. 1 Ouvrez le cache en caoutchouc du port micro USB situé à l'arrière de la caméra. 2 Insérez la plus petite extrémité du câble de chargem...
Page 17 - CONFIGURATION DE LA CAMÉRA
17 FR Lancez l’application Swann Security et connectez-vous. Appuyez sur le bouton Associer appareil à l’écran (ou ouvrez le Menu et sélectionnez Associer appareil ) et suivez les instructions fournies avec l'application pour configurer votre nouvelle caméra. Avant de commencer, approchez-vous de vo...
Page 18 - EMPLACEMENT DE LA CAMÉRA
18 FR La caméra peut être placée de manière pratique sur une table ou une étagère ou fixée au mur à l'aide du support magnétique ou du support extérieur (accessoire en option pouvant être acheté séparément). Étant donné que la caméra est complètement sans fil, vous disposerez d'une grande flexibilit...
Page 19 - ASTUCES
19 FR Des questions ? Nous sommes là pour vous aider! Visitez notre Centre de support à l'adresse support.swann.com . Vous pouvez enregistrer votre produit pour un support technique dédié, trouver des réponses aux questions fréquemment posées, etc. Vous pouvez également nous envoyer un email à tout ...
Page 20 - PANORAMICA DELLA TELECAMERA
20 IT PANORAMICA DELLA TELECAMERA Reset O P E N Sensore di rilevamento del notturno Microfono Altoparlante Sensore di rilevamento del movimento a raggi infrarossi passivo Foro di montaggio filettato (per accessori di supporto per esterno opzionali) Indicatore a LED Pulsante di abbinamento Supporto m...
Page 21 - RICARICARE LA TELECAMERA
21 IT RICARICARE LA TELECAMERA Prima di utilizzare la telecamera per la prima volta, caricarla per almeno due ore con il caricatore USB in dotazione. 1 Aprire il coperchio in gomma della porta micro USB sul lato posteriore della telecamera. 2 Inserire l'estremità più piccola del cavo USB nella porta...
Page 22 - OTTENERE L’APP SWANN SECURITY
22 IT OTTENERE L’APP SWANN SECURITY 1 Scaricare la versione più recente dell’app Swann Security dal’Apple App Store® o da Google Play™ Store sul dispositivo iOS o Android. Basta cercare " Swann Security ". 2 Aprire l'app ed creare l'account Swann Security. Prima di poter accedere bisogna att...
Page 23 - CONFIGURAZIONE DELLE TELECAMERA
23 IT Aprire l’app Swann Security e eseguite l’accesso. Toccate il tasto Abbina dispositivo sullo schermo (o aprire Menu e selezionare Abbina dispositivo ) e seguire le istruzioni dell’app per configurare la nuova telecamera. Prima di iniziare avvicinarsi al router o punto di accesso e tenere a port...
Page 24 - POSIZIONAMENTO DELLE TELECAMERA
24 IT La telecamera può essere comodamente posizionata su un tavolo o mensola o montata a parete mediante il supporto magnetico o il supporto per esterno (accessorio opzionale che può essere acquistato separatamente). Poiché la telecamera è completamente priva di cavi, ci sarà molta flessibilità rig...
Page 25 - SUGGERIMENTI
25 IT Hai domande? Siamo qui per aiutarti! Visita il nostro Centro di supporto su support.swann.com . È possibile registrare il prodotto per l'assistenza tecnica dedicata, trovare le risposte alle domande più frequenti e altro ancora. Puoi anche contattarci via email in qualsiasi momento all'indiriz...
Page 26 - KAMERAÜBERSICHT
26 DE KAMERAÜBERSICHT Reset O P E N Nacht- Bewegungs- sensor Mikrofon Lautsprecher Passiv-Infrarot Bewegungssensor Gewinde-Befestigungsbohrung (für optionalen Ständer zur Befestigung im Freien) LED-Anzeige Schaltfläche „Koppeln“ Magnetische Befestigungshalterung Reset-Taste Mikro-USB Ladeanschluss I...
Page 27 - KAMERA LADEN
27 DE KAMERA LADEN Die Kamera muss vor der ersten Verwendung mindestens zwei Stunden mit dem mitgelieferten USB-Kabel geladen werden. 1 Öffnen Sie den Gummideckel des USB-Anschlusses auf der Rückseite der Kamera. 2 Schließen Sie das kleinere Ende des USB-Ladekabels in den Mikro-USB-Anschluss der Kam...
Page 29 - KAMERA EINRICHTEN
29 DE Starten Sie die Swann Security App und melden sichan. Tippen Sie auf die Schaltfläche Gerät verknüpfen auf dem Bildschirm (oder öffnen Sie das Menü und wählen Gerät verknüpfen ) und befolgen die Anweisungen zum Einrichten der neuen Kamera. Bevor Sie beginnen sollten Sie dicht an Ihrem Router o...
Page 30 - PLATZIERUNG DER KAMERA
30 DE Die Kamera kann praktisch auf einen Tisch oder ein Regal gestellt oder an mit Hilfe des magnetischen oder Außenständers an der Wand montiert werden (optionales Zubehör, separat erhältlich). Da die Kamera komplett kabellos ist, bietet sich hinsichtlich der Platzierung ein hohes Maß an Flexibili...
Page 31 - TIPPS
31 DE Noch Fragen? Wir helfen Ihnen gerne. Besuchen Sie unser Support-Center auf support.swann.com . Sie können dort Ihr Produkt registrieren und erhalten so technischen Support, Antworten auf häufig gestellte Fragen und vieles mehr. Sie können uns auch jederzeit per E-Mail erreichen unter: [email p...


 Swann DVK856804RL4DE
User Manual
Swann DVK856804RL4DE
User Manual
 Swann SONVK-16768010D-US
User Manual
Swann SONVK-16768010D-US
User Manual
 Swann SONVK-876804D-US
User Manual
Swann SONVK-876804D-US
User Manual
 Swann SWDVK-84580V8D
User Manual
Swann SWDVK-84580V8D
User Manual
 Swann SWDVK-846804MQB-US
User Manual
Swann SWDVK-846804MQB-US
User Manual
 Swann SWDVK-856804MQB-US
User Manual
Swann SWDVK-856804MQB-US
User Manual
 Swann SWDVK-856808RQ1TB-CL
User Manual
Swann SWDVK-856808RQ1TB-CL
User Manual
 Swann SWIFI-CAMWSOLSTD-GL
User Manual
Swann SWIFI-CAMWSOLSTD-GL
User Manual
 Swann SWIFIXTRCM16G1
User Manual
Swann SWIFIXTRCM16G1
User Manual
 Swann SWIFI-XTRCM16G3PK-GL
User Manual
Swann SWIFI-XTRCM16G3PK-GL
User Manual