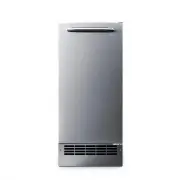
Summit Appliance BIM100ADA - Manuals
User Manual Summit Appliance BIM100ADA


Summary
2 TABLE OF CONTENTS Important Safety Instructions 3 Precautions 3 Grounding Instructions 4 Location of Parts 5 Installation Instructions 6-7 Before Using your Ice Maker 6 Installing the Ice Maker 6 Connecting the Water Line 6-7 Installing the Purification Filter 7 Operation 7-8 Ice Full Sensor 7 Ice...
3 IMPORTANT SAFETY INSTRUCTIONS Child entrapment and suffocation are not problems of the past. Unused or abandoned icemakers are still dangerous, even if they will just “sit in the garage a few days.” • Before you throw away your old icemaker, take off the doors. Leave any shelves or drawers in plac...
4 GROUNDING INSTRUCTIONS WARNING: Improper use of the grounding plug can result in a risk of electric shock. • This appliance must be grounded. In the event of an electrical short circuit, grounding reduces the risk of electric shock by providing an escape wire for the electric current. • This appli...
Summit Appliance Ice Makers Manuals
-
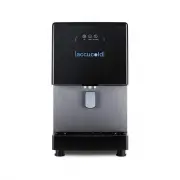 Summit Appliance AIWD160FLTR
User Manual
Summit Appliance AIWD160FLTR
User Manual
-
 Summit Appliance AIWD450FLTR
User Manual
Summit Appliance AIWD450FLTR
User Manual
-
 Summit Appliance BIM26H32
User Manual
Summit Appliance BIM26H32
User Manual
-
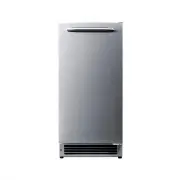 Summit Appliance BIM26H34
User Manual
Summit Appliance BIM26H34
User Manual
-
 Summit Appliance BIM271OS
User Manual
Summit Appliance BIM271OS
User Manual
-
 Summit Appliance BIM27OSADA
User Manual
Summit Appliance BIM27OSADA
User Manual
-
 Summit Appliance BIM44G
User Manual
Summit Appliance BIM44G
User Manual
-
 Summit Appliance BIM44GADA
User Manual
Summit Appliance BIM44GADA
User Manual
-
 Summit Appliance BIM44GCSS
User Manual
Summit Appliance BIM44GCSS
User Manual
-
 Summit Appliance BIM44GCSSADA
User Manual
Summit Appliance BIM44GCSSADA
User Manual
-
 Summit Appliance BIM44GCSSADAE
User Manual
Summit Appliance BIM44GCSSADAE
User Manual
-
 Summit Appliance BIM44GIF
User Manual
Summit Appliance BIM44GIF
User Manual
-
 Summit Appliance BIM44GIFADA
User Manual
Summit Appliance BIM44GIFADA
User Manual
-
 Summit Appliance BIM44GIFADAE
User Manual
Summit Appliance BIM44GIFADAE
User Manual
-
 Summit Appliance BIM44GIFE
User Manual
Summit Appliance BIM44GIFE
User Manual
-
 Summit Appliance BIM44GSS
User Manual
Summit Appliance BIM44GSS
User Manual
-
 Summit Appliance BIM47OSADA
User Manual
Summit Appliance BIM47OSADA
User Manual
-
 Summit Appliance BIM47OSADAE
User Manual
Summit Appliance BIM47OSADAE
User Manual
-
 Summit Appliance BIM47OSE
User Manual
Summit Appliance BIM47OSE
User Manual
-
 Summit Appliance BIM68OSPUMP
User Manual
Summit Appliance BIM68OSPUMP
User Manual