Page 2 - Cleaning
2 CAUTION To prevent electric shock and blade exposure, do not use this polarized AC plug with an extension cord, receptacle or other outlet unless the blades can be fully inserted. ❑ Operate the TV only on 110-240 V AC. ❑ Avoid operating the TV at temperatures below 41°F (5°C). Licensing Informatio...
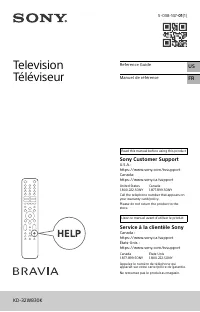
Page 3 - Customer Support; Contents
3 Customer Support United Stateshttp://www.sony.com/tvsupportCanadahttp://www.sony.ca/support On-line Registration United Stateshttp://productregistration.sony.comCanadahttp://www.SonyStyle.ca/registration Contents Introducing Your New BRAVIA ® Welcome to the World of BRAVIA ® . . . . . . . . 4 Expe...
Page 4 - Introducing Your New BRAVIA; Welcome to the World of BRAVIA
4 Introducing Your New BRAVIA ® Welcome to the World of BRAVIA ® Thank you for choosing this Sony BRAVIA ® high-definition television. Use the documentations listed below to get the most out of your TV. Experiencing Stunning HD with Your BRAVIA The quality of the image you see on your BRAVIA TV is o...
Page 5 - The Four Steps to a Stunning HD Experience
5 In troduc ing Your New BRAVIA ® The Four Steps to a Stunning HD Experience Set, Source, Sound, and Setup Along with your BRAVIA TV set , a complete HD system requires a source of HD programming, an HD sound system, and a proper connection setup . Refer to the Quick Setup Guide, enclosed separately...
Page 6 - Ambient Sensor; : Automatically optimizes the picture settings according to the
6 ➢ Ambient Sensor : Automatically optimizes the picture settings according to the ambient light in the room. The sensor detects ambient light levels to adjust the brightness and color temperature of the picture. With this feature you can have the best picture quality under your room’s lighting cond...
Page 7 - Getting Started; Setting Up Your TV; • Place your palm directly underneath but do
7 G e tting Started Getting Started Setting Up Your TV Some TV models are packaged with a detached Table-Top Stand so you can mount your TV to a wall right away. If you are not mounting the TV to a wall, you will need to attach the Table-Top Stand. You will need a Phillips screwdriver and the suppli...
Page 8 - Locating Inputs and Outputs; RF input that connects to your Cable or VHF/UHF antenna.; qa; Side Panel
8 Locating Inputs and Outputs Item Description 1 AC IN Connect the supplied power cord to AC IN and the nearest wall outlet. 2 DIGITAL AUDIO OUT (OPTICAL) Connects to the optical audio input of digital audio equipment that is PCM/Dolby* 2 Digital compatible. 3 CABLE/ANTENNA RF input that connects to...
Page 9 - USB; Connects to USB equipment to access photo, music, and video files.; • An HDMI or Component video (YP
9 G e tting Started 6 PC IN(RGB/AUDIO) Connects to a personal computer’s video and audio output connector. Can also be connected to other analog RGB equipment. See “PC Input Signal Reference Chart” on page 46 for the signals that can be displayed.For some Apple Macintosh computers, it may be necessa...
Page 10 - Adjusting the viewing angle of the TV; This TV can be adjusted within the angle shown below.; Connecting the TV; Refer to the supplied Quick Setup Guide for details.; Cable System or VHF/UHF Antenna System
10 Adjusting the viewing angle of the TV For KDL-55EX500/KDL-46EX500/KDL-40EX500/KDL-32EX500/KDL-55EX501/KDL-46EX501/KDL-40EX501 This TV can be adjusted within the angle shown below. Adjust the angle left and right (swivel) Connecting the TV 5.1 Surround Sound System (KDL-32FA600 only) Refer to the ...
Page 11 - Cable System and VHF/UHF Antenna System; Shown with HDMI Connection; • Be sure to set the; Signal Type; setting to; Cable; or; Antenna; found under the; Channel; settings
11 G e tting Started Cable System and VHF/UHF Antenna System Use an optional A-B RF switch (not supplied) to switch between the cable and over-the-air antenna programming, as indicated below. HD Cable Box/HD Satellite Box You can enjoy high-definition programming by subscribing to a high-definition ...
Page 13 - PC
13 G e tting Started PC Use the TV as a monitor for your PC by connecting an HD15-HD15 cable connection as shown below. This TV can also be connected to a PC with a DVI or HDMI output. (Refer to the separate Quick Setup Guide.) 1 2 1 1 AUDIO R R L COMPONENT IN PC IN AUDIO OUT (FIX) P R P B Y L VIDEO...
Page 14 - Connecting Other Equipment
14 Connecting Other Equipment 1 2 1 1 AUDIO R L COMPONENT IN PC IN AUDIO OUT (FIX) P R P B Y L R VIDEO IN AUDIO RGB PC/HDMI 1AUDIO IN (MONO) 4 IN AUDIO AUDIO R L (1080p/1080i/ 720p/480p/480i) CABLE/ ANTENNA DIGITAL AUDIO OUT (OPTICAL) VIDEO IN VIDEO AUDIO L R (MONO) 2 2 3 IN Personal computer Blu-ra...
Page 15 - When Installing the TV Against a Wall or Enclosed Area; Installed with stand; Installed on the wall
15 G e tting Started When Installing the TV Against a Wall or Enclosed Area Make sure that your TV has adequate ventilation. Allow enough space around the TV as shown below. Avoid operating the TV at temperatures below 41 °F (5 °C). (30 cm) 11 7 / 8 inches (6 cm) inches 4 inches (10 cm) 4 inches(10 ...
Page 16 - Securing the TV; Preventing the TV from Toppling; Do not allow children to play or climb on furniture and TV sets.; Recommended Measures to Secure the TV; Secure the stand for the TV.
16 Securing the TV Sony strongly recommends taking measures to prevent the TV from toppling over. Unsecured TVs may topple and result in property damage, serious bodily injury or even death. Preventing the TV from Toppling ❑ Secure the TV to a wall and/or stand. ❑ Do not allow children to play or cl...
Page 17 - Secure the TV to the stand.; follow all three measures recommended above.
17 G e tting Started 2 Secure the TV to the stand. Except KDL-32FA600 model Use the optional hardware listed below (not supplied):• M4 × 16 mm anchor bolt (screwed into the TV’s Table-Top Stand). • A screw or similar (attach it to the TV stand).• Rope or chain (strong enough to support the weight of...
Page 18 - Running Initial Setup; During initial setup, you will perform the following:
18 Running Initial Setup During initial setup, you will perform the following: • Set the language for the On Screen Display (OSD) text• Choose your viewing environment• Scan for digital and analog channels Complete your cable connections before beginning the Initial Setup . Refer to the Quick Setup ...
Page 19 - Operating the TV; Using the Remote Control; To Insert Batteries into the Remote Control
19 O p era ting t h e T V Operating the TV Using the Remote Control To Insert Batteries into the Remote Control Insert two size AAA batteries (supplied) by matching e and E on the batteries to the diagram inside the battery compartment of the remote control. Guidelines to follow For KDL-32/40/46/55/...
Page 20 - Remote Control Button Description
20 Remote Control Button Description Button Description 1 INPUT Press to display the list of External Inputs and TV mode. Press repeatedly to toggle through the inputs. See page 28. 2 BRAVIA Sync These buttons are used to control the equipment connected to the TV by using the Control for HDMI functi...
Page 23 - ql; Rear of Remote Control
23 O p era ting t h e T V Button Description ql " / 1 (Power) Press to turn on and off the TV.Available models : KDL-60EX500/KDL-55EX500/KDL-46EX500/KDL-40EX500/KDL-32EX500/KDL-55EX501/KDL-46EX501/KDL-40EX501 ql Rear of Remote Control
Page 24 - TV Controls and Indicators
24 TV Controls and Indicators Item Description 1 Ambient sensor(IR) Infrared Receiver Senses room light level and adjusts the screen brightness accordingly. Do not put anything over the sensor, doing so may affect its function.Receives IR signal from the remote control. 2 (Picture Off)/ (Timer) LED ...
Page 25 - tures; Using Features; BRAVIA; with
25 Using Fea tures Using Features BRAVIA ® Sync TM with Control for HDMI With the Control for HDMI function, BRAVIA Sync helps to communicate with BRAVIA Sync-compatible equipment using HDMI CEC (Consumer Electronics Control). Use the following settings and tips to help unify control of your connect...
Page 26 - Using PIP Feature; PIP Supported Inputs
26 Using PIP Feature PIP (picture in picture) displays a picture from a connected PC in full screen, and a TV program or other external input (see below “To Enter PIP” table) in an inset window. ( Closed Captions (CC) is not available with PIP mode.) To Enter PIP 1 Press TOOLS while in the PC mode. ...
Page 27 - Favorites; • Your
27 Using Fea tures Favorites Your favorite channels and external inputs can be easily accessed by pressing the FAVORITES button once they are added to the list. Adding to Favorites While tuned to the channel you want to watch or viewing connected equipment, press FAVORITES to display the list. Highl...
Page 28 - Incoming PC signal; • Use the; Auto Adjustment; to adjust
28 Wide Mode with PC Wide Mode is also available for the PC settings. When a PC is connected to the TV and PC input is selected, you can change the PC Screen settings. To change the Wide Screen Mode for PC Timing Press WIDE repeatedly to cycle through the available modes while in the PC input mode. ...
Page 30 - Using the Menus; MENU; Navigating through TV Menus
30 Using the Menus The MENU button allows you to access a variety of TV settings and USB media files. Navigating through TV Menus 1 Press on the remote control to display the menu options. 2 Press V / v / B / b to navigate on the menu or adjust the settings. 3 Press to select or confirm. 4 Press to ...
Page 31 - Using the Picture Settings; White adjustment
31 Usin g the Me nus Using the Picture Settings Option Description Picture Mode Customized picture viewing Displays the options selected in the Scene Select settings (see page 21). When Scene Select is set to General , the options below can be selected. Vivid Select for enhanced picture contrast and...
Page 33 - Using the Sound Settings
33 Usin g the Me nus Using the Sound Settings Option Description Sound Mode Customized sound listening Sets a sound mode. Sound Mode includes options best suited for video and photographs, respectively. The available options depend on the scene select settings. Dynamic Enhances treble and bass. Stan...
Page 34 - Digital channels only
34 MTS Audio Enjoy stereo, bilingual and mono programs Stereo Select for stereo reception when viewing a program broadcast in stereo. Auto SAP Select to automatically switch the TV to second audio programs when a signal is received. If no SAP signal is present, the TV remains in Stereo mode. Mono Se...
Page 35 - Using the Screen Settings
35 Usin g the Me nus Using the Screen Settings Option Description Wide Mode Wide Zoom Fills the screen with minimum distortion. Normal Select to display 4:3 picture in original size when the original source is 4:3. Full Select to enlarge the picture horizontally to fill the screen when the original ...
Page 37 - Using the Channel Settings
37 Usin g the Me nus Using the Channel Settings Option Description Favorites Select favorite channels and external inputs (see page 27). Signal Type Cable Select if you are receiving cable channels via Cable TV provider. Antenna Select if you are using an antenna. Auto Program Automatically sets up ...
Page 38 - Using the Parental Lock Settings
38 Using the Parental Lock Settings Option Description Enter Password The Parental Lock settings allow you to set up the TV to block programs according to their content and rating levels. Use 0-9 on the remote control to enter a four-digit password. The first time you create a password, confirm the ...
Page 39 - US Models: Selecting Custom Parental Lock Rating Options; in the; Country; Movie Rating
39 Usin g the Me nus US Models: Selecting Custom Parental Lock Rating Options To select custom rating options for the U.S., select U.S.A. in the Country setting (see page 38). Option Description Movie Rating G All children and general audience. PG Parental guidance suggested. PG-13 Parental guidance...
Page 40 - Canadian Models: Selecting Custom Parental Lock Rating Options; Canada; Viewing Blocked Programs; ENT; English Rating
40 Canadian Models: Selecting Custom Parental Lock Rating Options To select custom rating options for Canada, select Canada in the Country setting (see page 38). Viewing Blocked Programs You can view blocked programs by entering your password. Press ENT when tuned to a blocked program, then enter th...
Page 41 - Using the Setup Settings
41 Usin g the Me nus Using the Setup Settings Option Description USB Auto Start Select On to start photo playback automatically when the TV is turned on and a digital still camera or other device containing photo files is connected to the USB port then turned on. Closed Captions (CC) Allows you to s...
Page 45 - Using the Eco Settings
45 Usin g the Me nus Using the Eco Settings Option Description Power Saving Select from Off , Low , High , Picture Off to adjust your TV’s power consumption. By selecting the High option, you will reduce the power consumption more than the other available settings.While Picture Off is set, pressing ...
Page 46 - Other Information
46 Other Information PC Input Signal Reference Chart for PC and HDMI IN 1/2/3/4 After connecting the PC to the TV, set the output signal from the PC according to the chart below. For KDL-32EX301/KDL-32FA600 models For KDL-32EX500/KDL-32EX400 and other KDL-40, 46, 55 and 60 inch models * The 1080p ti...
Page 47 - ation; Using a Wall-Mount Bracket; To Customers
47 O ther Inform ation Using a Wall-Mount Bracket Your TV can be mounted on a wall using a Wall-Mount Bracket (not supplied) out of the box as packaged. Some larger size TV may require removing the Table-Top Stand; refer to the instructions provided with the TV.Prepare the TV for the Wall-Mount Brac...
Page 48 - Dimension Table
48 Step 1: Checking the parts required for the installation Open the Wall-Mount Bracket package and check the contents for all required parts along with the Instructions. Step 2: Deciding on the installation location Decide where you want to install your TV. Refer to the TV installation dimensions t...
Page 49 - CAUTION; Step 3: Installing the Base Bracket on the wall; Follow the steps below to prepare for installing the TV.
49 O ther Inform ation CAUTION The wall that the TV will be installed on should be capable of supporting a weight of at least four times that of the TV. Refer to your TV’s operating instructions for its weight. Step 3: Installing the Base Bracket on the wall Refer to the Instructions for SU-WL500. S...
Page 51 - Do not attempt to lift the TV by yourself.; Step 5: Installing the TV on the wall
51 O ther Inform ation 5 Lift the TV off the Table-Top Stand. Make sure that you carry out this task with at least two or three people (see page 7 for details). Do not attempt to lift the TV by yourself. Step 5: Installing the TV on the wall Refer to the Instructions for SU-WL500. ~ • When you put t...
Page 52 - Troubleshooting; Things to consider; No picture
52 Troubleshooting Many of the poor pictures and poor sound conditions are related to improper connection of the cables; refer to the Quick Setup Guide provided for connections. If you have questions, service needs, or require technical assistance related to the use of your Sony TV even after you re...
Page 53 - Poor picture
53 O ther Inform ation Poor picture Picture quality not as good as viewed at the store • Picture quality depends on the signal content. See Quick Setup Guide (supplied) to display the best possible picture for that signal. Broadcast HD formats have poor quality • Content and signal quality are regul...
Page 56 - Important Notices; For Customers in the United States
56 Important Notices For customers in Canada This Class B digital apparatus complies with Canadian ICES-003. FCC Related Information This equipment has been tested and found to comply with the limits for a Class B digital device, pursuant to Part 15 of the FCC Rules. These limits are designed to pro...
Page 57 - Specifications
57 O ther Inform ation Specifications System Television system NTSC: American TV standard ATSC (8VSB terrestrial): ATSC compliant 8VSBQAM on cable: ANSI/SCTE 07 2000 (Does not include CableCARD functionality) Channel coverage Analog terrestrial: 2 - 69 / Digital terrestrial: 2 - 69Analog Cable: 1 - ...
Page 59 - Index
59 O ther Inform ation Index 0-9 buttons 22 4:3 Default 35 A AC IN 8 Add Digital Channels 37 Advanced Settings 32 Alternate Audio 34 Ambient Sensor 24 , 32 Analog Fine Tune 37 AUDIO OUT jack, described 9 Auto Adjustment 36 Auto Program 18 , 37 Auto Shut Off 45 Auto Wide 35 B Backlight 31 Balance 33 ...


 Sony KD32W830K
User Manual
Sony KD32W830K
User Manual
 Sony KD-32W830K
User Manual
Sony KD-32W830K
User Manual
 Sony KD-43X75K
User Manual
Sony KD-43X75K
User Manual
 Sony KD43X77L
User Manual
Sony KD43X77L
User Manual
 Sony KD43X8000G
User Manual
Sony KD43X8000G
User Manual
 Sony KD43X8000H
User Manual
Sony KD43X8000H
User Manual
 Sony KD43X85K
User Manual
Sony KD43X85K
User Manual
 Sony KD49X7000D
User Manual
Sony KD49X7000D
User Manual
 Sony KD49X7500F
User Manual
Sony KD49X7500F
User Manual
 Sony KD49X8000G
User Manual
Sony KD49X8000G
User Manual
 Sony KD49X8000H
User Manual
Sony KD49X8000H
User Manual
 Sony KD-50X72K
User Manual
Sony KD-50X72K
User Manual
 Sony KD-50X81K
User Manual
Sony KD-50X81K
User Manual
 Sony KD55A8F
User Manual
Sony KD55A8F
User Manual
 Sony KD55A8G
User Manual
Sony KD55A8G
User Manual
 Sony KD55A8H
User Manual
Sony KD55A8H
User Manual
 Sony KD55A9G
User Manual
Sony KD55A9G
User Manual
 Sony KD55X7500F
User Manual
Sony KD55X7500F
User Manual