Smeg STU8633 - Manuals
Smeg STU8633 Dishwasher – User Manual in PDF format online.
Manuals:
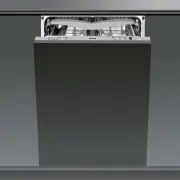
User Manual Smeg STU8633


Summary
Installation 2 TRANSLATION OF THE ORIGINAL INSTRUCTIONS 1. IMPORTANT SAFETY INSTRUCTIONS SAVE THESE INSTRUCTIONS Before using the appliance, carefully read all the instructions contained in this manual . During installation, take care not to injure yourself on the sharp edges of the appliance: w...
Installation 10 2. INSTALLATION AND HOOK-UP 2.1 Technical characteristics Water supply pressure min. 0,05 - max. 0,9 MPa (min. 0.5 – max. 9 bar) Water supply temperature max. 140°F – 60°C Capacity 12-13 standard place settings Class of protection against moisture IPX0 Protection against electric sho...
Installation 15 2.4 Electrical connection Check that the voltage and the frequency of the mains match the ratings on the name plate of the appliance positioned on the inner edge of the door. This appliance must be grounded. In the event of a malfunction or breakdown, grounding will reduce the risk...
Smeg Dishwashers Manuals
-
 Smeg CW511MDA-2
User Manual
Smeg CW511MDA-2
User Manual
-
 Smeg DWA157B
User Manual
Smeg DWA157B
User Manual
-
 Smeg DWA314W
User Manual
Smeg DWA314W
User Manual
-
 Smeg DWA315B
User Manual
Smeg DWA315B
User Manual
-
 Smeg DWA315W
User Manual
Smeg DWA315W
User Manual
-
 Smeg DWA315X
User Manual
Smeg DWA315X
User Manual
-
 Smeg DWA4510X
User Manual
Smeg DWA4510X
User Manual
-
 Smeg DWA4510X2
User Manual
Smeg DWA4510X2
User Manual
-
 Smeg DWA615DB3
User Manual
Smeg DWA615DB3
User Manual
-
 Smeg DWA615DX3
User Manual
Smeg DWA615DX3
User Manual
-
 Smeg DWA6214B2
User Manual
Smeg DWA6214B2
User Manual
-
 Smeg DWA6314B2
User Manual
Smeg DWA6314B2
User Manual
-
 Smeg DWA6314W2
User Manual
Smeg DWA6314W2
User Manual
-
 Smeg DWA6314X2
User Manual
Smeg DWA6314X2
User Manual
-
 Smeg DWA6315W
User Manual
Smeg DWA6315W
User Manual
-
 Smeg DWA6315W2
User Manual
Smeg DWA6315W2
User Manual
-
 Smeg DWA6315W3
User Manual
Smeg DWA6315W3
User Manual
-
 Smeg DWA6315X3
User Manual
Smeg DWA6315X3
User Manual
-
 Smeg DWA6D15X
User Manual
Smeg DWA6D15X
User Manual
-
 Smeg DWAFI152T
User Manual
Smeg DWAFI152T
User Manual