Smeg STA6145 - Manuals
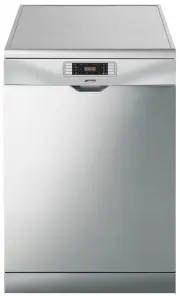
Smeg STA6145 Dishwasher – Manual in PDF format online.
Manuals:
Manual Smeg STA6145


Summary
Contents 13 1. Description of the controls________________________________ 14 2. Troubleshooting _______________________________________ 2 1 Thank you for choosing one of our products.You are advised to read this manual carefully; it contains all theinformation you need about the right conditions fo...
User instructions 14 1. Description of the controls 1.1 Upper panel All the dishwasher controls are grouped on the upper panel. 1 ON/OFF BUTTON Pressing this button energises the appliance. 2 SELECTED PROGRAM INDICATOR LIGHTS Illumination of this light denotes the program selected and the occurrence...
User instructions 15 After using the table to identify the most appropriate washing program: • press the ON/OFF button (1) and wait for the PROGRAM INDICATOR LIGHT (2) to illuminate; • keep pressing the PROGRAM SELECTION button (3) until the indicator light corresponding to the desired program illum...
Smeg Dishwashers Manuals
-
 Smeg CW511MDA-2
User Manual
Smeg CW511MDA-2
User Manual
-
 Smeg DWA157B
User Manual
Smeg DWA157B
User Manual
-
 Smeg DWA314W
User Manual
Smeg DWA314W
User Manual
-
 Smeg DWA315B
User Manual
Smeg DWA315B
User Manual
-
 Smeg DWA315W
User Manual
Smeg DWA315W
User Manual
-
 Smeg DWA315X
User Manual
Smeg DWA315X
User Manual
-
 Smeg DWA4510X
User Manual
Smeg DWA4510X
User Manual
-
 Smeg DWA4510X2
User Manual
Smeg DWA4510X2
User Manual
-
 Smeg DWA615DB3
User Manual
Smeg DWA615DB3
User Manual
-
 Smeg DWA615DX3
User Manual
Smeg DWA615DX3
User Manual
-
 Smeg DWA6214B2
User Manual
Smeg DWA6214B2
User Manual
-
 Smeg DWA6314B2
User Manual
Smeg DWA6314B2
User Manual
-
 Smeg DWA6314W2
User Manual
Smeg DWA6314W2
User Manual
-
 Smeg DWA6314X2
User Manual
Smeg DWA6314X2
User Manual
-
 Smeg DWA6315W
User Manual
Smeg DWA6315W
User Manual
-
 Smeg DWA6315W2
User Manual
Smeg DWA6315W2
User Manual
-
 Smeg DWA6315W3
User Manual
Smeg DWA6315W3
User Manual
-
 Smeg DWA6315X3
User Manual
Smeg DWA6315X3
User Manual
-
 Smeg DWA6D15X
User Manual
Smeg DWA6D15X
User Manual
-
 Smeg DWAFI152T
User Manual
Smeg DWAFI152T
User Manual