Page 2 - CUSTOMER ASSISTANCE; UNITED STATES ONLY; REGISTER YOUR PRODUCT; out of your Sharp product including:; EASY WAYS TO REGISTER TODAY!; PRODUCT SUPPORT; the corresponding section within this manual.; CONTACT US; Scan this QR Code on your mobile device
CUSTOMER ASSISTANCE UNITED STATES ONLY REGISTER YOUR PRODUCT Registering your new product is easy and offers benefits that help you get the most out of your Sharp product including: 9 Convenience: If you ever need warranty support, your product information is already on file. 9 Communication: Stay u...
Page 3 - CONSUMER LIMITED WARRANTY; Product model number &
CONSUMER LIMITED WARRANTY 3 SHARP ELECTRONICS CORPORATION (“Sharp”) warrants to the first consumer purchaser that this Sharp brand product (the “Product”), when shipped in its original container, will be free from defective workmanship and materials, and agrees that it will, at its option, either re...
Page 4 - IMPORTANT SAFETY INSTRUCTIONS; MEANING OF SAFETY WARNING; PROHIBIT; SAFETY WARNINGS
4 IMPORTANT SAFETY INSTRUCTIONS MEANING OF SAFETY WARNING SYMBOLS PROHIBIT This is a prohibition symbol. Any incompliance with instructions marked with this symbol may result in damage to the product or endanger the personal safety of the user. WARNING This is a warning symbol. It is required to ope...
Page 5 - ELECTRICITY RELATED WARNINGS
5 IMPORTANT SAFETY INSTRUCTIONS • Store raw meat and fish in suitable containers in the refrigerator, so that it is not in contact with or drip onto other food. • If the refrigerating appliance is left empty for long periods, switch off, defrost, clean, dry and leave the door open to prevent mold de...
Page 6 - WARNINGS FOR ENERGY; Correct Disposal of this product
6 IMPORTANT SAFETY INSTRUCTIONS WARNINGS FOR ENERGY 1. Refrigerating appliances might not operate consistently (possibility of defrosting of contents or temperature becoming too warm in the frozen food compartment) when sited for an extended period of time below the cold end of the range of temperat...
Page 7 - INSTALLATION INSTRUCTIONS; APPLIANCE/INSTALLATION DIMENSIONS
7 INSTALLATION INSTRUCTIONS A B FRONT VIEW SIDE VIEW TOP VIEW C F G C2 C1 C E D APPLIANCE/INSTALLATION DIMENSIONS DIMENSIONS SIZE (IN) Height A 69.9 Width B 35.8 Depth without Doors C2 24.4 Depth without Handles C1 29.0 Depth with Handles C 30.9 Door open 90° Depth D 43.1 Door open 90° Width E 44.1 ...
Page 8 - INSTALLATION LOCATION; Lock button; LEVELING THE REFRIGERATOR
8 INSTALLATION INSTRUCTIONS INSTALLATION LOCATION • This refrigerator is designed for indoor, household use only.• Keep away from heat and avoid direct sunlight or places near a heat source, such as an oven or a radiator. • Do not place the refrigerator in moist or watery places to prevent rust or r...
Page 9 - LEVELING THE DOORS; CONNECTING THE WATER LINE
9 LEVELING THE DOORS Precautions before operation1. Before operation of accessories, it shall be ensured that the refrigerator is disconnected from power. Before adjusting the door, precautions shall be taken to prevent any personal injury. 2. Raise the lower door up to the level of the higher door....
Page 10 - INSTALLING DOOR HANDLES; BEFORE USING THE REFRIGERATOR
10 INSTALLATION INSTRUCTIONS CONNECTING THE WATER LINE TO A DRINKABLE WATER SOURCE If your water line is NOT drinkable, please add an external water filter. If you must repair or disassemble the water line, cut off the plastic tubing to make sure you get a snug, leak-free connection. INSTALLING DOOR...
Page 11 - ENERGY SAVING TIPS
11 ENERGY SAVING TIPS • The appliance should be located in the coolest area of the room, away from heat producing appliances or heating ducts, and out of the direct sunlight. • Let hot foods cool to room temperature before placing in the appliance. Overloading the appliance forces the compressor to ...
Page 12 - APPEARANCE OVERVIEW
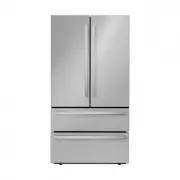
12 APPEARANCE OVERVIEW Dairy Bin Shelf Slide-in Shelf Door Bin Door Bin Humidity Controlled Crispers Pantry Drawer Upper Freezer Drawer Auto Ice Maker (inside) Lower Freezer Drawer Control and Display Panel LED Lighting
Page 13 - Refrigerator Body; Upper Freezer Drawer
13 APPEARANCE OVERVIEW Refrigerator Body Upper Freezer Drawer Lower Freezer Drawer Ice Storage Bin REFRIGERATING CHAMBER • The refrigerating chamber is suitable for storage of a variety of fruits, vegetables, beverages, and other food consumed in the short term. • Cooking foods shall not be put in t...
Page 14 - CONTROL AND DISPLAY PANEL; BUTTONS
14 CONTROL AND DISPLAY PANEL 1 2 3 4 5 6 BUTTONS 1 Ice-Making button 2 Chill Boost button 3 Temperature control button of refrigerator room 4 Temperature control button of freezer room 5 Freeze Boost button 6 Lock/unlock button
Page 15 - OPERATING REFRIGERATOR; BOOST mode, the set temperature of refrigerator room will
15 OPERATING REFRIGERATOR DISPLAY A. When plugging in the refrigerator, the display screen will totally display for 3 seconds, meanwhile the starting up bell rings, then the display screen enters the normal display of operation.(When power-on for first time, the default set temperature of the refrig...
Page 16 - CARE AND CLEANING
16 CARE AND CLEANING OVERALL CLEANING • Dusts behind the refrigerator and on the ground shall be timely cleaned to improve the cooling effect and energy saving. The interior of the refrigerator should be cleaned regularly to avoid odor. Soft towels or sponge dipped in water and non-corrosive neutral...
Page 17 - TROUBLE SHOOTING
17 17 TROUBLE SHOOTING You may try to solve the following simple problems by yourself. If them cannot be solved, please contact the after-sales department. Failed operation • Check whether the appliance is connected to power or whether the plug is in well contact. • Check whether the voltage is too ...