Schweigen PKDS3131-R2S1 - Manuals
User Manual Schweigen PKDS3131-R2S1


Summary
Page 2 Index 1. Welcome 3 Your State Regulatory Authority 3 2. Important Safety Information 4 Before Installation 5 Product Use 6 Ducted or Recirculating? 6 Electrical Cord 6 3. Description 7 Rangehood 7 4. Operation 8 Push Button Control Panel 8 Speed Control 8 Cleaning periods of metal filters — “...
Page 3 1. Welcome Thank you for purchasing your new Schweigen rangehood. To get the maximum output from this unit, please read through this guide before use. The guide contains important information on the use and maintenance of the unit, as well as important safety notes. This will ensure your pers...
Page 4 2. Important Safety Information WARNING Please read this section thoroughly before attempting to operate the appliance. Inspect your product upon receipt. Any damage or defects MUST be reported within 48 hours, or no claim will be recognised. DO NOT INSTALL THIS APPLIANCE IF YOU FIND IT DAMAG...
Schweigen Range Hoods Manuals
-
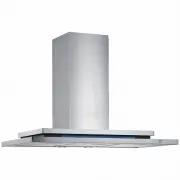
 Schweigen BGUM6B
User Manual
Schweigen BGUM6B
User Manual
-
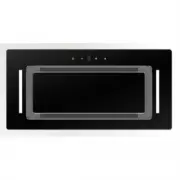
 Schweigen BGUM9B
User Manual
Schweigen BGUM9B
User Manual
-
 Schweigen BR500
User Manual
Schweigen BR500
User Manual
-
 Schweigen CC-INARTSEPAK
User Manual
Schweigen CC-INARTSEPAK
User Manual
-
 Schweigen CC-INARTSP2PAK
User Manual
Schweigen CC-INARTSP2PAK
User Manual
-
 Schweigen CC-PARA2SEPAK
User Manual
Schweigen CC-PARA2SEPAK
User Manual
-
Schweigen CC-PARA2SPPAK
User Manual
-
 Schweigen CC-PARA2WSEPAK
User Manual
Schweigen CC-PARA2WSEPAK
User Manual
-
Schweigen CC-PARA2WSPPAK
User Manual
-
 Schweigen CC-PARA3SEPAK
User Manual
Schweigen CC-PARA3SEPAK
User Manual
-
 Schweigen CC-PARA3WSEPAK
User Manual
Schweigen CC-PARA3WSEPAK
User Manual
-
 Schweigen CC-PARA4SEPAK
User Manual
Schweigen CC-PARA4SEPAK
User Manual
-
 Schweigen CC-PARA4SP2PAK
User Manual
Schweigen CC-PARA4SP2PAK
User Manual
-
 Schweigen CC-PARA4WSEPAK
User Manual
Schweigen CC-PARA4WSEPAK
User Manual
-
Schweigen CC-PARA4WSP2PAK
User Manual
-
 Schweigen CC-SURF2E
User Manual
Schweigen CC-SURF2E
User Manual
-
 Schweigen CC-SURFSP2
User Manual
Schweigen CC-SURFSP2
User Manual
-
 Schweigen CL6272PAK
User Manual
Schweigen CL6272PAK
User Manual
-
 Schweigen CL7372BPAK
User Manual
Schweigen CL7372BPAK
User Manual
-
 Schweigen CL7372BSEPAK
User Manual
Schweigen CL7372BSEPAK
User Manual