Schweigen KLS-ALBW9STPAK - Manuals
Schweigen KLS-ALBW9STPAK Range Hood – User Manual in PDF format online.
Manuals:
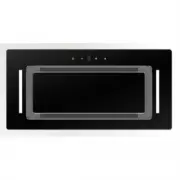
User Manual Schweigen KLS-ALBW9STPAK


Summary
Page 2 Welcome 3 Important Safety Information 4 Description 7Operation 8Cleaning and Maintenance 10 Installation 14Condensation Information 28 Troubleshooting 29Technical Specifications 31 Disclaimer 34 INDEX
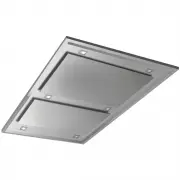
YOUR STATE REGULATORY AUTHORITYDifferent Australian states have varying legislative requirements for the installation of rangehood ducting. Some will insist on ducting being vented externally (i.e. not in to the ceiling cavity); others will not. It is imperative that you check with your state buildi...
Page 4 IMPORTANT SAFETY INFORMATION Please read the instructions carefully. Only then will you be able to operate your appliance safely and correctly. Retain the instruction manual for future use or for subsequent owners. Check the appliance for damage after unpacking it. Do not connect or install t...
Schweigen Range Hoods Manuals
-
 Schweigen BGUM6B
User Manual
Schweigen BGUM6B
User Manual
-
 Schweigen BGUM9B
User Manual
Schweigen BGUM9B
User Manual
-
 Schweigen BR500
User Manual
Schweigen BR500
User Manual
-
 Schweigen CC-INARTSEPAK
User Manual
Schweigen CC-INARTSEPAK
User Manual
-
 Schweigen CC-INARTSP2PAK
User Manual
Schweigen CC-INARTSP2PAK
User Manual
-
 Schweigen CC-PARA2SEPAK
User Manual
Schweigen CC-PARA2SEPAK
User Manual
-
Schweigen CC-PARA2SPPAK
User Manual
-
 Schweigen CC-PARA2WSEPAK
User Manual
Schweigen CC-PARA2WSEPAK
User Manual
-
Schweigen CC-PARA2WSPPAK
User Manual
-
 Schweigen CC-PARA3SEPAK
User Manual
Schweigen CC-PARA3SEPAK
User Manual
-
 Schweigen CC-PARA3WSEPAK
User Manual
Schweigen CC-PARA3WSEPAK
User Manual
-
 Schweigen CC-PARA4SEPAK
User Manual
Schweigen CC-PARA4SEPAK
User Manual
-
 Schweigen CC-PARA4SP2PAK
User Manual
Schweigen CC-PARA4SP2PAK
User Manual
-
 Schweigen CC-PARA4WSEPAK
User Manual
Schweigen CC-PARA4WSEPAK
User Manual
-
Schweigen CC-PARA4WSP2PAK
User Manual
-
 Schweigen CC-SURF2E
User Manual
Schweigen CC-SURF2E
User Manual
-
 Schweigen CC-SURFSP2
User Manual
Schweigen CC-SURFSP2
User Manual
-
 Schweigen CL6272PAK
User Manual
Schweigen CL6272PAK
User Manual
-
 Schweigen CL7372BPAK
User Manual
Schweigen CL7372BPAK
User Manual
-
 Schweigen CL7372BSEPAK
User Manual
Schweigen CL7372BSEPAK
User Manual