Schlage BE479AAVCAM716FE285GCAM716ACCCAM - Manuals

Schlage BE479AAVCAM716FE285GCAM716ACCCAM Electronic Deadbolt – User Manual in PDF format online.
Manuals:
User Manual Schlage BE479AAVCAM716FE285GCAM716ACCCAM


Summary
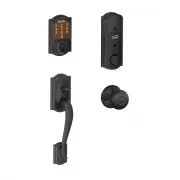
2 ENGLISH 2 Schlage Sense ™ Installation Instructions Package Contents Camelot Style shown throughout guide. Need Help? For technical documents and videos, visit schlage.com U.S.A.: 888-805-9837 Canada: 800-997-4734 Mexico: 018005067866 Touchscreen Assembly Battery Cover Reinforcement Plate Reinforc...
3 ENGLISH Let’s get started! Once you have all your tools together, please follow each step carefully and in order. Because this is an electronic lock, the order of steps is very important. If you skip a step, you may have to perform a factory default reset and start over. You will definitely need t...
4 ENGLISH 1 Download the app. Download the Schlage Sense app from the App Store. Just search for “Schlage Sense” to find the app. Apple HomeKit™ technology provides an easy, secure way to control your home’s lights, doors, thermostats, and more from your iPhone�, iPad�, or iPod touch�.HomeKit requir...
Schlage Electronic Deadbolts Manuals
-
 Schlage 62409
User Manual
Schlage 62409
User Manual
-
 Schlage BE468ZP CAM 619
User Manual
Schlage BE468ZP CAM 619
User Manual
-
 Schlage BE469NX CAM 716
User Manual
Schlage BE469NX CAM 716
User Manual
-
 Schlage BE469ZP CAM 605
User Manual
Schlage BE469ZP CAM 605
User Manual
-
 Schlage BE469ZP CAM 622
User Manual
Schlage BE469ZP CAM 622
User Manual
-
 Schlage BE469ZP CAM 625
User Manual
Schlage BE469ZP CAM 625
User Manual
-
 Schlage BE469ZP CEN 622
User Manual
Schlage BE469ZP CEN 622
User Manual
-
 Schlage BE469ZP V CAM605 + FE285 V CAM 605 GEO
User Manual
Schlage BE469ZP V CAM605 + FE285 V CAM 605 GEO
User Manual
-
 Schlage BE469ZP V CEN 619
User Manual
Schlage BE469ZP V CEN 619
User Manual
-
 Schlage BE469ZP V CEN619 + FE285 V LAT 619 CEN
User Manual
Schlage BE469ZP V CEN619 + FE285 V LAT 619 CEN
User Manual
-
 Schlage BE469ZPVCAM716FE285GCAM716ACCCAM
User Manual
Schlage BE469ZPVCAM716FE285GCAM716ACCCAM
User Manual
-
 Schlage BE479AA V CAM 716
User Manual
Schlage BE479AA V CAM 716
User Manual
-
 Schlage BE479AA V CAM 716 + FE285 CAM 716 ACC LH
User Manual
Schlage BE479AA V CAM 716 + FE285 CAM 716 ACC LH
User Manual
-
 Schlage BE479AA V CAM 716 + FE285 CAM 716 ACC RH
User Manual
Schlage BE479AA V CAM 716 + FE285 CAM 716 ACC RH
User Manual
-
 Schlage BE479AA V CAM 716 + FE285 CAM 716 GEO
User Manual
Schlage BE479AA V CAM 716 + FE285 CAM 716 GEO
User Manual
-
 Schlage BE489WB CEN 619
User Manual
Schlage BE489WB CEN 619
User Manual
-
 Schlage BE489WB CEN 622
User Manual
Schlage BE489WB CEN 622
User Manual
-
 Schlage BE489WB V CAM 716
User Manual
Schlage BE489WB V CAM 716
User Manual