Samsung SMK9175ST - Manuals
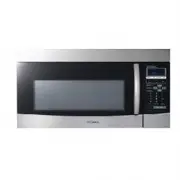
User Manual Samsung SMK9175ST


Summary
2_ features of your new microwave oven features of your new microwave oven • Luxurious Look The Stainless Steel (STSS) exterior delivers a luxurious look to your kitchen. The design matches perfectly with your other kitchen appliances, providing a harmonious kitchen interior. • Controllable Ventilat...
safety information _3 safety information PRECAUTIONS TO AVOID POSSIBLE EXPOSURE TO EXCESSIVE MICROWAVE ENERGY A. Do not attempt to operate this oven with the door open since open-door operation can result in harmful exposure to microwave energy. It is important not to defeat or tamper with the safet...
4_ safety information safety information Congratulations on your new Samsung microwave oven. This manual contains important information on the installation, use and care of your appliance. Please take time to read this manual to take full advantage of your microwave oven’s many benefits and features...
Manual Samsung SMK9175ST


Summary
2_ features of your new microwave oven features of your new microwave oven • Luxurious Look The Stainless Steel (STSS) exterior delivers a luxurious look to your kitchen. The design matches perfectly with your other kitchen appliances, providing a harmonious kitchen interior. • Controllable Ventilat...
safety information _3 safety information PRECAUTIONS TO AVOID POSSIBLE EXPOSURE TO EXCESSIVE MICROWAVE ENERGY A. Do not attempt to operate this oven with the door open since open-door operation can result in harmful exposure to microwave energy. It is important not to defeat or tamper with the safet...
4_ safety information safety information Congratulations on your new Samsung microwave oven. This manual contains important information on the installation, use and care of your appliance. Please take time to read this manual to take full advantage of your microwave oven’s many benefits and features...
Samsung Microwaves Manuals
-
 Samsung CE1180GBR (UBR) (GWR)
User Manual
Samsung CE1180GBR (UBR) (GWR)
User Manual
-
 Samsung CE1185GBR (UBR) (GWR)
User Manual
Samsung CE1185GBR (UBR) (GWR)
User Manual
-
 Samsung CE745G
User Manual
Samsung CE745G
User Manual
-
 Samsung MC12J8035CT/AA
User Manual
Samsung MC12J8035CT/AA
User Manual
-
 Samsung MC17T8000CG/AA
User Manual
Samsung MC17T8000CG/AA
User Manual
-
Samsung MC17T8000CS/AA
User Manual
-
 Samsung MC32K7058CT
User Manual
Samsung MC32K7058CT
User Manual
-
 Samsung MC455THRCBB
User Manual
Samsung MC455THRCBB
User Manual
-
 Samsung ME11A7510DG/AA
User Manual
Samsung ME11A7510DG/AA
User Manual
-
Samsung ME11A7510DS/AA
User Manual
-
 Samsung ME11A7710DG/AA
User Manual
Samsung ME11A7710DG/AA
User Manual
-
Samsung ME11A7710DS/AA
User Manual
-
 Samsung ME11CB751012
User Manual
Samsung ME11CB751012
User Manual
-
 Samsung ME16A4021AS/AA
User Manual
Samsung ME16A4021AS/AA
User Manual
-
 Samsung ME17R7021EG/AA
User Manual
Samsung ME17R7021EG/AA
User Manual
-
Samsung ME17R7021ES/AA
User Manual
-
 Samsung ME19CB704112
User Manual
Samsung ME19CB704112
User Manual
-
 Samsung ME19R7041FG/AA
User Manual
Samsung ME19R7041FG/AA
User Manual
-
Samsung ME19R7041FS/AA
User Manual
-
 Samsung ME21A706BQN/AA
User Manual
Samsung ME21A706BQN/AA
User Manual