Samsung MS23K3555EW - Manuals
Samsung MS23K3555EW Microwave – User Manual in PDF format online.
Manuals:
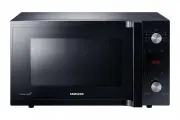
User Manual Samsung MS23K3555EW


Summary
2 English C ontents Contents Safety instructions 3 Important safety instructions 3 General safety 5 Microwave operation precautions 6 Limited warranty 7 Product group definition 7 Correct Disposal of This Product (Waste Electrical & Electronic Equipment) 7 Cooking instructions on food packaging ...
English 3 Safety ins truc tions Only use utensils that are suitable for use in microwave ovens.When heating food in plastic or paper containers, keep an eye on the oven due to the possibility of ignition.The microwave oven is intended for heating food and beverages. Drying of food or clothing and he...
English 5 Safety ins truc tions General safety Any modifications or repairs must be performed by qualified personnel only.Do not heat food or liquids sealed in containers for the microwave function.Do not use benzene, thinner, alcohol, or steam or high-pressure cleaners to clean the oven.Do not inst...
Samsung Microwaves Manuals
-
 Samsung CE1180GBR (UBR) (GWR)
User Manual
Samsung CE1180GBR (UBR) (GWR)
User Manual
-
 Samsung CE1185GBR (UBR) (GWR)
User Manual
Samsung CE1185GBR (UBR) (GWR)
User Manual
-
 Samsung CE745G
User Manual
Samsung CE745G
User Manual
-
 Samsung MC12J8035CT/AA
User Manual
Samsung MC12J8035CT/AA
User Manual
-
 Samsung MC17T8000CG/AA
User Manual
Samsung MC17T8000CG/AA
User Manual
-
Samsung MC17T8000CS/AA
User Manual
-
 Samsung MC32K7058CT
User Manual
Samsung MC32K7058CT
User Manual
-
 Samsung MC455THRCBB
User Manual
Samsung MC455THRCBB
User Manual
-
 Samsung ME11A7510DG/AA
User Manual
Samsung ME11A7510DG/AA
User Manual
-
Samsung ME11A7510DS/AA
User Manual
-
 Samsung ME11A7710DG/AA
User Manual
Samsung ME11A7710DG/AA
User Manual
-
Samsung ME11A7710DS/AA
User Manual
-
 Samsung ME11CB751012
User Manual
Samsung ME11CB751012
User Manual
-
 Samsung ME16A4021AS/AA
User Manual
Samsung ME16A4021AS/AA
User Manual
-
 Samsung ME17R7021EG/AA
User Manual
Samsung ME17R7021EG/AA
User Manual
-
Samsung ME17R7021ES/AA
User Manual
-
 Samsung ME19CB704112
User Manual
Samsung ME19CB704112
User Manual
-
 Samsung ME19R7041FG/AA
User Manual
Samsung ME19R7041FG/AA
User Manual
-
Samsung ME19R7041FS/AA
User Manual
-
 Samsung ME21A706BQN/AA
User Manual
Samsung ME21A706BQN/AA
User Manual