Samsung MS23A7013AB/EO - Manuals
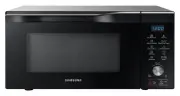
Samsung MS23A7013AB/EO Microwave – User Manual in PDF format online.
Manuals:
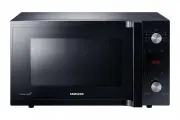
User Manual Samsung MS23A7013AB/EO


Summary
2 English C ontents Using the Quick Defrost 19 Using Home Dessert 21 Using Auto Cook 23 Using Keep Warm 26 Using Deodorization 27 Using Child Lock 27 Switching the beeper off 27 Cookware guide 28 Cooking guide 29 Microwaves 29Cooking 29Reheating 31Reheating liquids 32 Manual defrosting 33 Tips and t...
English 3 Safety ins truc tions Safety instructions IMPORTANT SAFETY INSTRUCTIONS READ CAREFULLY AND KEEP FOR FUTURE REFERENCE. WARNING : If the door or door seals are damaged, the oven must not be operated until it has been repaired by a competent person. WARNING : It is hazardous for anyone other ...
English 5 Safety ins truc tions The door or the outer surface may get hot when the appliance is operating.The temperature of accessible surfaces may be high when the appliance is operating.The surfaces are liable to get hot during use.The appliances are not intended to be operated by means of an ext...
Samsung Microwaves Manuals
-
 Samsung CE1180GBR (UBR) (GWR)
User Manual
Samsung CE1180GBR (UBR) (GWR)
User Manual
-
 Samsung CE1185GBR (UBR) (GWR)
User Manual
Samsung CE1185GBR (UBR) (GWR)
User Manual
-
 Samsung CE745G
User Manual
Samsung CE745G
User Manual
-
 Samsung MC12J8035CT/AA
User Manual
Samsung MC12J8035CT/AA
User Manual
-
 Samsung MC17T8000CG/AA
User Manual
Samsung MC17T8000CG/AA
User Manual
-
Samsung MC17T8000CS/AA
User Manual
-
 Samsung MC32K7058CT
User Manual
Samsung MC32K7058CT
User Manual
-
 Samsung MC455THRCBB
User Manual
Samsung MC455THRCBB
User Manual
-
 Samsung ME11A7510DG/AA
User Manual
Samsung ME11A7510DG/AA
User Manual
-
Samsung ME11A7510DS/AA
User Manual
-
 Samsung ME11A7710DG/AA
User Manual
Samsung ME11A7710DG/AA
User Manual
-
Samsung ME11A7710DS/AA
User Manual
-
 Samsung ME11CB751012
User Manual
Samsung ME11CB751012
User Manual
-
 Samsung ME16A4021AS/AA
User Manual
Samsung ME16A4021AS/AA
User Manual
-
 Samsung ME17R7021EG/AA
User Manual
Samsung ME17R7021EG/AA
User Manual
-
Samsung ME17R7021ES/AA
User Manual
-
 Samsung ME19CB704112
User Manual
Samsung ME19CB704112
User Manual
-
 Samsung ME19R7041FG/AA
User Manual
Samsung ME19R7041FG/AA
User Manual
-
Samsung ME19R7041FS/AA
User Manual
-
 Samsung ME21A706BQN/AA
User Manual
Samsung ME21A706BQN/AA
User Manual