Page 2 - Using this manual; Read me first
Using this manual 2 Available features and additional services may vary by device, software, • or service provider.Formatting and delivery of this user manual is based on Google Android • operating systems and may vary depending on the user’s operating system.Applications and their functions may var...
Page 3 - Copyright
Using this manual 3 Copyright Copyright © 2010 Samsung ElectronicsThis user manual is protected under international copyright laws.No part of this user manual may be reproduced, distributed, translated, or transmitted in any form or by any means, electronic or mechanical, including photocopying, rec...
Page 5 - Contents
Contents 5 Web ........................................................................... 23 Internet ........................................................................................ 23Readers Hub ................................................................................ 25News and We...
Page 8 - Charge the battery; Assembling; Unpack
Assembling 8 Charge the battery Your device has a built-in battery. Before using the device for the first time, you must charge the battery. Use only Samsung-approved chargers. Unauthorised chargers can cause batteries to explode or damage your device.When your battery is low, the device will emit a...
Page 9 - Insert the SIM or USIM card
Assembling 9 To install the SIM or USIM card, Open the cover to the SIM card slot on the side of the device. 1 Insert the SIM or USIM card. 2 Place the SIM or USIM card into the device with the gold-coloured • contacts facing down.Do not insert a memory card into the SIM card slot. • Close the cover...
Page 10 - Remove the memory card
Assembling 10 Open the cover to the memory card slot. 1 Insert a memory card with the gold-coloured contacts facing down. 2 Push the memory card in the memory card slot until it locks in place. 3 Close the memory card cover. 4 Remove the memory card › Before removing a memory card, first unmount it ...
Page 11 - Format the memory card
Assembling 11 Push the memory card gently until it disengages from the device. 3 Pull the memory card out of the memory card slot. 4 Do not remove a memory card while the device is transferring or accessing information, as this could result in loss of data or damage to the memory card or device. For...
Page 12 - Get to know your device; Device layout; Getting started; Turn your device on and off; Switch to Flight mode; Switch to Silent mode
Getting started 12 Get to know your device Device layout › 12 13 14 15 16 17 6 1 2 5 8 7 7 4 3 10 9 11 Getting started Turn your device on and off To turn on your device, Press and hold [ 1 ]. If you turn on your device for the first time, follow the on-screen 2 instructions to set up your device. T...
Page 13 - Keys
Getting started 13 Keys › Key Function Power Turn on the device (press and hold); Access the quick menus (press and hold); Lock the touch screen. Volume Adjust the device’s volume. Menu Open a list of options available on the current screen. Home Return to the home screen; Open the list of recent ap...
Page 15 - Rotate the touch screen; Lock or unlock the touch screen; Use the touch screen
Getting started 15 You can control your touch screen with the following actions: Tap: Touch once with your finger to select or launch a menu, option, or • application.Drag: Tap and drag your finger up, down, left, or right to move to items • on lists.Tap and hold: Tap an item and hold it for more th...
Page 16 - Add items to the home screen; Get to know the home screen
Getting started 16 Number Function 4 Open the web browser. 5 Access Menu mode. 6 Select a dot at the top of the screen to move to the corresponding panel directly. 7 Launch the email application. › Add items to the home screen You can customise the home screen by adding shortcuts to applications or ...
Page 17 - Access applications; Organise applications
Getting started 17 GPS • : Activate or deactivate the GPS feature. Data • : Activate or deactivate the data connection. Orientation lock • : Activate or deactivate the rotation lock. Available options may vary depending on your region or service provider. Access applications In Idle mode, select 1 A...
Page 18 - Customise your device
Getting started 18 Set the current time and date › In Menu mode, select 1 Settings → Date and time . Select your time zone, set the time and date, and change other options. 2 Select a wallpaper for the home and menu screens › In Idle mode, press [ 1 ] → Wallpaper . Select an image folder 2 → an imag...
Page 19 - Change your ringtone
Getting started 19 Set an unlock pattern In Menu mode, select 1 Settings → Location and security → Set screen lock → Pattern . See the on-screen instructions and example patterns and select 2 Next (if necessary).Draw a pattern by dragging your finger to connect at least 4 dots. 3 Select 4 Continue ....
Page 20 - Enter text using the Swype keyboard; Enter text; Change the text input method
Getting started 20 Enter text using the Swype keyboard › Select the first character of a word and drag your finger to the second 1 character without releasing the finger from the screen. Continue until you have finished the word. 2 Release the finger on the last character. 3 When the word displays c...
Page 21 - Enter text using the Samsung keypad
Getting started 21 Enter text using the Samsung keypad › Enter text by selecting alphanumeric keys and you can use the following keys: 8 7 1 2 4 5 9 6 10 3 Number Function 1 Change case. 2 Hide the keypad. 3 Switch between Number/Symbol mode and ABC mode. 4 Change the input language; This icon is av...
Page 22 - Copy and paste text
Getting started 22 Number Function 6 Insert a space. 7 Clear your input. 8 Start a new line. 9 Access the keypad settings; Change the text input method (tap and hold). 10 Enter frequently used symbols. Copy and paste text › While you are entering text, you can use the copy and paste feature to use t...
Page 23 - Web; Internet
Web 23 Navigate web pages with the following keys: 2 1 3 2 4 The above screen may differ depending on your region or service provider. Number Function 1 Move backward or forward to web pages in history; View the recent internet history (tap and hold). 2 Open a new window or switch between the curren...
Page 24 - Bookmark your favourite web pages; Open multiple pages
Web 24 Bookmark your favourite web pages › If you know the web address of the web page, you can manually add a bookmark. Add a bookmark In Menu mode, select 1 Internet . Press [ 2 ] → Add bookmark . Enter a page title and a web address. 3 To bookmark the web page you were viewing, skip to step 5.Sel...
Page 25 - Access frequently visited pages or recent history; Readers Hub; Add an RSS feed address
Web 25 Access frequently visited pages or recent history › In Menu mode, select 1 Internet . Select 2 → Most visited or History . Select a web page to access. 3 Readers Hub Learn to use the integrated readers hub for accessing various reading materials. Some features may be currently unavailable. In...
Page 26 - Market; View the weather information; Samsung Apps
Web 26 Your device gets smarter with fully optimised applications from Samsung Apps. Explore amazing applications and make your mobile life even better. The feature may be unavailable depending on your region or • service provider.For details, please visit www.samsungapps.com. • In Menu mode, select...
Page 27 - Watch videos; YouTube
Web 27 Watch videos › In Menu mode, select 1 YouTube . Select a video from the list. 2 Rotate the device anti-clockwise to landscape view. 3 Control playback with the following keys: 4 1 2 4 3 5 Number Function 1 Scan backward in a file. 2 Move to a point of the file by dragging the bar. 3 Scan forw...
Page 28 - View daily briefing; Maps; Upload videos; Daily Briefing; Customise daily briefing settings
Web 28 Adjust the following settings to customise the daily briefing screens: 3 Option Function Select city Add cities for weather forecast. Select stock Add companies for stock information. Widget auto refresh Set the daily briefing screens to be automatically updated with latest information. Widge...
Page 29 - Places; Search for a specific location; Latitude
Web 29 This feature may be unavailable depending on your region or service provider. In Menu mode, select 1 Latitude . The device automatically joins Latitude. Press [ 2 ] → Add friends → Select from Contacts or Add via email address . Select friends you want to add or enter an email address, and se...
Page 30 - Orange Wednesdays; Google Search
Web 30 Orange Wednesdays You can get cinema tickets for less, free movie trailers, cinema listings, the latest film news, and interviews.In Menu mode, select Orange Wednesdays . This feature may be unavailable depending on your region or service provider. Orange Maps You can search for streets or pl...
Page 31 - View an email message; Communication; Google Mail; Send an email message
Communication 31 View an email message › In Menu mode, select 1 Google Mail . Select an email message. 2 From the message view, use the following options: To reply to the message, select • . To reply to the message including all recipients, select • → Reply all . To forward the message to other peop...
Page 32 - Email; Set up an email account
Communication 32 When you are finished setting up the email account, the email messages are downloaded to your device. If you have created more than two accounts, you can switch between email accounts; Select a domain logo at the top left of the screen and select one you want to retrieve messages fr...
Page 33 - Talk; Add friends to your friend list
Communication 33 Talk Learn to chat with friends and family via Google Talk ™ . This feature may be unavailable depending on your region. Add friends to your friend list › In Menu mode, select 1 Talk . The friend list shows all of your Google Talk contacts at a glance.Press [ 2 ] → Add friend . Ente...
Page 34 - Send a multimedia message; Messaging; Send a text message
Communication 34 Send a multimedia message › In Menu mode, select 1 Messaging . Select 2 . Add recipients of your message. 3 Enter phone numbers or email addresses manually, separating them • with a semicolon or a comma.Select phone numbers or email addresses from the lists by selecting • . When you...
Page 35 - Activate calling functions; View a text or multimedia message; Calling
Communication 35 The speakerphone feature is automatically activated when • a call is connected. To avoid damage to your hearing, do not hold the device close to your ear while using the speakerphone. You can make or answer calls with the supplied headset or an • optional Bluetooth headset. While us...
Page 36 - Use options during a voice call
Communication 36 Use options during a voice call › You can use the following options while a voice call is in progress: To adjust the voice volume, press the Volume key up or down. • To place a call on hold, select • Hold . To retrieve a held call, select Unhold again.To dial a second call, select •...
Page 37 - View and dial missed calls
Communication 37 Set auto rejection Use auto rejection to reject calls from certain numbers automatically. To activate auto rejection and set up the reject list, In Menu mode, select 1 Settings → Call settings → Auto reject . Select 2 Enable auto reject to activate auto rejection. Select 3 Auto reje...
Page 38 - View call logs
Communication 38 In Menu mode, select 1 Settings → Call settings → Call forwarding . For a video call, select Settings → Call settings → Video call → Video call forwarding . Select a condition. 2 Enter a number to which calls will be forwarded and select 3 Update . Your setting will be sent to the n...
Page 39 - Entertainment; Music
Entertainment 39 Control playback with the following keys: 4 6 8 10 11 4 9 1 2 3 7 5 Number Function 1 View file details. 2 Set the file as your favourite track. 3 Adjust the volume. 4 Move to a point of the file by dragging or tapping the bar. 5 Activate Shuffle mode. 6 Skip backward; Scan backward...
Page 40 - Music Store; Create a playlist
Entertainment 40 Adjust the following settings to customise your music player: 3 Option Function Equaliser Select a default equaliser type. Effect Select a sound effect. Music menu Select music categories to display on the music library screen. Music Store You can access the online music store, and ...
Page 41 - Capture a photo
Entertainment 41 Number Function 2 Change the shooting mode. 3 Change the scene mode. 4 Change the flash setting; You can manually turn the flash on or off, or set the camera to automatically use the flash when needed. 5 Adjust the exposure value. 6 Change the camera settings. 7 Switch to the camcor...
Page 42 - Capture a panoramic photo
Entertainment 42 Tap and hold 5 . The camera will continue to take photos until you release the camera shutter. Capture a panoramic photo › You can take wide panoramic photos using Panorama shooting mode. This mode is convenient for photographing landscapes. In Menu mode, select 1 Camera to turn on ...
Page 43 - Capture a photo in Self shot mode; Customise camera settings
Entertainment 43 Option Function Effects Apply a special effect. ISO Adjust the sensitivity of the camera imaging sensor. Image quality Set the quality level for your photos. Before taking a photo, select → Setup to access the following settings: Setting Function Review Set the camera to display the...
Page 44 - Record a video
Entertainment 44 Number Function 5 Change the camcorder settings. 6 Switch to the camera. 7 Record a video. 8 Open the image viewer to view videos you recorded. Select 5 to start recording. Select 6 to stop recording. The video is saved automatically. The camcorder may not be able to properly record...
Page 45 - Customise camcorder settings
Entertainment 45 Video Learn to use the video player to play various kinds of videos. In Menu mode, select 1 Video . Select a category at the top of the screen. 2 Select a video to play. 3 Rotate the device anti-clockwise to landscape view. 4 Control playback with the following keys: 5 8 7 6 5 4 1 2...
Page 46 - Play a video; Gallery; View a photo
Entertainment 46 To start a slideshow in the selected folder, select • Slideshow . Tap the screen to stop the slideshow.To send a photo to others, select • Menu → Share → an option. To delete a photo, select • Menu → Delete . To use additional features, select • Menu → More and select one of the fol...
Page 47 - Find a contact; Personal information; Contacts; Create a contact
Personal information 47 Select a memory location. 4 If you have more than one account, select an account to which you want to add the contact.Enter contact information. 5 Select 6 Done to add the contact to memory. Find a contact › In Menu mode, select 1 Contacts . Select the search field and enter ...
Page 48 - Copy or move contacts
Personal information 48 Copy or move contacts › To copy or move contacts from the SIM or USIM card to your device, In Menu mode, select 1 Contacts . Press [ 2 ] → Import/Export → Import from SIM card . Select an importing location. 3 If you have more than one account, select an account to which you ...
Page 49 - Create an event; Calendar; Change the calendar view
Personal information 49 Create an event › In Menu mode, select 1 Calendar . Select 2 . Enter the details of the event as required. 3 Select 4 Done . View events › To view today’s schedule, In Menu mode, select 1 Calendar . Select 2 Today . Select an event to view its details. 3 To view events of a s...
Page 50 - Stop an event alarm; Memo; Create a memo
Personal information 50 Stop an event alarm › If you set an alarm for a calendar event, the alarm will sound at the specified time. To snooze or dismiss the reminder, select Snooze all or Dismiss all . Memo Learn to record important information to save and view at a later date. Create a memo › In Me...
Page 51 - Synchronise with Windows Media Player; Connectivity; PC connections; Connect with Samsung Kies
Connectivity 51 › Synchronise with Windows Media Player Ensure that Windows Media Player is installed on your PC. In Menu mode, select 1 Settings → Wireless and network → USB settings → Media player . Press [ 2 ] to return to Idle mode. Using the PC data cable, connect the multifunction jack on your...
Page 52 - Activate the WLAN feature
Connectivity 52 You can connect to the internet or other network devices anywhere an access point or wireless hotspot is available. Your device uses non-harmonised frequency and is intended for use in all European countries. The WLAN can be operated in the EU without restriction indoors, but cannot ...
Page 53 - Mobile AP; Add a WLAN manually
Connectivity 53 Mobile AP You can set your device as a wireless access point for PCs and share your device's mobile network connection through the WLAN feature. In Menu mode, select 1 Settings → Wireless and network → Mobile AP . Select 2 Mobile AP to activate the mobile AP feature. Select 3 Mobile ...
Page 54 - Turn on the Bluetooth wireless feature; USB tethering
Connectivity 54 Samsung is not responsible for the loss, interception, or misuse of • data sent or received via the Bluetooth wireless feature. Always ensure that you share and receive data with devices that • are trusted and properly secured. If there are obstacles between the devices, the operatin...
Page 55 - Customise DLNA settings for sharing media files; AllShare
Connectivity 55 Customise DLNA settings for sharing media files › To allow other DLNA-enabled devices to access media files on your device, you must activate media sharing. Some files may not play on the DLNA-enabled devices depending on the devices. In Menu mode, select 1 AllShare . Press [ 2 ] → S...
Page 56 - Activate location services; GPS
Connectivity 56 Do not touch the internal antenna area or cover this area with your hands or other objects while using the GPS functions.This feature may be unavailable depending on your region or service provider. Activate location services › You must activate location services to receive location ...
Page 58 - Look up a word in the dictionary; ThinkFree Office; Tools; eBook; Read books
Tools 58 Look up a word in the dictionary › In Menu mode, select 1 eBook . Open a book. 2 Tap and hold a word you want and select 3 Dictionary from the pop-up window. Import book files › You can import book files (in epub format) from the memory card. Book files must be saved to the /eBooks/import/ ...
Page 59 - Manage documents online; My files; Supported file formats
Tools 59 Manage documents online › In Menu mode, select 1 ThinkFree Office . Select 2 Online . Enter your user name and password to access your account, and then 3 select Sign in . View and manage your documents on the server as desired. 4 My files Learn to quickly and easily access all of your imag...
Page 60 - Copy or cut files; Digital Frame; View the clock
Tools 60 Copy or cut files › In Menu mode, select 1 My files → Select . Select folders or files to copy or cut. 2 Select 3 Copy or Cut . Locate a folder and select 4 Paste . Delete files › In Menu mode, select 1 My files → Select . Select folders or files to delete. 2 Select 3 Delete → Delete . Digi...
Page 61 - Alarm Clock
Tools 61 Set alarm details. 3 When you are finished, select 4 Done . Stop an alarm › When the alarm sounds, Select • Dismiss to stop the alarm. Select • Snooze to silence the alarm for the snooze period. Delete an alarm › In Menu mode, select 1 Alarm Clock . Press [ 2 ] → Delete alarm . Select alarm...
Page 62 - World Clock
Tools 62 World Clock Learn to view the time in another region and set world clocks to appear on your display. In Menu mode, select 1 World Clock . Select 2 or press [ ] → Add city . Enter a city name or select one from the list. 3 To select a city in the world map view, select . To add more world cl...
Page 63 - Access the Settings menu
Settings 63 Mobile AP › Mobile AP • : Activate the mobile AP feature to share your device's mobile network connection with PCs or other devices through the WLAN feature. ► p. 53 Mobile AP settings • : Change the settings to customise the mobile AP feature. Bluetooth settings › Bluetooth • : Turn the...
Page 64 - Call settings
Settings 64 Fixed Dialing Numbers › Enable FDN • : Activate or deactivate FDN mode to restrict calls to numbers in the FDN list. You must enter the PIN2 supplied with your SIM or USIM card and reboot the device. Change PIN2 • : Change the PIN2, which is used to protect the primary PIN. If the SIM or...
Page 65 - Display settings; Answering call; Sound settings
Settings 65 Phone ringtone • : Select a ringtone to alert you to incoming voice calls. Video call ringtone • : Select a ringtone to alert you to incoming video calls. Notification ringtone • : Select a ringtone to alert you to events, such as incoming messages and missed calls. Audible touch tones •...
Page 66 - Applications
Settings 66 Visible passwords • : By default, the device displays your password as · for security. Set the device to display your password as you enter. Select device administrators • : View device administrators installed on your device. You can activate device administrators to apply new policies ...
Page 67 - Privacy
Settings 67 Privacy Back up my settings • : Back up your device’s settings to the Google server. Automatic restore • : Set the device to restore applications' data you backed up when they are installed in your device. Factory data reset • : Reset your settings to the factory default values. SD card ...
Page 68 - Samsung keypad; Locale and text; Select locale
Settings 68 Show complete trace • : Set how long the trace of your dragging will display on the keyboard. Word choice window • : Set how often the word list will display. Speed vs. accuracy • : Set the balance for the speed and accuracy. Swype help • : Access help information for using the Swype key...
Page 69 - Accessibility; Voice recognition settings
Settings 69 Accessibility Change the settings for accessibility features. Accessibility • : Activate an accessibility application you have downloaded, such as Talkback or Kickback, which provide voice, melody, or vibration feedback. Accessibility services • : Select an accessibility application to u...
Page 70 - The touch screen responds slowly or improperly; Troubleshooting; When you turn on your device or while you are using the
Troubleshooting 70 The touch screen responds slowly or improperly If your device has a touch screen and the touch screen is not responding properly, try the following: Remove any protective covers from the touch screen. Protective covers • may prevent the device from recognising your inputs and are ...
Page 72 - Error messages appear when opening music files; Another Bluetooth device is not located
Troubleshooting 72 Error messages appear when opening music files Some music files may not play on your Samsung mobile device for a variety of reasons. If you receive error messages when opening music files on your device, try the following: Free some memory by transferring files to a PC or deleting...
Page 73 - Caution: Follow all safety warnings and regulations when; Safety precautions
Safety precautions 73 Never dispose of batteries or devices in a fire. Follow all local regulations when disposing of • used batteries or devices.Never place batteries or devices on or in heating devices, such as microwave ovens, stoves, • or radiators. Batteries may explode when overheated.Never cr...
Page 74 - Comply with all safety warnings and regulations regarding
Safety precautions 74 Comply with all safety warnings and regulations regarding mobile device usage while operating a vehicle While driving, safely operating the vehicle is your first responsibility. Never use your mobile device while driving, if it is prohibited by law. For your safety and the safe...
Page 75 - Proper care and use of your mobile device
Safety precautions 75 Magnetic stripe cards, including credit cards, phone cards, passbooks, and boarding passes, • may be damaged by magnetic fields.Do not use carrying cases or accessories with magnetic closures or allow your device to • come in contact with magnetic fields for extended periods of...
Page 77 - Correct disposal of batteries in this product; Specific Absorption Rate (SAR) certification information
Safety precautions 77 To prevent possible harm to the environment or human health from uncontrolled waste disposal, please separate these items from other types of waste and recycle them responsibly to promote the sustainable reuse of material resources.Household users should contact either the reta...
Page 78 - Disclaimer
Safety precautions 78 Disclaimer Some content and services accessible through this device belong to third parties and are protected by copyright, patent, trademark and/or other intellectual property laws. Such content and services are provided solely for your personal noncommercial use. You may not ...
Page 79 - Index
Index 79 Index connections Bluetooth 54 DLNA 55 PC 51 WLAN 52 contacts creating 47 daily briefing 28 device customising 18 indicator icons 13 keys 13 layout 12 settings 63 shortcuts panel 17 turning on or off 12 digital frame 60 DLNA see AllShare call log 38 calls activating calling functions 64 ans...
Page 83 - Using a PC data cable, connect your device to your PC.
Some of the contents in this manual may differ from your device depending on the software of the device or your service provider. English. 10/2010. Rev. 1.0 To install Kies (PC Sync) Download the latest version of Kies from the Samsung website 1. ( www.samsungmobile.com ) and install it on your PC. ...


 Samsung Galaxy Tab S6
User Manual
Samsung Galaxy Tab S6
User Manual
 Samsung Tab Active Pro
User Manual
Samsung Tab Active Pro
User Manual
 Samsung Galaxy Book
User Manual
Samsung Galaxy Book
User Manual
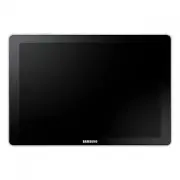
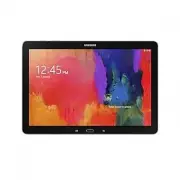 Samsung Galaxy Note pro
User Manual
Samsung Galaxy Note pro
User Manual
 Samsung Galaxy Tab 4
User Manual
Samsung Galaxy Tab 4
User Manual
 Samsung Galaxy Tab A
User Manual
Samsung Galaxy Tab A
User Manual
 Samsung Galaxy Tab A7
User Manual
Samsung Galaxy Tab A7
User Manual
 Samsung Galaxy Tab A8
User Manual
Samsung Galaxy Tab A8
User Manual
 Samsung Galaxy Tab A9
User Manual
Samsung Galaxy Tab A9
User Manual
 Samsung Galaxy Tab A9+
User Manual
Samsung Galaxy Tab A9+
User Manual
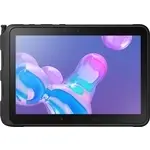
 Samsung Galaxy Tab Active Pro
User Manual
Samsung Galaxy Tab Active Pro
User Manual
 Samsung Galaxy Tab E
User Manual
Samsung Galaxy Tab E
User Manual
 Samsung Galaxy Tab Lite
User Manual
Samsung Galaxy Tab Lite
User Manual
 Samsung Galaxy Tab S
User Manual
Samsung Galaxy Tab S
User Manual
 Samsung Galaxy Tab S2
User Manual
Samsung Galaxy Tab S2
User Manual
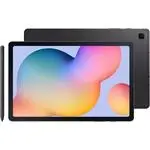
 Samsung Galaxy Tab S6 Lite
User Manual
Samsung Galaxy Tab S6 Lite
User Manual
 Samsung Galaxy Tab S7
User Manual
Samsung Galaxy Tab S7
User Manual
 Samsung Galaxy Tab S7 FE
User Manual
Samsung Galaxy Tab S7 FE
User Manual
 Samsung Galaxy Tab S7+
User Manual
Samsung Galaxy Tab S7+
User Manual
 Samsung Galaxy Tab S8
User Manual
Samsung Galaxy Tab S8
User Manual