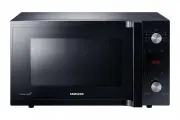
Samsung GK641 - Manuals
Samsung GK641 Microwave – User Manual in PDF format online.
Manuals:
User Manual Samsung GK641


Summary
English - 2 contents Safety information ................................................................................ 2Oven features ........................................................................................13 Oven .......................................................................
English - 3 01 SAFET Y INFORMA TION IMPORTANT SAFETY INSTRUCTIONS READ CAREFULLY AND KEEP FOR FUTURE REFERENCE. Make sure that these safety precautions are obeyed at all times. Before using the oven, confirm that the following instructions are followed. WARNING (Microwave function only) WARNING: If ...
English - 6 A equipment is equipment suitable for use in all establishments other than domestic and those directly connected to a low voltage power supply network which supplies buildings used for domestic purposes. Warning: Class A equipment is intended for use in an industrial environment. There m...
Samsung Microwaves Manuals
-
 Samsung CE1180GBR (UBR) (GWR)
User Manual
Samsung CE1180GBR (UBR) (GWR)
User Manual
-
 Samsung CE1185GBR (UBR) (GWR)
User Manual
Samsung CE1185GBR (UBR) (GWR)
User Manual
-
 Samsung CE745G
User Manual
Samsung CE745G
User Manual
-
 Samsung MC12J8035CT/AA
User Manual
Samsung MC12J8035CT/AA
User Manual
-
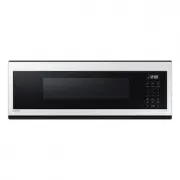
 Samsung MC17T8000CG/AA
User Manual
Samsung MC17T8000CG/AA
User Manual
-
Samsung MC17T8000CS/AA
User Manual
-
 Samsung MC32K7058CT
User Manual
Samsung MC32K7058CT
User Manual
-
 Samsung MC455THRCBB
User Manual
Samsung MC455THRCBB
User Manual
-
 Samsung ME11A7510DG/AA
User Manual
Samsung ME11A7510DG/AA
User Manual
-
Samsung ME11A7510DS/AA
User Manual
-
 Samsung ME11A7710DG/AA
User Manual
Samsung ME11A7710DG/AA
User Manual
-
Samsung ME11A7710DS/AA
User Manual
-
 Samsung ME11CB751012
User Manual
Samsung ME11CB751012
User Manual
-
 Samsung ME16A4021AS/AA
User Manual
Samsung ME16A4021AS/AA
User Manual
-
 Samsung ME17R7021EG/AA
User Manual
Samsung ME17R7021EG/AA
User Manual
-
Samsung ME17R7021ES/AA
User Manual
-
 Samsung ME19CB704112
User Manual
Samsung ME19CB704112
User Manual
-
 Samsung ME19R7041FG/AA
User Manual
Samsung ME19R7041FG/AA
User Manual
-
Samsung ME19R7041FS/AA
User Manual
-
 Samsung ME21A706BQN/AA
User Manual
Samsung ME21A706BQN/AA
User Manual