Samsung DW60M5040BB - Manuals
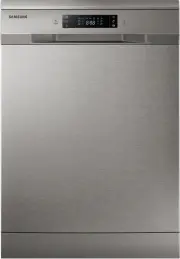
Samsung DW60M5040BB Dishwasher – User Manual, Repair Manual in PDF format online.
Manuals:
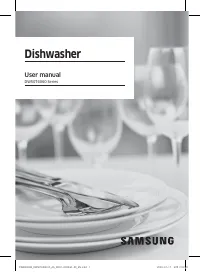
User Manual Samsung DW60M5040BB


Summary
2_ Contents Contents SAFETY INFORMATION 3 5 Hydrogen gas is explosive 5 Proper use 6 Disposal 6 Instruction about the WEEE mark OPERATION INSTRUCTION 7 7 Control panel 13 Displays18 Dishwasher features PRIOR USING FOR THE FIRST TIME 20 20 Set the water softener21 Loading the salt into the softener22...
Safety information _3 01 SAFETY INFORM ATION READ AND FOLLOW THIS SAFETY INFORMATION CAREFULLY SAVE THESE INSTRUCTIONS Safety information Please read this User Information carefully and keep it to refer to at a later date. Pass it on to any subsequent owner of the appliance.This manual contains sect...
6_ Safety information READ AND FOLLOW THIS SAFETY INFORMATION CAREFULLY SAVE THESE INSTRUCTIONS Disposal Dispose of the dishwasher packaging material correctly.All packaging materials can be recycled.Plastic parts are marked with the standard international abbreviations: PE for polyethylene, e.g. sh...
Repair Manual Samsung DW60M5040BB


Summary
IMPORTANT SAFETY NOTICE Following the repair by a non-authorized service provider self-repair or non-professional repair of the product Samsung is not liable for any damage to the product any injury or any other product safety issue caused by any attempt to repair the product which does not carefull...
Disassembly and Reassembly _ 3 1. TOOLS FOR REMOVAL AND REASSEMBLY Tool image No. Tool Type Remarks ① Adjustable Wrench ② Open-end Wrench 1-7/16” ③ Vice Pliers ④ Others(screwdriver, nipper, long nose pliers) Common tools for servicingScrewdriver – Phillip, Flat, Torx T15 ⑤ Ear clamping tool In reass...
4 _ Disassembly and Reassembly 2. STANDARD DISASSEMBLY DRAWINGS 2-1. PRECAUTION Caution Before servicing,- Make sure to remove all items include baskets inside dishwasher.- Drain the water in the dishwasher and disconnect the power supply.- Lock the water faucet that connected with inlet hose.- Unin...
Samsung Dishwashers Manuals
-
 Samsung DW50T6060US
User Manual
Samsung DW50T6060US
User Manual
-
 Samsung DW50T6060US/AA
User Manual
Samsung DW50T6060US/AA
User Manual
-
 Samsung DW5343TGBSL
User Manual
Samsung DW5343TGBSL
User Manual
-
 Samsung DW5343TGBWQ
User Manual
Samsung DW5343TGBWQ
User Manual
-
 Samsung DW60H6050FS
User Manual
Samsung DW60H6050FS
User Manual
-
 Samsung DW60H6050FW
User Manual
Samsung DW60H6050FW
User Manual
-
 Samsung DW60R2014US
User Manual
Samsung DW60R2014US
User Manual
-
 Samsung DW60R2014US/AA
User Manual
Samsung DW60R2014US/AA
User Manual
-
 Samsung DW80B6060UG
User Manual
Samsung DW80B6060UG
User Manual
-
 Samsung DW80B6060US
User Manual
Samsung DW80B6060US
User Manual
-
 Samsung DW80B7070AP
User Manual
Samsung DW80B7070AP
User Manual
-
 Samsung DW80B7070AP/AA
User Manual
Samsung DW80B7070AP/AA
User Manual
-
 Samsung DW80B7070UG
User Manual
Samsung DW80B7070UG
User Manual
-
Samsung DW80B7070UG/AA
User Manual
-
 Samsung DW80B7070US
User Manual
Samsung DW80B7070US
User Manual
-
Samsung DW80B7070US/AA
User Manual
-
 Samsung DW80B7071UG
User Manual
Samsung DW80B7071UG
User Manual
-
Samsung DW80B7071UG/AA
User Manual
-
 Samsung DW80B7071US
User Manual
Samsung DW80B7071US
User Manual
-
Samsung DW80B7071US/AA
User Manual