Page 2 - Features of your new
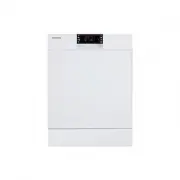
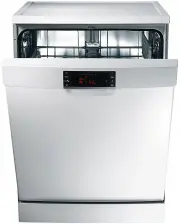
2_ Features of your new Samsung dishwasher Features of your new Samsung dishwasher Your new dishwasher will change the way you feel about washing kitchenware. From its specialised features to its energy efficiency, your new Samsung dishwasher ensures that washing your kitchenware is as easy and enjo...
Page 3 - Safety instructions; WHAT YOU NEED TO KNOW ABOUT SAFETY INSTRUCTIONS; Important safety symbols
Safety instructions _3 Safety instructions Congratulations on your new Samsung dishwasher. This manual contains important information on the installation, use and care of your appliance. Please take time to read this manual to take full advantage of your dishwasher’s many benefits and features. WHAT...
Page 4 - Important safety precautions
4_ Safety instructions Important safety precautions This appliance conforms to current safety requirements. Inappropriate use can, however, lead to personal injury and damage to property. To avoid the risk of accidents and damage to the appliance, please read these instructions carefully before usin...
Page 5 - INSTRUCTIONS WHEN USING YOUR DISHWASHER; INSTRUCTIONS FOR PROTECTING YOUR CHILDREN
Safety instructions _5 INSTRUCTIONS WHEN USING YOUR DISHWASHER This dishwasher is not designed for commercial use. It is intended for use in domestic households and in similar working and residential environments such as: • Shops • Offices and showrooms and by residents in establishments such as: • ...
Page 6 - INSTRUCTIONS FOR INSTALLING YOUR DISHWASHER
6_ Safety instructions This appliance can be used by children aged from 8 years and above and persons with reduced physical, sensory or mental capabilities or lack of experience and knowledge if they have been given supervision or instruction concerning use of the appliance in a safe way and underst...
Page 8 - Contents
8_ Contents SETTING UP YOUR DISHWASHER 9 9 Checking the parts and control panel 11 Meeting the installation requirements12 Installing your dishwasher (only for installing under the sink) BEFORE USING THE PRODUCT FOR THE FIRST TIME 15 15 Using the water softening system16 Using the Sound On/Off funct...
Page 9 - Setting up your dishwasher; CHECKING THE PARTS AND CONTROL PANEL
Setting up your dishwasher _9 01 SETTING UP Setting up your dishwasher Be sure to have your technician follow these instructions closely to ensure the safe and normal operation of your new dishwasher. CHECKING THE PARTS AND CONTROL PANEL When your dishwasher has been unpacked, make sure that you’ve ...
Page 10 - Checking the accessories
10_ Setting up your dishwasher DW-FG720, D154, DW5363PGB, D156, DW5343TGB, D155 1 2 3 4 12 13 14 15 6 7 8 5 1 2 3 4 16 13 14 15 9 10 11 DW-FG520, D153 1 Power button 9 Wash indicator 2 Programme selection buttons 10 Rinse indicator 3 Half Load button 11 Dry indicator 4 Delay Start button 12 Intensiv...
Page 11 - MEETING THE INSTALLATION REQUIREMENTS; Power supply and grounding
Setting up your dishwasher _11 01 SETTING UP MEETING THE INSTALLATION REQUIREMENTS Power supply and grounding Do not use an extension cord. Only use the power cord that came with the dishwasher. When preparing for the installation, ensure that your power supply offers: • An AC 220-240V/50Hz fuse or ...
Page 12 - Flooring; INSTALLING YOUR DISHWASHER (ONLY FOR INSTALLING UNDER; STEP1. Removing the work top
12_ Setting up your dishwasher Flooring For best performance, your dishwasher must be installed on a solid, even floor.Wooden floors may need to be reinforced to minimize vibrations. Carpeting and soft tiles are contributing factors to vibrations and may cause your dishwasher to move slightly while ...
Page 13 - STEP2. Leveling the dishwasher
Setting up your dishwasher _13 01 SETTING UP STEP2. Leveling the dishwasher 0~40 mm 1. You can adjust the height of the product by turning the legs. - Slightly lift up the front and back of the product and turn the legs to adjust the height. - You can adjust the height up to 40 mm. 2. Push the produ...
Page 14 - STEP3. Connecting the hoses and powering
14_ Setting up your dishwasher STEP3. Connecting the hoses and powering Min. 30 cm Max. 80 cm Max. 80 cm 1. Remove the hose holder which is attached to the product and cut off part of the holder as shown in the figure. 2. Discard the part you have just cut off and use only the part that is shown by ...
Page 15 - Before using the product for; USING THE WATER SOFTENING SYSTEM; Setting the water hardness level
Before using for the first time _15 02 BEFORE USING Before using the product for the first time USING THE WATER SOFTENING SYSTEM Better washing results require the use of soft water. Hard water contains impurities that can hinder the washing performance.You will need to soften the water if the water...
Page 16 - USING THE SOUND ON/OFF FUNCTION; USING DISHWASHER SALT; Filling the salt reservoir
16_ Before using for the first time USING THE SOUND ON/OFF FUNCTION 1. While holding down the Delay Start and Half Load buttons, press the Power button to access the setting to activate/deactivate the Sound On/Off function. 2. Press the Sanitize button to activate or deactivate the Sound On/Off func...
Page 17 - USING RINSE AID; Filling the rinse aid reservoir
Before using for the first time _17 02 BEFORE USING Checking the Salt Refill indicator If the “Salt Refill ” indicator is lit, add dishwasher salt as described above. A lit “Salt Refill ” indicator means that there remains salt for three more cycles from the first switched on. USING RINSE AID Fillin...
Page 18 - Loading your dishwasher; DISHWASHING GUIDELINES; Before loading dishes; Items not suitable for the dishwasher; USING THE BASKETS; Handling the baskets
18_ Loading your dishwasher Loading your dishwasher DISHWASHING GUIDELINES Follow these simple guidelines to get the best results and save energy. Before loading dishes Remove food remains such as bones, fruit seeds, etc. and waste such as toothpicks, paper napkins, etc. from your dishes. Food remai...
Page 19 - Using the upper basket; Using the lower basket
Loading your dishwasher _19 03 L O ADING Using the upper basket Use the upper basket for mainly small, light or delicate items such as cups, saucers, glasses, dessert bowls, etc. Adjusting the upper basket You can adjust the height of the upper basket for additional clearance for placing large items...
Page 22 - Using the cup selves; USING DETERGENT; Filling the detergent dispenser
22_ Loading your dishwasher Using the cup selves You can place cups, small items and long cooking utensils on the cup selves. This is also a very convenient way to wash wine glasses. Place wine glasses on the pegs of the cup selves. The cup selves can also be folded back when not in use. Do not adju...
Page 23 - Using multi tabs
Loading your dishwasher _23 03 L O ADING 4. For better cleaning result, especially if you have very dirt items, add small amount(about 8 g) of detergent on the door. That will act in prewash phase. Using multi tabs You can also use 2-in-1, 3-in-1, or 4-in-1 multi tabs.Multi tabs, depending on the ty...
Page 24 - Operating your dishwasher; BASIC INSTRUCTIONS; USING THE PROGRAMME SELECTION BUTTONS
24_ Operating your dishwasher Operating your dishwasher BASIC INSTRUCTIONS 1. Open the door. 2. Load the baskets. Do not overload the baskets. 3. Make sure the spray arms are not obstructed. 4. Add the appropriate amount of dishwasher detergent into the dispenser and on the door (if required). 5. Pu...
Page 25 - Interrupting a programme; USING THE DELAY START FUNCTION; USING THE DIGITAL DISPLAY; Time display
Operating your dishwasher _25 04 OPERA TING Interrupting a programme If you open the door while a programme is in progress, the programme is temporarily halted. To resume the programme, simply close the door. The water in the dishwasher may be extremely hot. Only open the door when absolutely necess...
Page 26 - USING ADDITIONAL FUNCTIONS
26_ Operating your dishwasher Salt Refill indicator If the “Salt Refill ” indicator is lit, it means the dishwasher is low on dishwasher salt and needs to be refilled. To refill the salt reservoir, refer to the “Filling the salt reservoir” section on page 16. Rinse Refill indicator If the “Rinse Ref...
Page 27 - Cleaning and maintaining your; CLEANING THE EXTERIOR; CLEANING THE WASH CABINET; CLEANING THE FILTERS
Cleaning and maintaining your dishwasher _27 05 CLEANING AND MAINT AINING Cleaning and maintaining your dishwasher Keeping your dishwasher clean improves its performance, reduces unnecessary repairs, and prolongs its life. CLEANING THE EXTERIOR It’s best to clean spills on the exterior of your dishw...
Page 28 - CLEANING THE SPRAY ARMS; Cleaning the spray arms
28_ Cleaning and maintaining your dishwasher 4. Disassemble the coarse filter and micro filter. 5. Remove any dirt or other remains from the filters and rinse them under running water. 6. Reassemble the filters in the reverse order of the dissasembly, replace the filter insert, and rotate clockwise ...
Page 29 - STORING YOUR DISHWASHER
Cleaning and maintaining your dishwasher _29 05 CLEANING AND MAINT AINING 4. Remove the lower basket. 5. Firmly pull the lower spray arm upward at once to remove it. 6. Use a pointed object such as a toothpick to push out food particles in the spray arm’s jets. 7. Rinse thoroughly under running wate...
Page 30 - Troubleshooting and
30_ Troubleshooting and information codes Troubleshooting and information codes CHECK THESE POINTS IF YOUR DISHWASHER... PROBLEM POSSIBLE CAUSE SOLUTION Will not start. The door is not closed completely. The Start/Reset button is not selected. Check that the door is latched and closed completely. Pr...
Page 32 - INFORMATION CODES
32_ Troubleshooting and information codes INFORMATION CODES Information codes are displayed to help you better understand what is occurring with your dishwasher. If any of the codes below occur, you should select the Reset option and follow the respective instruction. CODE SYMBOL MEANING SOLUTION bE...
Page 33 - Programme chart; PROGRAMME CHART
Programme chart _33 07 C Y CLE CHAR T Programme chart PROGRAMME CHART Soil level Intensive 70 Auto 40-65 (DW-FG720, D154, DW5363PGB, D156, DW5343TGB, D155) Normal 65 (DW-FG520, D153) Express 65 Eco 45 Quick 50 Delicate 40 Prewash Amount of food remains Heavy Very light to Heavy Normal Normal Normal ...
Page 34 - Appendix; DISPOSING THE DISHWASHER AND HELPING THE ENVIRONMENT
34_ Appendix Appendix DISPOSING THE DISHWASHER AND HELPING THE ENVIRONMENT Your dishwasher is manufactured from recyclable materials. If you decide to dispose of it, please observe your local waste disposal regulations. Cut off the power cord so that the appliance cannot be connected to a power sour...
Page 35 - For standard test
For standard test _35 09 FOR S TAND ARD TES T For standard test The diagrams below show the proper way to load the baskets based on the European Standards (EN50242). • Washing capacity: 14 (DW-FG720, D154, DW5363PGB, D156) / 13 (DW-FG520, D153, DW5343TGB, D155) place settings • Test standard: EN5024...
Page 37 - Product fiche
Product fiche _37 10 PRODUC T FICHE Product fiche REGULATION (EU) No 1059/2010 Supplier SAMSUNG SAMSUNG Model name DW-FG720, D154, DW5363PGB, D156 DW-FG520, D153, DW5343TGB, D155 Rated Capacity (place setting) 14 13 Energy efficiency class A+ A+ Eco label No No Annual energy consumption, (AE C) (kWh...
Page 38 - Note
Note DD68-00093A-04_S05_140602_EN.indd 38 2/6/2014 17:46:38
Page 40 - QUESTIONS OR COMMENTS?
QUESTIONS OR COMMENTS? COUNTRY CALL OR VISIT US ONLINE AT AUSTRIA 0810 - SAMSUNG (7267864, € 0.07/min) www.samsung.com BELGIUM 02-201-24-18 www.samsung.com/be (Dutch) www.samsung.com/be_fr (French) CZECH 800 - SAMSUNG (800-726786) www.samsung.com DENMARK 70 70 19 70 www.samsung.com FINLAND 030-6227 ...